Pages

Sunday, September 30, 2012

Nambé Wings

Culinarily speaking, New Mexico is perhaps known best for its chiles. The most prominent pepper is the Hatch chile, which gets its name from the fact that the chile grows in the area around Hatch, New Mexico.  Despite its prominence, the Hatch chile is not the only one grown and cultivated in New Mexico.

During my trips to Santa Fe, I discovered a heirloom chile known as the Nambé chile (capsicum annuum longe ground Nambé supreme).  Like the Hatch Chile, the Nambé chile gets its name from the area in which it is cultivated, namely, the Nambé Pueblo in northeastern New Mexico.  The Nambé chile has a very earthy flavor, as well as a very spicy kick.

Recently, I decided to make that heirloom chile the centerpiece of a wing recipe.  I also used the traditional accompaniment of spices -- paprika, onion powder, garlic powder -- to round out the recipe, plus a little cumin to add some depth to the rub.  I could have added other spices, such as thyme or oregano, but, I left that for the next time I made this recipe.

NAMBE WINGS
A Chef Bolek Original
 Serves 1-2

Ingredients:
12 chicken wings, first and second parts, wing tips removed
2 teaspoons of Native Nambé Chile Pepper
1 teaspoon of paprika
1 teaspoon of onion powder
1 teaspoon of garlic powder
1/2 teaspoon of cumin
1/4 teaspoon of salt

Directions:
1.  Prepare the rub.  Mix the chile pepper, paprika, onion powder, garlic powder, cumin and salt together in a bowl. After rinsing the chicken and patting it dry, rub the spice mix onto the chicken.

2.  Cook the chicken.  You can either cook the chicken under the broiler for about twenty to twenty-five minutes or bake the wings at 400 degrees Fahrenheit for about thirty minutes. 

PAIRING THIS RECIPE

It is a universal truth that beer is the best pairing to buffalo wings or chicken wings.  For a spicy rub such as this one, the best beer is probably a lighter, crisper beer, such as a pilsner or a pale ale.

ENJOY!

Wednesday, September 26, 2012

Baltimore Pit Beef with Tiger Sauce

My latest barbecue project takes me to a place where "barbecue" is not barbecue.  There is no low and slow, smoking large cuts of pork or beef over carefully selected woods until they are cooked through and fork tender.  There is no application of thick tomato-based sauces or thinner vinegary sauces.  Yet, in this place, the residents still embrace what they believe to be barbecue.  The place is Baltimore, Maryland and the "barbecue" is known as pit beef.

I did some research into the history of pit beef, which appears to have originated in the working class neighborhoods of eastern Baltimore city.  The recent tradition of pit beef, according to Baltimore Pit Beef History, can be found along "Pit Beef Row" on Route 40, also known as Pulaski Highway.  The "big three" are Chap's Charcoal Restaurant, Big Al's and Big Fat Daddy's.  Of the three, Chap's is perhaps the best known because of its appearances on shows such as Anthony Bourdain's No Reservations and Adam Richman's Man v. Food.

When it comes to explaining pit beef, it may be best to draw upon Adam Richman's Man v. Food.  I do so because I am a big fan of his show.   A little introduction, and, then on to the pit beef:


If you think about it, pit beef is the exact opposite of barbecue.  Cuts of beef are grilled over higher heat, with the grillmaster opening the grill often to turn the meat to ensure a crunchy crust develops on all sides of the cut, while ensuring that the meat remains between rare and medium rare on the inside.  Pitmasters from western Texas to eastern North Carolina would label it "heresy" if pit beef were to be called "barbecue."   

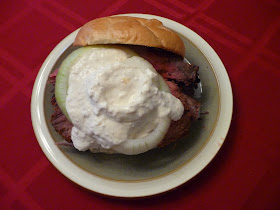
Heresy or not, I have wanted to make pit beef ever since I saw Adam Richman eat that sandwich.  During my research, I came across a few recipes for pit beef.  I decide to use a recipe from the professor of "Barbecue University," Steve Raichlen.  As it turns out, Steve grew up in Maryland, although he never had pit beef while he lived here.  Steve based his recipe based on Big Fat Daddy's recipe for pit beef.  This recipe was easy, but I had a problem.  Steve's recipe called for the use of top round.  I went to a couple of supermarkets, but I could not find any top round.  All that was available were eye round and bottom round.  The Man v. Food video above was taken at Chap's, which uses bottom round.  So, I decided that I would substitute bottom round. It was a sizable cut, weighing in at four and one-half pounds. 

The only other thing I needed is the sauce.  A pit beef sandwich is a very simple construction ... beef, white onions and the sauce ... a mayonnaise/horseradish combination sometimes called "Tiger Sauce."  While Steve Raichlen included a recipe for a white sauce from Big Fat Daddy's, but I wanted to find a recipe for the Tiger Sauce used by Chap's.  (After all, I was using a bottom round like Chap's rather than a top round like Big Fat Daddy's).  After a little more research, I found a recipe from a website called Food So Good Mall.  Although I could not verify that it was a recipe for Chap's Tiger Sauce, it was still very good.  


BALTIMORE PIT BEEF WITH TIGER SAUCE
Pit Beef Recipe adapted from Big Fat Daddy's by Steven Raichlen and 
printed in the New York Times; and, the Tiger Sauce recipe
adapted from Food So Good Mall
Serves several

Ingredients (for the rub):
2 tablespoons seasoned salt
1 tablespoon sweet paprika
1 teaspoon garlic powder
1 teaspoon dried oregano
1/2 teaspoon black pepper

Ingredients (for the sandwich):
1 3-pound piece top round
8 kaiser rolls or 16 slices of rye bread
1 sweet white onion, sliced thin

Ingredients (for the Tiger Sauce):
1 cup of mayonnaise
1 cup of prepared horseradish
2 tablespoons of dry mustard
2 tablespoons of sour cream

Directions:
1. Marinate the beef.  Combine ingredients for the rub in a bowl, and mix. Sprinkle 3 to 4 tablespoons all over the beef, patting it in. Place in a baking dish, and cover with plastic wrap. You can cover the beef with the rub for a few hours, but for maximum flavor, leave it for 3 days in the refrigerator, turning once a day.

2.  Make the Tiger Sauce.  Combine the mayonnaise, horseradish, mustard and sour cream. Mix all the ingredients well. Set aside in the refrigerator.

3. Grill the beef.  Prepare a hot grill (my estimate is about 400 to 450 degrees). Grill beef 30 to 40 minutes, or until outside is crusty and dark brown and internal temperature is about 120 degrees (for rare).  Times will vary depending upon the cut used and its size.  Still, turn beef often. Transfer to a cutting board; let it rest 5 minutes.

4. Plate the dish.  Slice beef thinly across grain. Pile beef high on a roll or bread and slather the beef with the Tiger Sauce. Garnish with white onions.

One last thought ... given the cut of beef, pit beef should be, at most, medium rare.  Bottom round (or top round) cooked to medium or well is better used as leather than served as a sandwich.  When you grill the bottom round according to the times, it is very likely that you will end up with part of the round being rare or even bordering on raw.  The solution is easy ... just slice off the medium rare slices and put the round back on the grill for one or two minutes.  You can then continue slicing the meat.  I provide this information with one caveat: many people like the rare slices and often request the "rare" when they order pit beef sandwiches whenever they visit one of those shacks on Pit Beef Row. 

PAIRING THIS RECIPE

Given the pit beef sandwich is a quintessential Baltimore food, it needs to be paired with the quintessential Baltimore beverage ... beer.  I would suggest a beer from one of Baltimore's craft brewers, such as Heavy Seas.  Some of the Heavy Seas beers that could pair well with this recipe include the Classic Lager and IPA, or even some of the Pyrate Fleet Beers, like the Small Craft Warning Uber Pils or Loose Cannon IPA.

ENJOY!

Monday, September 24, 2012

Deus Ex Machina

Albert Einstein once said, "anyone who has never made a mistake has not tried anything new."   Although I am sure that the quote has its application to theoretical physics, it applies perfectly to brewing beer. Beer is produced according to recipes, with precise measurements of ingredients and also of times. If you deviate from the the recipe or the brewing process, then you will most likely have something new to try.  

Take D.C. Brau, for example.  The brewers were working on a new batch of their Double India Pale Ale, On the Wings of Armageddon (OTWOA).  They suffered a mistake in the brewing process.  Many mistakes have to be discarded, but this one led to something new.  It was not the OTWOA; however, the mistake produced a double IPA, with a character all of its own.  According to the Chief Executive Officer of D.C. Brau, Brandon Skall, "sometimes you have to embrace blunders."  This "blunder" was not really one at all.  It produced a unique double IPA that the brewers dubbed Deux Ex Machina or "God from the Machine."

Deus Ex Machina is a force, with an ABV of 8.75% ABV and IBUs totalling 131 IBUs.  The brewers describe the beer as being hopped with Falconer's Flight and Columbus hops.  Both of these hops are known for their spicy and strong flavors.  For the Deus Ex Machina, they create what the brewers call "a virtual pine forest of super dank, mouth-coating flavors with underlying hints of sugar coated fruit."  

For a mistake, the Deus Ex Machina pours a perfect golden orange color.  The foam is thick and persistent; however, it eventually gives way as the aromas greet the nose.   Those aromatic elements are full of the piney and resinous hops, but there is a surprising amount of citrus fruit.  The most prominent fruit, as one would expect, is grapefruit, but there are also some hints of lemon.  The flavor is just as advertised ... one large, deep conifer forest of hop flavors.  The citrus fruit is also present, but, it is seems as if there is not just the fruit, but also the rind.  This means that there is some bitterness, but something that is welcomed by hopheads. 

D.C. Brau has said that this is a limited release and it may never be made again.  This would be unfortunate.  Even though it was a mistake, the Deus Ex Machina is a great beer.  

ENJOY!

Saturday, September 22, 2012

Abruzzese Style Pork Barbecue Sandwiches

With football season now in gear, I have decided to devote one day each weekend (when I can) to barbecue.  For the first weekend, I decided to make a Texas Barbecue Brisket.  I tried to meld Central Texas and Western Texas barbecue, by using a salt/pepper rub and smoking the brisket over mesquite.  Now, I have moved onto pork shoulders.  I have previously made Big Bob Gibson's Eight Time World Championship Pork Shoulder or my own Raging Pig Pulled Pork. I decided that, for this barbecue project, I would try a spin on pork ... Abruzzese style pork barbecue sandwiches. 

This recipe draws its inspiration from the Italian roasted pork sandwiches.  As I thought of this recipe, I had thoughts of the DiNic's Roasted Pork sandwich that I had at the Reading Terminal in Philadelphia, Pennsylvania.  My goal was not to replicate the sandwich, but to let it inspire me.  I decided that I would prepare a rub using some classic Italian herbs -- sage, rosemary and thyme -- along with garlic and onion powders.  I also decided to use a liberal amount of crushed red pepper, a favorite ingredient in the Abruzzo region of Italy, to provide a spicy kick.  After the shoulder marinated overnight, I smoked the pork shoulder using wood charcoal and apple wood.  Once the shoulder was cooked, I pulled it out of the smoker, allowed it to rest. 

I had a little difficulty with the toppings.  I wanted to keep it simple and fresh.  A slice of tomato, onion and some lettuce.  It worked out well.


ABRUZZESE STYLE PORK BARBECUE SANDWICHES
A Chef Bolek Original
Serves many

Ingredients:
1 boston butt pork shoulder, around 4 to 5 pounds
1 tablespoon of onion powder
1 tablespoon of garlic powder
1 tablespoon of dried thyme
1 tablespoon of dried parsley
3/4 tablespoon of dried sage
1/2 tablespoon (or to taste) of crushed red pepper
1/2 tablespoon of ground dried rosemary
3/4 tablespoon of ground black peppercorns
3/4 tablespoon of kosher salt
Olive oil
Toppings (lettuce, tomato, onion, etc.)
Hoagie buns

Directions:
1.  Marinate the pork shoulder.  Combine the onion powder, garlic powder, dried thyme, parsley, dried sage, crushed red pepper, rosemary, pepper and salt.  Mix well.  Brush olive oil on every side of the pork shoulder.  Sprinkle the rub on every side of the pork shoulder and gently rub the mix into the pork.  Refrigerate the shoulder overnight.

2.  Prepare the fire.  Place a few chunks of apple wood in a bucket full of water. Start a chimney and prepare a fire in the bottom of the smoker.  Once the temperature reaches the range between 225 degrees and 250 degrees Fahrenheit, add a couple chunks of apple wood.

3.   Smoke the pork shoulder.  Add the pork shoulder, fat side up, and close the smoker.  The shoulder is going to cook for 1 1/2 hours per pound, until the shoulder reaches approximately 195 degrees Fahrenheit.   I used a four and one half pound pork shoulder, so I was looking at about six hours total.  After about four hours, I basted the shoulder with just some water.

4.  Rest the shoulder.  Remove the shoulder from the smoker and wrap it in foil.  Allow the shoulder to rest for half an hour to an hour.  Pull the pork or slice it.

5.  Make the sandwiches.   Slice the hoagie bun.  Place some of the pork in the sandwich, top it with onions, lettuce and tomatoes (or any other toppings you like).

PAIRING THIS RECIPE

As with most barbecue recipes, beer is often the first choice for a pairing.  Any pale ale or pilsner will work with this recipe.  If you want to think about wine, a friend suggested an Italian syrah or negramaro.  In addition, a good Montepulciano d'Abruzzo could work as well.  

ENJOY!

Thursday, September 20, 2012

Sugarloaf Mountain Vineyard Pinot Grigio (2011)

I have become a big fan of Maryland's growing wine movement.  The mantra of these winemakers and vineyards is to make wines in the "Bordeaux-style."  That saying is a good goal when one is making red blends.  To be sure, Maryland winemakers are making some amazing red wines using a wide range of grapes.  However, "Bordeaux-style" does not capture the full range of wines being produced in the Free State.

Many winemakers, such as Sugarloaf Mountain Vineyard, are making some very good wines based on one grape.  A while back, I bought a bottle of Sugarloaf Mountain Vineyard's Pinot Grigio.  Many professionals -- such as sommeliers, wine critics and others -- scoff at Pinot Grigio.  I even admit that, when it comes to white wines, Pinot Grigio (or, as it is known in France, Pinot Gris) would not be my first choice.  There is a caveat, which really applies to any wine.  When someone does it right, the wine is especially good.  And I think Sugarloaf got it right with their Pinot Grigio.

Like most winemakers, Sugarloaf ferments its Pinot Grigio in stainless steel.  The wine pours a pale yellow color with some very pale green hints.  The wine offers aromas of melon, grapefruit and honeysuckle.  It has a nice medium body, offering a little more substance than its much lighter counterparts. The flavors of the wine include green apple, citrus, and a slight hazelnut finish.  The apple and citrus blend together nicely, making this a wine that drinks very quickly if one is not too careful.  

There are a lot of food pairings that are recommended with this wine.  Pairings such as any seafood (shrimp, crab, lobster, and most fish), along with herb pastas, prosciutto, and focaccia.  This wine also makes a good aperitif, something to enjoy before the meal begins.

The winemakers recommend that the Sugarloaf Mountain Vineyard Pinot Grigio should be enjoyed young.  That means you should enjoy it sooner rather than later, within one to two years.  The wine can be found at the vineyard's tasting room or at some stores in Maryland.  

ENJOY!

Tuesday, September 18, 2012

Pan Roasted Salmon Steaks with Tomato Vinaigrette

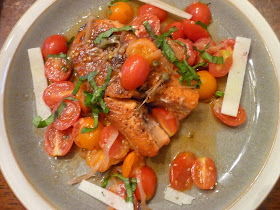
Several weeks ago, I was looking for a new and different recipe for making salmon.  I had bought a couple of sockeye salmon steaks and wanted to make something special for my beautiful Angel.  I searched the Internet and came across a recipe by Ted Allen for Pan Roasted Salmon with a Tomato Vinaigrette on the Food & Wine website.  I decided that I would adapt this recipe and use it with the salmon steaks.

I modified this recipe in a couple of respects.  First, the recipe called for the use of center-cut salmon fillets.  I went with salmon steaks.  Second,  I used a variety of yellow and red tomatoes, to add some more color to the dish.  Finally, I decided to garnish the dish with some thin slices of Pecorino Romano.  I thought that the cheese would add another layer of flavor to the dish, although, after-the-fact, I think the cheese could be left off the dish.

Overall, this dish was okay.  Obviously, I still need to work on plating and appearance.  (I was very disappointed with the plating, so much so that this dish almost did not make the blog.)  As for taste, it was delicious.  I will definitely try to make this dish again and see if I can do a better job.


PAN-ROASTED SALMON STEAK WITH TOMATO VINAIGRETTE
Adapted from recipe by Ted Allen and available at Food & Wine
Serves 4

Ingredients:
1 pint of grape tomatoes, halved
1 medium shallot, thinly sliced 
1 tablespoon of drained capers
2 tablespoons of red wine vinegar
Salt
3 tablespoons of extra-virgin olive oil
4 salmon steaks
Freshly ground pepper
1/2 teaspoon of ground cumin
     or 1/2 teaspoon crushed red pepper
2 tablespoons of canola oil
1 tablespoon minced parsley
1 tablespoon of chopped basil

Directions:
1.  Begin the vinaigrette.  While the oven is preheating to 425 degrees Fahrenheit, toss the tomatoes with the shallots, capers, vinegar and 1/2 teaspoon of salt in a bowl. 

2.  Cook the salmon.  In a medium ovenproof skillet, heat 1 tablespoon of the olive oil.  Season the salmon with salt and pepper and add it to the skillet, skin side up.  (If you are using salmon steaks, just add them to the skillet.) Cook over moderately high heat until well-browned on the bottom, about three minutes.  Carefully flip the fillets (or steaks).  Transfer the skillet to the oven and roast until the salmon is cooked through, about 7 minutes.  Transfer the fish to the plates and pour off any fat in the skillet.

3.  Finish the dish.  Place the skillet over moderate heat and add the tomato mixture along with the cumin (or crushed red pepper), canola oil and remaining 2 tablespoons of olive oil.  Cook, scraping up any bits stuck to the skillet, until the tomatoes just soften, about two minutes.  Pour the sauce over the salmon, sprinkle with the parsley and basil and serve immediately.

PAIRING THIS RECIPE

Food & Wine suggests that this dish could be paired with an Argentinian rose wine.  Those may be a little difficult to find.  French rose wines are generally more available.  Winemakers in Provence and the Loire Valley produce some great rose wines.

ENJOY! 

Sunday, September 16, 2012

Les Deux Brasseurs

De Proef Brouwerij and its brewer, Dirk Naudts, have worked with various American craft brewers to produce collaboration beers.  I reviewed one of Naudt's collaborations with Terrapin Brewing Company, the Monstre Rouge. My beautiful Angel found another one of Naudt's collaborations, and bought a bottle of Les Deux Brasseurs Belgian Ale.  This collaboration represents the combination of the talents and creativity of Naudts with Jason Perkins, the head brewer at Allagash Brewing in Portland, Maine.

Les Deux Brasseurs ("the Two Brewers") is a Belgian Style Golden Ale.  This beer sets itself apart from other golden ales by the fact the beer is fermented with two different strains of Brettanomyces, which are wild yeast strains.  Commonly referred to as "Brett," these yeast strains are the bane of winemakers, but craft brewers love them.  Allagash's strain of Brett was discovered and isolated in their brewery.  Allagash flew this yeast strain to Belgium just days before the brew day for Les Deux Brasseurs.  On behalf of De Proef, Naudt chose his personal favorite strain of Brett.  The two Brett strains provided a second level of collaboration, working together to provide a unique flavor for this beer.  The brewers fermented and aged the beer for four months, during which time it was dry-hopped with Czech Saaz hops. 

According to brewers, the two yeasts strains yield notes of pear, apple and subtle pineapple, along with flavors of graham cracker, bread crust and subtle distinctive barnyard character.  That is quite an interesting description for the beer. 

The beer is a hazy, golden color, with a lot of fermentation.  Small bubbles working their way up through the beer to the surface, while dead yeast cells linger along the bottom of the glass.  That "barnyard" character is present in the aroma, but not the taste, which is marked with the pear, apple and pineapple.  The Brett yeast strains worked incredibly well together.

Generally speaking, so-called "Brett" beers are very difficult to pair with food.  This beer is best enjoyed on its own, or, maybe with some soft cheeses that do not have their own "barnyard character."

This beer is a little hard to find and I have not found it at any stores.  However, Clare found it at a beer store in Virginia, where it sold for $17.99 a bottle. 
ENJOY!

Thursday, September 13, 2012

Texas Barbecue Brisket

I love all forms of barbecue.   If I have the option, I always get the barbecue sampler or platter, with two or three different types of 'cue (pulled pork, brisket, links, ribs, chicken, etc.).  However, if that option is unavailable, then there is a definite order to how I order barbecue.  I almost always go with pulled pork, especially if it is done in an Eastern Carolina style.  I think that it is because that represents the one type of barbecue that I have the least access to ... eastern Carolina whole hog barbecue.  The order continues with brisket, ribs and then chicken.

My preference for pulled pork also carries over to my own smoking.  I usually smoke pork shoulders, such as when I made Big Bob Gibson's Eight Time World Championship Pork Shoulder or my own Raging Pig Pulled Pork.  While I have also made smoked salmon and smoked mullet, I have not really ventured into smoking other types of meat.  I did try to smoke a brisket once, but I would hardly describe it a success, let alone "blog-worthy." So, I decided that I would try to smoke a brisket once again.  

Brisket is synonymous with Texas barbecue.  There are four, distinct types of Texas barbecue: Eastern, Central, Southern and Western.  One of the things that differentiate these types of barbecue is the wood: Eastern Texas barbecue uses hickory wood, while central Texas barbecue uses indirect grilling over oak wood and western Texas barbecue uses more direct grilling over mesquite wood.  As I looked at my bags of wood, I realized that I had a lot of mesquite wood.  So, I decided to smoke the brisket in the Western Texas style (i.e., using mesquite wood), but with some inspiration and techniques drawn from the Central Texas style, such as indirect grilling.

I immediately realized that I was behind the proverbial eight-ball.  Generally speaking, when one smokes a brisket, they should use a "packer cut."  This is the cut of the brisket that includes the fatty point of the meat.  Most grocery stores sell the flat cut, which does not include the fatty point.  As I stared down at the brisket on the cutting board, I realized that I had a flat cut.  I knew that I would have to adjust cooking temperatures to ensure that the brisket would not dry out.  Low and slow would have to be lower and slower. 

One can do only so much with a flat cut.  While I got a great smoke ring, the meat was still a little dry. I kept the temperatures between 225 and 250 degrees Fahrenheit (and, for most of the smoke, it was at the lower end).  Still, cooking is about trial and error, that is the only why you learn.  I've already got information on where I can get a packer cut.  So, the next time, it will be different ....  


TEXAS BARBECUE BRISKET
Adapted from Obsessive Compulsive BBQ and 
inspired by Aaron Franklin's advice in Food & Wine
Serves Many

Ingredients:
1 brisket (preferably a packer cut)
1/4 cup of freshly ground black pepper
1/4 cup of kosher salt
Vegetable or canola oil.

Directions:
1.  Prepare the brisket.  Trim any excess fat off of the top side (the meat side) of the brisket.  Brush a little vegetable oil or canola oil on the top side of the brisket, as well as the sides of the meat.  There is no need to brush any oil on the fat side.  Apply the salt and pepper rub to the top side of the brisket and all of the sides. 

2.  Prepare the fire.  Place a few chunks of wood in a bucket full of water. Start a chimney and prepare a fire in the bottom of the smoker.  Once the temperature reaches the range between 225 degrees and 250 degrees Fahrenheit, add a couple chunks of mesquite wood.  

3.   Smoke the brisket.  Add the brisket, fat side down, and close the smoker.  The brisket is going to cook for at least 1 hour to 1 1/4 hours per pound, until the brisket reaches approximately 185 degrees Fahrenheit.   I used a five pound brisket, so I was looking at about six hours total.  After about half of the smoke time, combine about 1/2 cup of water and 1/2 of Worcestershire sauce in a sprayer and spritz the brisket.  As an alternative, use a basting mop and just delicately baste the meat.  Whatever you do, do not cause the rub to run off of the brisket.  Make sure that the temperature stays within the 225-250 degree range throughout the cooking time.  You can also add a couple more mesquite chunks, but be cautious with the wood.   Too much wood may result in an "over-smoking" of the meat, with the brisket seeming like it had been bathed in Liquid Smoke.

4.  Rest the brisket.  After the cooking time, let the brisket rest for at least forty-five minutes, if not an hour.  Slice the brisket against the grain.

PAIRING THIS RECIPE

Obviously, the best thing that goes with barbecue -- at least for me -- is beer.  When one thinks of Texas, thoughts turn not only to brisket, but to Shiner Bock.  Other beers work just as well, such as a pale ale or a pilsner.  

ENJOY!

Wednesday, September 12, 2012

Morimoto Soba Ale

Rogue Ales has an interesting partnership with one of my favorite chefs ... Morimoto.  I used to watch Morimoto on Iron Chef (Japan) with amazement, wishing that, not only could I cook as well as he did, but that I could have the creativity and ingenuity that Chef Morimoto displayed during every challenge.  Since his Iron Chef days, Morimoto has opened restaurants across the United States, including one aptly named "Morimoto" in Philadelphia, Pennsylvania.  Both Clare and I dined at that Morimoto.  (We both had an amazing meal there.)  During that dinner, I had the chance to try Morimoto Soba Ale. 

Soba is the Japanese name for buckwheat.  It is the principal ingredient for inexpensive noodle dishes sold at train stations in Japan, as well as more expensive noodles found in specialty markets around the world.  In this case, Rogue Ales roasts the soba to make it the central ingredient in this specialty beer.  Along with the soba, Rogue Ales uses Harrington, Munich and C-15 Malts; Crystal and Rogue Farm Willammette Hops; "free range coastal waters"; and top fermenting Pacman Yeast.

Rogue Ales describes the beer as having a "delicate flavor" of roasted soba, which brings a "nutty finish to this light and refreshing ale."  The beer pours an orange and golden color.  There is a lot of fermentation, with the foam stubbornly sticking around long after the beer has been poured.  The beer is light and crisp, with only a 4.8% ABV.  There was some nuttiness in the aroma, but more malt or wheat tones.  As for the taste, the Soba Ale has a certain floral flavor, which is accompanied by bready flavors that come from the use of wheat and malt.  Overall, this is a very drinkable beer.  I can see why it won four medals -- three silver and one gold -- at the World Beer Cups.

When it comes to pairings, Rogue Ales suggests that this beer could be paired with poultry and fish dishes, as well as "lighter cuisine."  This makes perfect sense for anyone who has watched Morimoto cook during an Iron Chef challenge knows that he rarely cooks a "heavy" dish, opting for lighter cuisine that borders on perfection with respect to taste, texture and presentation.

This bottle was given to Clare and myself as a gift.  I have seen this beer at several stores with a decent craft beer selection.   Of course, if you find yourself at one of Morimoto's restaurants, you should order one and try it for yourself. 

ENJOY!

Tuesday, September 11, 2012

Around the World in 80 Dishes: Australia

It has been a while since I enjoyed some Tsebhi Sega and D'Nish Zigni as part of my challenge to prepare a main course from Eritrea.  That was a difficult challenge, because finding and authenticating recipes used in Eritrean cuisine is not very easy.  Now, I face a new challenge that, once again, takes me across the world.  I find myself with the challenge of making a main course from Australia.  

In some respects, this challenge is just as hard as the challenge to cook a main course from Eritrea, Bhutan or Paraguay.  What is Australian cuisine?  For most Americans, thoughts of Outback Steakhouse or Shrimp on the Barbie come to mind.  Obviously, I want to do more with this personal culinary challenge.  I thought about incorporating Aboriginal or Native Australian cuisine into this challenge.  I had a problem: it was difficult to find some of the ingredients used in native dishes.  I did a fair amount of research; however, I eventually relented, setting aside the idea of making a Native Australian dish as part of this challenge. 

THE MAIN DISH

But, that still leaves me with picking a main course from Australian cuisine.  I ultimately chose a dish that has an interesting history ... Carpetbag Steak.  This dish did not originate in Australia; instead, it originated in the United States.  According to the Food Timeline, oysters were considered a luxury in the nineteenth century, and cooks combined them with a lot of different ingredients.  The first recipes began to appear in American cookbooks in the late nineteenth century. The recipe went by different names -- such as Stewed Steak wtih Oysters or Steak with Oysters -- and usually involved cooking the oysters on top or outside of the steak. 

Around the turn of the twentieth century, someone introduced the dish to Australia, where it became popular.  As early as 1905, the recipe began to appear in cookbooks such as The Goulburn Cookery Book, Ms. Forster Rutledge (The National Trust: Sydney, Australia) and The Shauer Cookery Book, Misses A. and M. Schauer (Edwards, Dunlop & Co.: Brisbane & Sydney, Australia).  These recipes generally followed the same pattern: find a thick cut of steak (either a filet mignon or a strip steak), make an incision in the steak, insert the oysters, sew up the steak, and cook or grill the steak until it was done. 

The combination of oysters and steak happens to bring together two of my most favorite ingredients.  So, I decided to make this dish as a part of my personal culinary challenge.  I could have followed those old recipes, but I found a more recent recipe for Carpetbag Steak posted on Whats4Eats.  This recipe added another dimension to the dish, namely a sauce.  The steak is stuffed with oysters and pan-seared until cooked.  The steak is removed from the pan, the pan is removed from the flame,  and either brandy or cognac is added.  This is the start of the sauce.  Beef stock is latter added along with butter as a thickener.  I thought the idea of being able to serve the Carpetbag Steak with a sauce would elevate what is already a  luxurious dish.  The one thing I changed with respect to the recipe is that I did not use brandy or cognac.  I did not have either liquor on hand and did not want to spend the money on them because I do not drink hard liquor.  So, I decided to use something far more Australian ... Shiraz wine ... to produce a red wine sauce that could be drizzled over the steak once it is served.


CARPETBAG STEAK
Recipe from Whats4Eats
Serves 4

Ingredients:
4 thick cuts of filet mignon or New York strip steaks
8 to 10 oysters, cleaned and shucked
1/4 cup of Worcestershire sauce
2 tablespoons of lemon juice
3 tablespoons of vegetable oil
1/4 cup of cognac or brandy (or red wine)
1 cup of beef stock
4 tablespoons of butter at room temperature
Salt, to taste
Ground black pepper, to taste

Directions:
1.  Prepare the steak and oysters. Using a thin boning knife, cut a small incision into the side of each stage just big enough to insert the oysters.  Move the knife back and forth inside each steak to create a pocket.  In a bowl, mix together the oysters, Worcestershire sauce, lemon juice and salt and pepper to season.  Set aside to marinate for at least thirty minutes.

2.  Stuff the steaks.  Pour a little of the marinade into each pocket and stuff each steak with two or three oysters.  Secure the opening with toothpicks and let the steaks rest at room temperature for about thirty minutes to allow the flavors to meld.

3.  Cook the steaks.   Heat the oil in a large skillet or saute pan over medium-high heat until it just starts to smoke.  Season each steak with salt or pepper. Sear the steaks in the hot oil, letting them cook for about three minutes per side for medium-rare.  To make them more well done, reduce the flame to medium and cook for another two or three minutes for medium, or another four to six minutes for well done.  These times will vary depending upon the thickness of the steaks.

4.  Make the sauce.  Place the steaks on warm plates while you make the sauce.  Remove the skillet or saute plan from the flame and carefully pour in the cognac or brandy (or wine).  Return the pan to the medium flame and heat, scraping up any bits from the bottom until almost evaporated.  Then add the beef stock and simmer to reduce its volume by one-half.  (I added a few oysters to cook in the sauce while it was reducing.)  Remove from heat, adjust the seasoning with salt and pepper and whisk in the butter.  

5.  Plate the dish.  Serve the steaks with a little of the sauce poured over each steak.

*     *     *

Overall, this was a good dish.  I think that the steak was prepared well.  I really liked the oysters stuffed inside of the strip steak.  I would probably work a little more on developing the sauce, maybe adding some oyster liqueur or using the cognac/brandy when making the sauce.  This is the great thing about cooking, there is always something more that can be done.  Until next time...

ENJOY!

Monday, September 10, 2012

Nøgne-Ø Sunturnbrew

So it begins ..."while most people think differently, Norwegians are convinced that the sun turns and actually changes direction on every December 21st."  The only movement I am aware of is the ever so slight change in the light of the stars that happens during a solar eclipse, which was discovered during the course of proving Albert Einstein's theory of general relativity. In any event, the brewers at Nøgne-Ø wanted to pay tribute to "this stubborn idea" by making a "Sunturnbrew."

And, just what is a "Sunturnbrew"?  Technically speaking, it is an American barleywine.  The ingredient list is rather short: Grimstad water, malted barley, malted rye, malted wheat, hops and yeast. Nøgne-Ø describes a Sunturnbrew as much, much more: it is a beer brewed at the same time as the Norwegians think the sun changes direction.  The brewers declare, "[t]his brew is for the the changing direction of the sun, the change of mind and the change of perception."

A change in mind and change in perception is exactly the way to describe this beer.  Back in May, when I was sampling different beers at the International Beer Fest in Cleveland, Ohio, I tried the Sunturnbrew.  I was not impressed with it.  I did not have anything nice to say about it, so I left it out of my posts.  The beer tasted like burnt plastic or burnt rubber.  I was quite disappointed because Nøgne-Ø  is a great craft brewer and I really like their other beers, such as the #100 Barleywine Style Ale. I was unsure if I would ever try it again ... except for the fact that that my dad bought me a bottle of the Sunturnbrew, from batch number 474, which had been quietly resting in our basement.  

So, I decided that I would try it again.  Remember the "change in mind and change in perception."  The Sunturnbrew had changed 180 degrees from that taste I had back in May.  The beer poured a dark brown, the color of healthy, vitamin laden soil.  The aromatic elements of the beer gave gentle reminders of smoked malts and even a little smoked peat.  Those elements reminded me of L'Abri de Tempete's Corps Mort, which ranks as one of my favorite smoked beers.  (The Corps Mort earns that distinction because the brewers use smoked grains from a local smokehouse that makes smoked herring and smoked mackerel -- the use of those particular local ingredients sets that beer apart from others, at least for me.)   

As for the taste of the beer, it possessed a similar range of flavors as the Corps Mort, minus the taste of pepper.  There was a pleasant, smooth smokiness to the taste of the Sunturnbrew.  The smoked flavors were accompanied by a hint of vanilla and some spice, although all of the flavors were mellowed and rounded out by both the alcohol (11% ABV) and age.  After all, the beer had been resting in my basement for at least several months.  What had first seemed like burnt plastic, now tasted like a nice sipping beer, one that could be enjoyed by a fireplace on a cold winter night.  (Too bad I drank it during the fall.)  

As I mentioned above, I was given a bottle of Sunturnbrew as a gift.  I have seen it at some beer and wine stores that have large international and/or craft beer selections.

ENJOY!

Saturday, September 8, 2012

Roast Chicken Thighs with Lentil Stew

While I follow a lot of chefs, one of the true standouts is Jose Andrés.  Living in the metropolitan Washington, D.C. area, I have the great fortune of being within an easy driving distance of several of Chef Andrés' restaurants.  I have enjoyed some amazing meals at places like Jaleo, Zatinya and Oyamel.  (I still drool whenever I think of the beef tongue taco, pork belly taco and grasshopper tacos at Oyamel.)  I have even been able to enjoy Chef Andres' creations at China Poblano in Las Vegas.  

According to Chef Andrés, this Roast Chicken Thighs with Lentil Stew recipe "is the sort of simple, humble food I have at home with my family on Friday night."  It sounded so good that I decided to bring this dish to my home.  While I have made other recipes by Chef Andrés, such as Chipirones con Cebolla Caramelizada and Vieiras con Albariño, this recipe marked the first time that I have cooked with lentils.  And, while I cannot recall, it was also probably the first time I ate lentils. 

The key to this dish is the pimentón (or paprika).  Chef Andrés uses Pimentón de la Vera, which I did not have.  However, if you can find a good Spanish paprika, it will definitely enhance the dish.  Overall, this recipe produces a delicious main course.  I still have to work on the presentation.  While this dish pales in comparison to what a Roast Chicken Thighs with Lentil Stew plate would look like coming out of one of Chef Andrés' kitchens, I think it represents a substantial leap in cooking and presentation for me. 


ROAST CHICKEN THIGHS WITH LENTIL STEW
Recipe by Jose Andres and available at Food & Wine
Serves 4
Ingredients:
6 tablespoons extra-virgin olive oil
2 slices of thick-cut bacon, diced
1 small onion, finely chopped
1 quart chicken stock or broth
8 garlic cloves, plus 1 tablespoon chopped garlic
1 medium carrot, halved lengthwise
1 small leek, white and pale green parts only, halved lengthwise
1 large green bell pepper, quartered
1 cup green lentils
1 thyme sprig
4 large chicken thighs (2 pounds)
Salt
Pimentón de la Vera
2 teaspoons sherry vinegar

Directions:
1.  Prepare the stew.  In a large saucepan, heat 1 tablespoon of the oil. Add the bacon and cook over moderate heat until golden brown, about 4 minutes. Add the onion and cook, stirring, for 3 minutes. Add the stock, whole garlic cloves, carrot, leek, bell pepper, lentils and thyme and bring to a boil. Simmer over low heat for 30 minutes.

2.  Roast the chicken. Preheat the oven to 450°. In a baking dish, drizzle the chicken with 1 tablespoon of oil and season with salt and pimentón. Roast on the top rack for about 40 minutes, until cooked through. 

3.  Continue preparing the stew.  Discard the thyme sprig from the lentils. Transfer the garlic, carrot, leek and bell pepper to a blender. Add 1/4 cup of the cooking liquid and puree. Drain the lentils and return them to the pot. Stir in the pureed vegetables.

4.  Finish the dish.  In a small skillet, heat the remaining 1/4 cup of oil. Add the chopped garlic and cook over low heat for 1 minute. Add 1 teaspoon of pimentón. Scrape the mixture into the lentils and simmer for 5 minutes. Add the vinegar and season with salt. Serve the lentils in bowls topped with the chicken.

PAIRING THIS RECIPE

Food and Wine magazine suggests a rich, plummy Merlot as a pairing for this dish.  A red wine is definitely the proper wine to pair with this dish.  If you are looking for a Spanish red wine, consider a Ribero del Duero.  

ENJOY!

Thursday, September 6, 2012

Robert the Bruce

Roibert a Briuis -- or, as we would call him, Robert the Bruce -- is an important figure in Scottish history. Although he pledged himself to the English monarch, King Edward I, Robert broke his pledge to align himself with those who fought for Scottish independence, including William Wallace.  After the English captured and killed Wallace, Robert the Bruce continued the fight.  He was crowned King Robert I in 1305, during the Scottish war for independence.  After a couple of early defeats, Robert the Bruce led the Scots to independence after the Battle of Bannockburn. 

Half a world away and several centuries later, in Munster, Indiana, the craft brewers at Three Floyds Brewing drew upon the inspiration of Robert the Bruce with their Scottish-style ale.  The brewers describe their beer as "[a] bold Scottish ale with a complex malty body derived from roasted and crystal malts balanced with just the right combination of hops," adding that it "pours a deep ruby color, has a sweet malty nose with layered caramel and roasted notes and a full body. Robust yet smooth, Robert The Bruce is a malt lover’s delight."

I have to say that, when I poured the beer, it was more of a lighter reddish-brown color than a deep ruby red.  The beer has a thin foam, which quickly recedes to the edges of the glass, leaving only wisps of bubbles on the surface.  The cirrus-like wisps seem to evoke some abstract image.  As I look down on the beer, the aromas of the roasted malts greet my nose. The roasted malts evoke some chocolate and coffee bean. 

As for the taste, the roasted malts foreshadow the flavors of this beer.  There is a roasted component to the beer, which provides a slight bitterness, but all of that is rounded or softened by the taste of the alcohol (the beer has an ABV of 7% and 30 IBUs) and the smooth body of the beer.  For me, the alcohol eventually became more prominent, somewhat eclipsing the roasted flavors, relegating them to the finish of the beer.  

When it comes to pairing a scotch ale like Robert the Bruce, the pairings tend to lean toward roasted and smoked meats.  Roasted pork dishes, as well as smoked salmon, are two suggestions. Smoked cheeses may also work well with this beer. 

My father gave me a bottle of the Robert the Bruce.  I have not seen it for sale anywhere near where I live . If you should see it, it is worth a try.  

 ENJOY!

Monday, September 3, 2012

Grilled Peaches in Primitivo

As followers of this blog may recall, Clare and I recently hosted a wine dinner based upon Mario Batali's cookbook, Italian Grill.  We served an appetizer of Portobellos with Arugula and Parmigiano and a main course of Chicken Thighs with Snap Peas and Agliata.  When it came to the dessert, we had a problem.  While Italian Grill has a lot of great recipes, it did not have any dessert recipes.  We needed a dessert recipe that involved the use of a grill so that we could keep true to our theme of Mario Batali's Italian Grill.

I follow Mario Batali on Twitter, so I sent a tweet to him asking if he knew of any good dessert recipes that involve the use of a grill.  I explained that we were trying to prepare a three course dinner based on his cookbook, and we needed a dessert recipe that included grilling as part of the recipe.  Unfortunately, Mario did not respond to my tweet.

So, Clare and I were left to our own devices.  I wanted to stay true to the theme of our wine dinner.  So, I poured through our other Mario Batali cookbooks and found a recipe that I could easily modify into a grill recipe.   The recipe is Peaches in Primitivo, from Mario's Molto Italiano cookbook.  Mario explains that serving fruit with red wine is a tradition in Puglia.  The tradition is very simple ... just chill the wine and pour it over the fruit.  Mario's recipe turns the wine into a sweet syrup that can be drizzled over the fruit.
 
To bring this recipe into the theme of an Italian grill, I decided to halve the peaches, remove the pits, and grill the peaches for just about one to two minutes on each side until the grill marks began to show.  When it came to presentation, I sliced the peaches, drizzled the Primitivo syrup over them, and served it with some vanilla ice cream.   


GRILLED PEACHES IN PRIMITIVO
Recipe adapted from Mario Batali's Molto Italiano, p. 486
Serves 4

Ingredients:
2 cups of sugar
2 cups of Primitivo di Gioia (from Puglia) or 
     other dry red wine
1 clove
4 peaches
1 tablespoon of grapeseed or canola oil

Directions:
1.  Make the Primitivo Syrup.  In a medium saucepan, combine the sugar, red wine, and clove, bring to a simmer and simmer until reduced by half, about 30 minutes.  Let cool and remove the clove.  (The syrup can be made ahead and refrigerated for up to 1 week.)  

2.  Grill the peaches.  Heat a grill on medium heat.  Slice the peaches in half and remove the pits.  Brush the cut sides of the peaches with the grapeseed oil.  Grill the peaches on the cut sides for 1 to 2 minutes, or until grill marks begin to show.  Flip the peaches and grill for a minute longer.  Remove. 

3.  Plate the dish.  Slice the peaches and divide them among four footed bowls.  Pour 1/4 cup of the Primitivo syrup over the peaches and serve.

PAIRING THIS RECIPE

Given this dish was served at a wine dinner, it comes with a pairing.  That pairing is suggested by the recipe's name ... Primitivo wine.  The wine served at our wine dinner was a Caleo Primitivo (2011), which was produced with grapes from the southern region of Puglia.  The wine went very well with this recipe. 

ENJOY!

Saturday, September 1, 2012

Chicken Thighs with Snap Peas and Agliata

When I read Mario Batali's recipe for Chicken Thighs with Snap Peas and Agliata, I knew I had to make it.  Mario describes the recipe as follows: "[t]hese chicken thighs are coated with a garlicky bread crumb mixture and cooked slowly over the cooler part of the grill so you end up with juicy meat and toasted herb crust."  Put another way, garlicky bread mixture + indirect cooking = juicy meat + toasted herb crust.  A great calculation in my estimation!

The only question was when would I have an opportunity to make this recipe.  The opportunity presented itself when Clare and I hosted a wine dinner for our Wine Club.  We decided that the theme would be based upon Mario Batali's cookbook, Italian Grill.  I immediately had the main course selected.  And it was the Chicken Thighs with Snap Peas and Agliata.

I bought the chicken thighs and snap peas, but I got to wondering what is "agliata."  As it turns out, "agliata" is a garlic sauce that dates back to the Middle Ages.  The sauce is very easy to make, having only three ingredients: garlic, bread crumbs and red wine vinegar.  Mario Batali's version of agliata includes a lot of garlic.   Twelve cloves!  (I have to admit that I used only nine cloves out of concern that some guests may not like an overpowering garlic flavor, which I really like.)  Mario also uses bread crumbs; and, instead of vinegar, he uses anchovy paste and olive oil to provide the agliata with its sauce-like characteristic.  (Once again, I have to admit I that omitted the anchovy paste, but that is because I did not have any on hand and could not find it at the store).  Mario also adds flat leaf parsley to his agliata.  Although the Middle Ages version of agliata did not include parsley, Mario Batali's use of this herb adds a lot of character -- along with brightness and color -- to the sauce/bread crumb mixture.  That is something that I've come to expect from a chef like Mario Batali, who is himself a bright and colorful character. 

In the end, this recipe worked out very well.  I think all of the guests enjoyed this dish and, at least for me, it now ranks as one of my favorite chicken thigh dishes.  Although I say this a lot, I definitely plan on making this recipe again.  And I mean it!


CHICKEN THIGHS WITH SNAP PEAS AND AGLIATA
Recipe by Mario Batali and available in Italian Grill, pg. 141
Serves 6

Ingredients:
12 garlic cloves, crushed
1/2 cup, plus 3 tablespoons extra virgin olive oil
1/2 cup flat leaf parsley, chopped
2 cups of fresh bread crumbs
12 boneless, skinless, chicken thighs
3 shallots, sliced 1/4 inch thick
1/2 teaspoon of anchovy paste
1 pound snap peas, blanched in boiling water until
     bright green, chilled in an ice bath and drained
Olio Piccante for drizzling

Directions:
1.  Prepare the bread crumb mixture.  Combine the garlic, 1/2 cup of the oil, the anchovies, parsley and bread crumbs in a food processor and zap until smoothish. 

2.  Prepare the chicken thighs.  Put the chicken thighs in a large bowl and sprinkle with the bread crumb mixture, turning to coat well.  Arrange in a single layer on a platter and put in the refrigerator for 15 minutes. 

3.  Grill the chicken.   Prepare a gas or charcoal grill for indirect grilling.  Place the chicken thighs skinned side up on the cooler part of the grill, cover the grill, and grill, turning once until the chicken is cooked through, about fifteen minutes per side.

4.  Finish the dish.  Meanwhile, heat the remaining 3 tablespoons oil in a 10 to 12 inch saute pan over medium heat.  Add the shallots and anchovy paste and cook, stirring occasionally, until the shallots are soft, about 5 minutes.  Add the snap peas and cook, stirring, just until heated through.  Transfer the snap peas to a platter and set aside.  

5.  Plate the dish.  Arrange the thighs on top of the snap peas and serve with a drizzle of olio piccante.

PAIRING THIS RECIPE

As I noted above, I made this dish for a wine dinner.  The couple who brought the wines paired the Chicken Thighs with Snap Peas and Agliata with a Chilean Pinot Noir.  The wine was the Ona Anakena Pinot Noir (2010) from the Leyda Valley of Chile.  The wine is a deep cherry red in color, with a good balance between the fruit and the oak.  This wine pairing worked extremely well with the dish, pairing a lighter red wine with the garlicky chicken, which provided an experience where the wine tamed the herb and garlic flavors of the grilled meat.    

ENJOY!