Showing posts with label Guest Blog Post by Clare. Show all posts

Saturday, February 1, 2014

Apple Crumble

I am not the only one who cooks in our family.  My beautiful wife, Clare, is also a great cook and a great baker.  Every once in a while, I ask my Angel to provide a guest blog post so that I can share some of the amazing and delicious things that she makes for family, friends and, of course, me.  She has already provided guest blog posts about Cuban Bread, Loyalist Bread, Salmon Burgers, Peach Cobbler, Parmesan Soufflé with White Wine Butter Sauce and Meatballs with Orechhiette, Kale and Pine Nuts.   So, without further ado,

A Guest Blog Post by Clare ...

When it comes to desserts, I am the one that makes them in our family.  Keith does not really make a lot of desserts; and, I think that is because he is not really into baking.  When it comes to cooking, he does not always measure things exactly.  He likes to "eyeball"the measurements.  This does not lend itself very well to baking, where exact measurements are much more important, particularly if you want to have a good dessert.

Then there are desserts that are more "Keith-friendly," that is, ones in which being off on a measurement or two would not spell ruin for the dish.  One such dish is this apple crumble, which I made as part of our Wine Club dinner back last September.  (Keith has been really busy at work and at home, which has left some recipes, like this one, waiting to be posted.)  The theme of the Wine Club dinner was The F Word, which was a dinner based on recipes by Gordon Ramsay.  This is Gordon's take on an Apple Crumble.  

The key to this recipe is that the apple is presented in two forms ... puree and chunks.  This helps to provide some interesting texture to the fruit in the dessert.  Gordon adds dried cranberries, which add some interesting flavor to complement the apples.  The granola topping, which adds that crunch one would expect with a crumble rounds out the dish. 

Over all, this is a delicious dessert and a great way to end that particular wine club dinner. 


APPLE CRUMBLE
Recipe from Gordon Ramsay's Cookery Course
Serves 4

Ingredients (for the apples):
6 tablespoons of caster sugar
Pinch of ground cinnamon
1 vanilla pod, seeds only
6 apples, cored but not peeled, 3 of them grated
     3 of them cut into chunks
3 tablespoons of dried cranberries
Zest of one lemon, juice of 1/2 lemon

Ingredients (for the crumble topping):
6 2/3 tablespoons of plain flour
2 tablespoons of demerara sugar
3 1/3 tablespoons of butter, chilled and cubed
Pinch of ground cinnamon
4 tablespoons of nutty granola or muesli

Directions:
1.  Prepare the apples.  Heat the oven to 390 degrees Fahrenheit.  Heat a small hob-proof baking dish. Add the caster sugar and heat for about 5 minutes until it caramelizes.  Add the cinnamon, vanilla seeds and grated apples and cook for 1-2 minutes.  Stir in the apple chunks, then mix in the cranberries, lemon zest and juice.  Remove from heat and set aside.

2.  Make the topping. Place the flour, sugar, butter and cinnamon in a bowl and rub together with your fingertips until the mixture resembles breadcrumbs.  Add the granola and mix fully until incorporated. 

3.  Bake the crumble.  Scatter the crumble topping over the fruit and heat the dish on the hob.  Once the apple mixture is bubbling, transfer to the preheated oven and bake for 12-14 minutes until the topping is a deep golden brown.  Remove and serve warm.

ENJOY!

Sunday, October 20, 2013

Meatballs with Orecchiette, Kale and Pine Nuts

I am not the only one who cooks in our family.  My beautiful wife, Clare, is also a great cook and a great baker.  Every once in a while, I ask my Angel to provide a guest blog post so that I can share some of the amazing and delicious things that she makes for family, friends and, of course, me.  She has already provided guest blog posts about Cuban Bread, Loyalist Bread, Salmon Burgers, Peach Cobbler and Parmesan Soufflé with White Wine Butter Sauce.   So, without further ado,

A Guest Blog Post by Clare ...

This dish -- Meatballs with Orecchiette, Kale and Pine Nuts -- was the second dish from our recent wine club dinner.  As Keith previously explained in connection with the first dish, Grilled Seafood with Romesco Sauce, we hosted a wine dinner based on the recipes of Chef Gordon Ramsay.  Keith has watched a lot of Gordon Ramsay's shows, like Hell's Kitchen and Master Chef; however, we did not want this dinner to be like either of those shows.  Instead, the recipes were chosen to reflect Gordon Ramsay's interest in various cuisines.

This recipe is a both a display of Southern Italian cuisine and a twist with the flavors.  Orecchiette is a traditional pasta from Apulia, a region in southern Italy.  In Apulia, this pasta may be served with broccoli, anchovies and chiles.  The twist comes from Chef Ramsay's substitution of meatballs, kale and pine nuts.   

We decided to add our own little twist to Chef Ramsay's recipe.  His recipe calls for the use of beef meatballs; however, I do not eat red meat.  So, Keith suggested that we substitute ground turkey for ground meat.  I do eat turkey, so that substitution worked well.

Both Keith and I really liked this dish; and, I think we will make this recipe again ... if at the very least to ensure that Keith gets enough greens in his diet. 


MEATBALLS WITH ORECCHIETTE, KALE AND PINE NUTS
Recipe from Gordon Ramsay's Cookery Course
Serves 4

Ingredients (for the pasta):
2 cups of dried orecchiette pasta
2 garlic cloves, peeled and sliced
Slightly less than 1 cup of kale
4 tablespoons of pine nuts, toasted
Freshly grated Parmesan cheese

Ingredients (for the meatballs):
1 small onion, peeled and finely diced
2 garlic cloves, peeled and finely sliced
Olive oil
1 teaspoon of dried chile flakes
1 pound of minced beef (or turkey)
1/3 cup of fresh breadcrumbs
3-4 tablespoons of milk
Sea salt
Freshly ground black pepper

Directions:
1.  Prepare the meatballs.  Saute the onion and garlic with seasoning in a hot oiled frying pan for about 5 minutes until soft and lightly colored, adding the chile flakes after a minute or two.  Place the mince in a large bowl and add seasoning.  Put the breadcrumbs in a separate bowl and moisten with the milk.  Add seasoning, then stir the breadcrumbs and onion mixture into the mince and combine well.  With wet hands, shape the mince mixture into small balls about 2 centimeters wide.  Transfer to a lightly greased plate or tray and chill for 30 minutes until firm. 

2.  Cook the pasta.  Cook the pasta in boiling salted water until al dente, according to packet instructions.  

3.  Prepare the meatballs and kale.  Heat a large frying pan over a medium heat and add a little olive oil.  Brown the meatballs for 6 minutes until colored on all sides.   Add the garlic to the pan and cook for 2 minutes until tender, then add the kale and season.  Sweat the kale over medium heat for 5 minutes with a couple of tablespoons of the cooking water from the pasta.  Taste and adjust the seasoning as necessarty, then stir in the pine nuts.

4.  Finish the dish.  Drain the pasta, reserving a few tablespoons of the cooking water.  Tip the pasta into the pan with the meatballs and stir over a medium-low heat until well mixed.  Add a good handful of finely grated Parmesan, and mix well with a little cooking water to help coat the pasta.  Taste and adjust the seasoning as necessary.  Serve garnished with another grating of Parmesan.

And, as Keith says ...

ENJOY!

Monday, April 8, 2013

Quiche Lorraine

I am not the only one who cooks in our family.  My beautiful wife, Clare, is also a great cook and a great baker.  Every once in a while, I ask my Angel to provide a guest blog post so that I can share some of the amazing and delicious things that she makes for family, friends and, of course, me.  She has already provided guest blog posts about Cuban Bread, Loyalist Bread, Salmon Burgers, Peach Cobbler and Parmesan Soufflé with White Wine Butter Sauce.   So, without further ado,

A Guest Blog Post by Clare ...

It has been a very long time since my last guest blog post.  Every Easter, Keith and I host some friends for dinner.  The meal is a potluck, with the guests bringing appetizers, salads, sides, beverages and even dessert.  We supply the main course.  In the past, Keith has prepared the main course, but, this Easter, I decided to take the lead in the kitchen.  I also decided to host a brunch, and, I knew what I wanted to make ... quiches.

I made three quiches, all of which everyone enjoyed.  However, Keith asked if I would agree to do a guest blog post about the Quiche Lorraine.  I think it is because it was the only quiche that had bacon in it.  (The other two quiches were a broccoli quiche and a spinach quiche.)  In fact, I know that is the reason.

At this point, Keith would probably give some background or history of the dish.  Something like an observation about how Quiche Lorraine dates back to the 16th Century, when it was said that Charles III, the Duke of Lorraine would eat this dish.  Keith would also probably note that, at that time, they did not call it quiche.  The name "quiche" did not appear to until the 19th century, when it was used in L'Histoire de Nancy.  He would most likely add that the word "quiche" is not even of French origin.  It is derived from the German word "küchen" or "cake."

A quiche is hardly a cake. It is more like a delicious egg pie.  And, this particular quiche is doubly delicious for Keith because of the use of bacon.  One thing that I did differently is that I did not use all of the bacon in the initial making of the quiche.  Instead, I reserved some of the bacon to sprinkle on the top before I put it into the oven to bake.  


QUICHE LORRAINE
Recipe from All Recipes
Makes 1 Quiche

Ingredients:
9 inch single crust pie
12 slices of bacon
1 cup shredded Swiss cheese
1/3 cup minced onion
4 eggs, beaten 
2 cups light cream 
3/4 teaspoon of salt
1/4 teaspoon of white sugar
1/8 teaspoon cayenne pepper

Directions:
1.  Preheat the oven. Preheat oven to 425 degrees Fahrenheit.

2.  Prepare the quiche. Place bacon in a large skillet, and fry over medium-high heat until crisp. Drain on paper towels, then chop coarsely. Sprinkle bacon, cheese and onion into pastry shell.  In a medium bowl, whisk together eggs, cream, salt, sugar and cayenne pepper. Pour mixture into pastry shell.

3.  Bake the quiche. Bake 15 minutes in the preheated oven. Reduce heat to 300 degrees Fahrenheit, and bake an additional 30 minutes, or until a knife inserted 1 inch from edge comes out clean. Allow quiche to sit 10 minutes before cutting into wedges.

And, as "Chef Bolek" always says ...

 ENJOY!

Monday, November 21, 2011

Parmesan Soufflé with White Wine Butter Sauce

I am not the only one who cooks in our family.  My beautiful wife, Clare, is also a great cook and a great baker.  Every once in a while, I ask my Angel to provide a guest blog post so that I can share some of the amazing and delicious things that she makes for family, friends and, of course, me.  She has already provided guest blog posts about Cuban Bread, Loyalist Bread, Salmon Burgers and Peach Cobbler.  So, without further ado,

A Guest Blog Post by Clare ...

As you may know, both Keith and I hosted a dinner for a Wine Club.  We both decided to cook a four-course meal using recipes from Frank Stitt's Bottega Favorita.  Frank Stitt is a well known chef who owns a few restaurants in and around Birmingham, Alabama.  My parents took Keith and myself to one of those restaurants, Bottega, for dinner during the weekend that Keith met them for the first time.  Perhaps the most memorable moment of that dinner, apart from spending time with my parents and with Keith, was the Parmesan Soufflé that we had as an appetizer.

This dish was amazing ... as one can expect when Frank Stitt describes it as a "cloud-like" pudding.  The eggs, cream and garlic make for a rather light soufflé.  This lightness is contrasted with the richness of the white wine butter sauce.  The wine, vinegar, cream and butter are combined together in the sauce, which is then infused into the mushrooms.  The dish is completed with a garnish of a few strips of prosciutto. 

Looking back, this is a recipe that was easier than what I thought.  One bit of advice that I have learned from making this dish.  When you are baking the soufflés, you should make sure that the sides of the pan or baking dish are not that much higher than the sides of the ramekins.  I found that the best dish for baking the soufflés is a pyrex glass baking dish.  The soufflés seemed to set better in the pyrex dish than the other dishes that I used, such as a roasting pan.


PARMESAN SOUFFLE WITH WHITE WINE BUTTER SAUCE
Recipe from Frank Stitt's Bottega Favorita at p. 40
Serves 6

Ingredients (for the Souffle):
8 large eggs
3 cups heavy cream
1/2 teaspoon roasted garlic puree
Pinch of freshly grated nutmeg
3/4 cup freshly grated Parmigiano Reggiano
1/2 teaspoon kosher salt
1/4 teaspoon white pepper
Dash of Tabasco Sauce

Ingredients (for the White Wine Butter Sauce):
3/4 cup dry white wine
3/4 cup white wine vinegar
1 shallot, finely minced
1 thyme sprig
1 1/2 teaspoons heavy white cream
1/2 pound of unsalted butter
Kosher salt
Freshly ground white pepper
Fresh lemon juice, to taste
Tabasco sauce

Ingredients (to add to the White Wine Butter Sauce):
1 tablespoon of unsalted butter
2 cups quartered or thickly sliced cremini, oyster or button
     mushrooms or a mix of mushrooms
1 shallot, minced
2 thyme sprigs, leaves only
Kosher salt, to taste
Ground black pepper, to taste
4 thin slices of Prosciutto di Parma, sliced julienne

Directions:
1.  Preheat oven to 300 degrees Fahrenheit.  Butter six 6 ounce ramekins and place them in a large shallow baking dish or pan.

2.  Combine all souffle ingredients in a bowl and whisk until combined.  Fill the ramekins almost to the top (use 5.5 ounces in each ramekin).  Fill the baking dish with enough water to come up to about three-quarters the side of the ramekins.

3.  Cover the pan with foil and bake for 1 hour.  Uncover and bake until the souffles are slightly puffed, set and golden, about fifteen minutes more.

4.  Meanwhile, shortly before the souffles are done, prepare the butter sauce.  Combine the wine, vinegar, shallot, and thyme in a small heavy non-reactive pan, bringing it to a boil over high heat to reduce to a syrupy glaze.  This should take about twelve minutes.  Then remove the saucepan from the heat and stir in the cream.  Return it to a simmer and simmer for about 1 minute.  reduce the heat to low and whisk in the butter bit by bit, adding more only after each previous addition has been incorporated.  Regulate the heat so that the sauce stays warm but does not get too hot (otherwise it will separate).  Add the salt, pepper, lemon juice and hot sauce.  Taste and add a little more vinegar or hot sauce is needed.  Strain the sauce. Keep the sauce warm while you saute the mushrooms.

5.  Heat a large saute pan over medium-high heat, and add the butter.  When the butter is melted, add the mushrooms and saute until the edges are golden, about 3 minutes.  Add the shallot and saute for one 1 minute.  Season with the thyme leaves and add the salt and pepper and toss for about 30 seconds.  Set aside, covered to keep warm.

6.  Unmold the souffles onto warm plates and ladle the butter sauce around.  Scatter some of the sauteed mushrooms and sliced prosciutto around each one and serve.

And, as Keith would say,

ENJOY!

Sunday, September 4, 2011

Peach Cobbler

I am not the only one who cooks in our family.  My beautiful wife, Clare, is also a great cook and a great baker.  Every once in a while, I ask my Angel to provide a guest blog post so that I can share some of the amazing and delicious things that she makes for family, friends and, of course, me.  She has already provided guest blog posts about Tuscan Vegetable Soup, Cuban Bread, Loyalist Bread and Salmon Burgers.  So, without further ado,

A Guest Blog Post by Clare ...

Peaches are a great summertime fruit and are very versatile.  I bought some peaches during a recent trip with Keith to Eastern Market.  I have previously used peaches to make ice cream, which Keith devours at every chance he can get.  But, I decided to do something different.  After doing a little searching on the Internet, I came across a recipe for a peach cobbler.  Keith devoured that as well.  Fortunately for me and this guest post, Keith took pictures of the cobbler before he began eating it.   

Usually, at this point, Keith would probably say something about the history of the dish or the ingredients used to make the dish. According to the Food Timeline, food historians have determined that the cobbler dates back to the second half of the 19th century, when settlers where making their way across North America.  These pioneers created the dish using a crust, filling it with whatever fresh or canned fruit they may have, and cooking it in a dutch oven.  The first reference to a "cobbler" appeared as early as 1839 in a book called The Kentucky Housewife, which provided a recipe for a "peach pot-pie" or "cobler."  The term also began to appear in American dictionaries in 1859.

Over the past 160 years, the cobbler has evolved over time, as people settled down and, once again, were able to cook with ovens rather than over a fire.  This recipe comes from the Food Network.


PEACH COBBLER
Adapted from Food Network
Serves many

Ingredients (for the filling):
4 cups of peeled and sliced peaches
3/4 cup of brown sugar
1 teaspoon cinnamon
1 teaspoon vanilla
1 tablespoon flour
1 cup flour

Ingredients (for the crust):
1 teaspoon baking powder
1/2 teaspoon of baking soda
3 tablespoons of brown sugar
4 tablespoons of unsalted butter, cut in to small pieces
2/3 cup of buttermilk
1 tablespoon brown sugar for topping
Whipped cream

Directions:
1.  Preheat the oven to 425 degrees F.

2. Generously butter a 1 1/2-quart shallow baking dish. Place the sliced peaches in the dish and sprinkle with brown sugar, cinnamon, vanilla, and flour. Mix gently and spread evenly again. Bake for 10 minutes.

3. Meanwhile combine all dry ingredients for cobbler crust in a bowl. Cut in the butter with a pastry cutter or your fingers, to make the texture like coarse crumbs. Add buttermilk and stir to form a soft dough.

4.  Remove fruit from oven and drop rounded spoonfuls of dough on top. Sprinkle with last tablespoon of brown sugar and return to oven. Bake until fruit is bubbly and crust topping is golden brown, about 20 minutes. Serve warm with whipped cream. 

A great accompaniment for this dessert is either some whipped cream (which I made from scratch) or some ice cream.  Maybe some peach ice cream.  Well, until next time, as Chef Bolek would say ...

ENJOY!

Sunday, June 19, 2011

Salmon Burgers with Ancho Guacamole

I am not the only one who cooks in our family.  My beautiful wife, Clare, is also a great cook and a great baker.  Every once in a while, I ask my Angel to provide a guest blog post so that I can share some of the amazing and delicious things that she makes for family, friends and, of course, me.  She has already provided guest blog posts about Tuscan Vegetable Soup, Cuban Bread and Loyalist Bread. So, without further ado,

A Guest Blog Post by Clare ...

Keith has posted a few things about our recent vacation in the Outer Banks on his blog.  We spent a week with my parents, along with one of my aunt and uncle and my cousins in Avon, which is near Hatteras. For the first night, the plans were to grill hamburgers and hot dogs.  This is a problem for me because I do not eat meat.  But I do eat seafood.  My dad went to the grocery store and bought a piece of salmon and made me salmon burgers.  The burgers that he prepared were delicious and I got to thinking about salmon burgers a lot.  Eventually, I decided to make salmon burgers myself.

I looked at a couple of recipes online and I talked to my dad and Keith.  My dad helped me with the ingredients for the salmon burgers and Keith had a great idea of "planking" the burgers.  By using cedar planks, it would be much easier to turn the burgers and the planks would add a little cedar flavor to the burgers.  Keith also offered to make some ancho guacamole for the salmon burgers.  The guacamole was a good topping for the burgers.  


SALMON BURGERS
A Clare Bolek Original
Serves 12

Ingredients:
2 pounds of salmon
3/4 cup cilantro, chopped
2 tablespoons of Lusty Monk Mustard (you can substitute
      with Dijon Mustard)
1 medium Vidalia onion, diced
3 cups Panko bread crumbs
2 beaten eggs
3 cloves garlic, diced finely
1 teaspoon of Spanish paprika
1/2 lemon, juiced
1 tablespoon of olive oil
Salt, to taste
Ground black pepper, to taste

1.  Begin soaking a cedar plank(s) in water.  You should be able to place about four burgers on a plank.  The plank(s) should soak for about an hour.

2.  Prepare the burgers by cutting the salmon into even pieces.  Place the salmon pieces in a food processor and process until the salmon is broken up.  Add the salmon to a bowl and add the onion, garlic, cilantro, paprika and lemon juice.  Mix thoroughly and then add the Panko bread crumbs, eggs and olive oil. Continue to mix thoroughly.

3. Make patties by taking a handful of the salmon mixture.  You should get about a dozen patties.  Place the patties on a sheet of wax paper.  Once all of the patties are formed, place them in the freezer for about one half of an hour.

4.  After about thirty minutes, remove the patties from the freezer.  Heat the grill on medium high heat.  Remove the plank from the water and pat dry.  Drizzle a little olive oil on the plank and place the patties on the plank(s).

5.  Put the planks on the grill.  Let the burgers cook for about ten minutes and then flip them.  Continue to cook the burgers for about ten minutes more.  Remove the burgers from the heat.

Serve the salmon burgers on toasted or grilled buns.  You can use whatever toppings you like, such as lettuce, tomato, red onion or ... guacamole.


ANCHO GUACAMOLE
Adapted from a recipe by Alton Brown
Serves many

Ingredients:
3 avocados
1 lime, juiced
1/2 teaspoon kosher salt
1/2 teaspoon ground cumin
1/2 teaspoon ground ancho chile powder
1/2 medium red onion, diced
2 plum tomatoes, seeded and diced
1 tablespoon chopped cilantro
1 clove garlic, diced

Directions:
1.  In a large bowl, place the scooped avocado pulp and lime juice, toss to coat the avocado with the lime juice. Drain, and reserve the lime juice, after all of the avocados have been coated.

2.  Add the salt, cumin, and ancho chile powder.  With a potato masher, mash the avocados.

3.  Fold in the onions, tomatoes, cilantro, and garlic. Add 1 tablespoon of the reserved lime juice.

4.  Let sit at room temperature for 1 hour and then serve.

The Salmon Burgers were a great success.  Both Keith and I really enjoyed eating these burgers.  The great thing is that we more burgers, which I froze to eat another day.  I am definitely going to make this recipe again.  As Keith would say,

ENJOY!

Friday, April 15, 2011

Loyalist Bread

I am not the only one who cooks in our family.  My beautiful wife, Clare, is also a great cook and a great baker.  Every once in a while, I ask my Angel to provide a guest blog post so that I can share some of the amazing and delicious things that she makes for family, friends and, of course, me.  She has already provided guest blog posts about Tuscan Vegetable Soup and Cuban Bread.  So, without further ado,

A Guest Blog Post by Clare ...

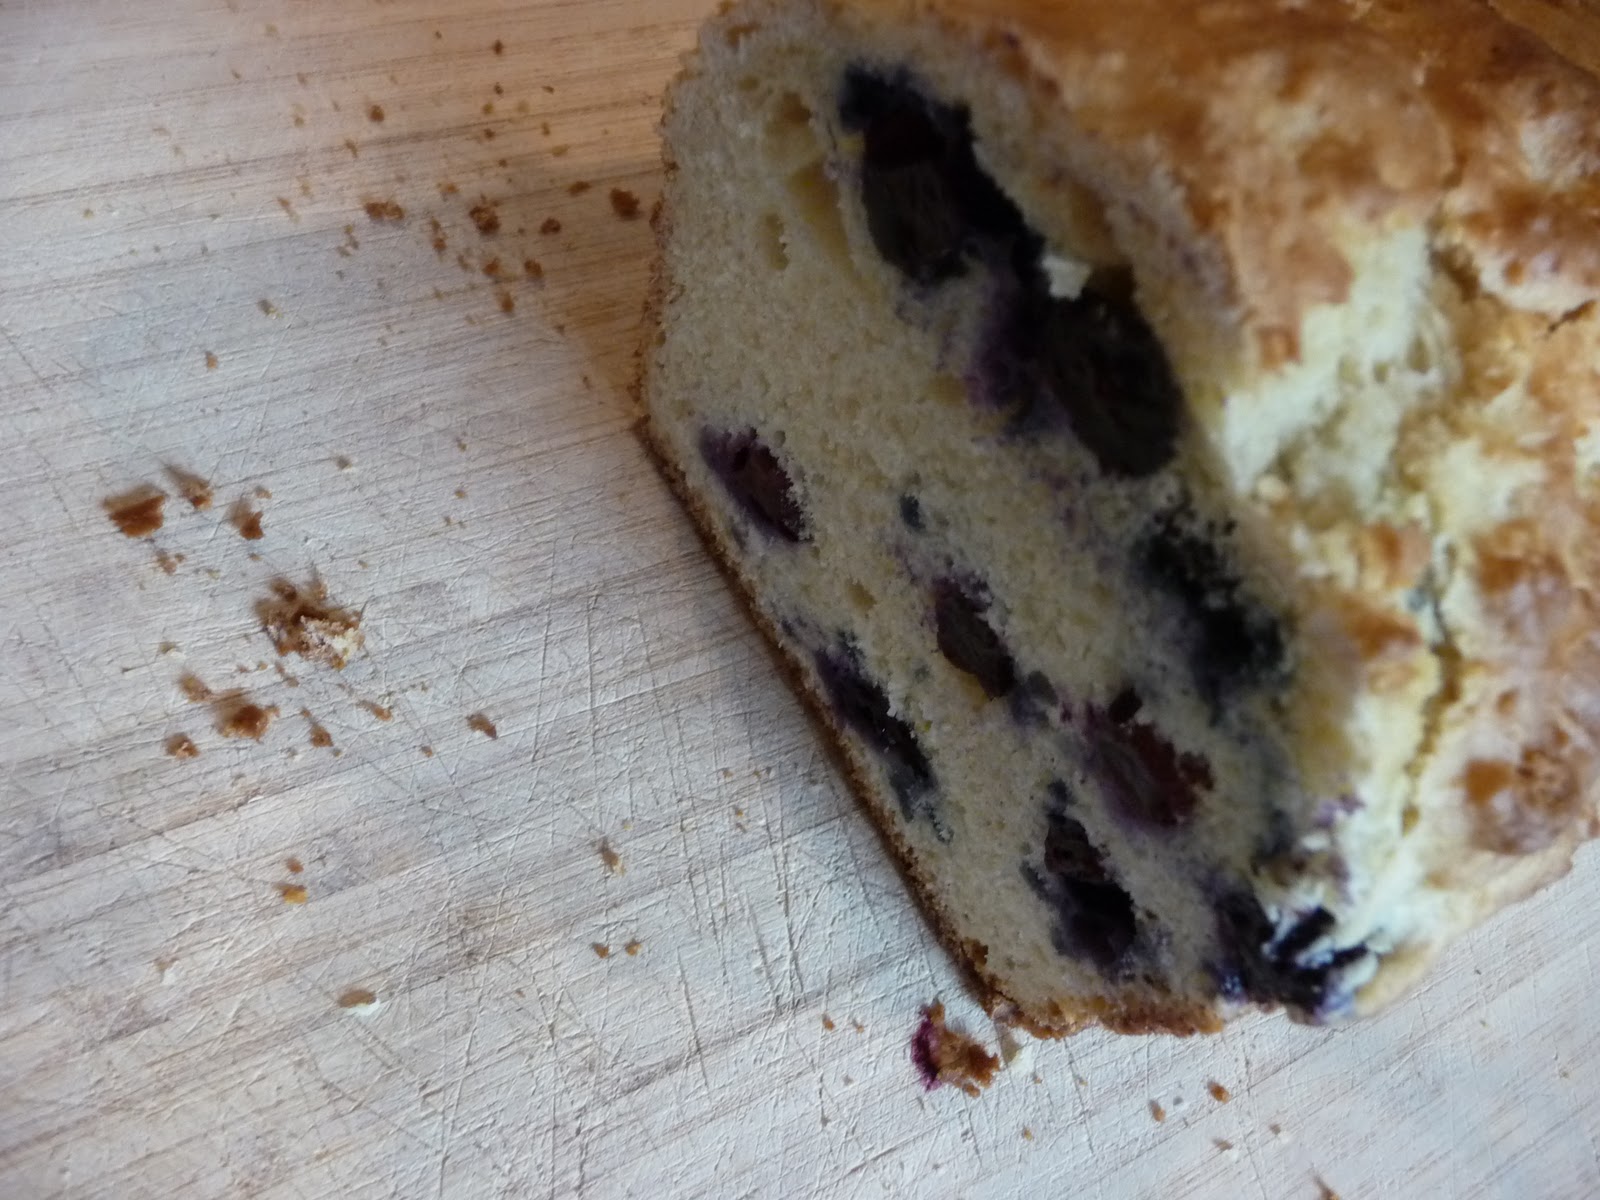
For years, my mom has baked a blueberry bread called Loyalist Bread.  She usually made this bread for special occasions, like breakfast for guests during the Thanksgiving holiday or for Keith and myself when we visit.  And, whenever my mom makes this bread, it tends to be eaten very quickly, because it is delicious.  The recipe for making this bread is very fun and easy.  Recently, I made Loyalist bread with my godson, J.T.,  his sister, Ella, and one of my best friends, Michele.  This time, the special occasion was my birthday.

According to Bernard Clayton's New Complete Book of Breads, the recipe for Loyalist Bread dates back to the American Revolution.  During that time, the recipe for Loyalist Bread was commonly made by families who were loyal to King George III.  As the Revolutionary War progressed, these families fled the colonies to various parts of Canada, like Nova Scotia.  These families took their recipes with them.  When they arrived at their new homes, these families continued to use those recipes, like the Loyalist Bread recipe, using local ingredients.  This recipe and others were collected in a book called The Blueberry Connection, written by Beatrice Ross Buzek from Nova Scotia, where the provincial berry happens to be the wild blueberry..

All you need to make Loyalist Bread are two medium (8 inch by 4 inch) loan pans, greased or Teflon, lined with buttered wax paper.  It is best to use fresh blueberries for this bread and you need to use some care to ensure the blueberries are not broken up or smashed.  You will be rewarded in the end because, beneath the great crust of this bread, there will be little blueberry pockets that are perhaps the key to what makes this bread so delicious to eat.


LOYALIST BREAD
Adapted from Bernard Clayton's New Complete Book of Breads at 452-53.
Makes 2 loaves

Ingredients:
2 tablespoons of shortening, melted
2 cups of sugar
2 cups of buttermilk
2 eggs, lightly beaten
4 1/2 cups of all-purpose flour
5 teaspoons baking powder
1 teaspoon baking soda
1 teaspoon salt
2 cups of cleaned blueberries
1 cup chopped walnuts 

Directions:
1.  Mix the melted shortening together with the sugar, buttermilk and beaten eggs in a bowl.

2.  In a larger bowl, mix the dry ingredients.  Form a well at the bottom and pour in the buttermilk mixture.  Stir together with 15 to 20 strokes.  Drop in the blueberries and walnuts and push into the corners.

3.  Pour or spoon the batter into the prepared pans (see discussion above) while preheating the oven to 350 degrees Farenheit.  Allow the pans to stand for 20 minutes.

4. Place in the oven and bake for 1 to 1 1/2 hours.  The crust will become light brown.  Test with a toothpick inserted into the center of the loaf.  If it comes out clean and dry, then the bread is done.

5.  Remove from the oven and allow the bread to cool for 10 minutes before turning the pans on their side.  Tug the bread loose with the ends of the wax pepper.  Allow to cool further on a wire rack.

And, as Keith always says,

ENJOY!

Tuesday, March 15, 2011

Cuban Bread

A Guest Blog Post by Clare ...

This the second post that I have done for Keith's blog, and, I get to post about something that Keith has never posted about ... bread.  Keith does not bake, but I love to bake.  For example, if I mention the word "Cuban" to Keith, he'll think of the sandwich, with its ham and roast pork.  Mention the word "Cuban," I think of a bread I made a while back called "Cuban bread."

This recipe makes two round loaves of bread, which is very similar to a French bread made with only yeast, flour, water, salt and a little sugar.  When making this bread, you cut a little "x" into the top of the bread.  As it bakes, the bread opens at the top.

This is a very easy recipe to make.  I think even Keith could make this recipe. 


CUBAN BREAD
Makes 2 loaves
Adapted from Bernard Clayton's New Complete Book of Breads at pages 23-24

Ingredients:
5 to 6 cups of bread or all purpose flour, approximately
2 packages of dry yeast
1 tablespoon of salt
2 tablespoons of sugar
2 cups of hot water (120 to 130 degrees)
Sesame seeds

Directions:
1.  Place four cups flour in a large mixing bowl and add the yeast, salt and sugar.  Stir until they are well blended.  Pour in the hot water and beat with one hundred strong strokes or for three minutes with a mixer flat beater.  Gradually work in the remaining flour 1/2 cup at a time (using fingers if necessary), until the dough takes shape and is no longer sticky.

2.  Sprinkle the work surface with flour.  Work in the flour as you knead, keeping a dusting of it between the dough and the work surface. Knead for eight minutes by hand or with a dough hook until the dough is smooth, elastic and feels alive under your hands.

3.  Turn the dough fro the bowl and allow it to rest for four or five minutes before dividing it into two pieces.  Shape each piece into a ball.  Flatten with the palm into an oblong roughly the length of the loaf pan.  Fold lengthwise, pinch the seam together, tuck in the ends and drop into the prepared tin.  Press down with the hand to force the dough into the corners.

4.  Cover the pans with greased wax or parchment paper and put aside to almost tripe in volume.  The dough should rise 1 1/2 to 2 inches above the rim of the tin in about fifty minutes.

5.  Preheat the oven to 400 degrees about fifteen minutes before baking.

6.  Brush the loaves with the egg-milk wash and place the pans on the middle or lower shelf of the oven.  Bake until the loaves are a golden brown, thirty to forty minutes, and test done when rapped on the bottom crust with a forefinger.

7.  Remove the loaf from the oven and allow to cool on a metal rack before slicing.

ENJOY!

Sunday, January 23, 2011

Tuscan Vegetable Soup with White Beans and Parmesan


A GUEST BLOG BY CLARE...
I feel honored to be the first guest blogger for Chef Bolek’s blog.  It is hard to compete with Keith’s words and history, but I will try. 

I knew how much Keith loved me when he was willing to accept a vegetarian in his life.  Keith often jokes about his master plan to convert me to being a meat eater again, but in the meantime, he enjoys trying new vegetarian friendly recipes with me.  Keith’s mom made this recipe for me the first Christmas I shared with his family.  It was very good but a great deal of preparation is involved.  After making it myself, I know his mom and dad love me too.

I made this soup this past Christmas for our guests and it turned out very well.  The soup is an interesting mix of beans, cabbage, tomatoes, celery, carrots and zucchini.  There are a couple of options for enhancing this soup, such as adding toasted slices of bread to the bottom of the bowl and spooning the soup over the bread.  I did those options this past Christmas and would recommend them when you make this recipe.


TUSCAN VEGETABLE SOUP WITH WHITE BEANS AND PARMESAN
Serves many

Ingredients:
1 pound of dried cannelloni (white kidney beans)
2 tablespoons of olive oil
1 large onion, finely chopped
2 tablespoons of fresh thyme
4 cloves of garlic, minced
1/4 head of green cabbage, cut into 1/2 inch pieces
2 cups chopped fresh tomatoes
4 celery stalks, cut into 1/2 inch pieces
3 carrots, cut into 1/2 inch pieces
10 cups of vegetable stock
2 medium potatoes, cut into 1/2 inch pieces
1/2 cup of fresh basil, chopped
1/2 head of red cabbage cut into 1/2 inch pieces
6 3/4 inch thick slices of 7 grain bread, toasted (optional)
1 cup of grated Parmigiano Reggiano
Additional olive oil (optional)

Directions:
1.  Place beans in a heavy large pot.  Pour in enough water to cover beans by 3 inches. Soak overnight.  Drain beans.  As an alternative, you can buy canned white beans.  Just make sure to rinse the beans before suing them.  

2.  Heat 2 tablespoons in a very large pot over medium heat.  Add onion, thyme and garlic.  Saute for five minutes.  Then add the green cabbage, tomatoes, celery and carrots.  Saute for an additional ten minutes.

3.  Add the beans, 10 cups of stock, potatoes and basil.  Bring to a boil, cover, and reduce the heat to allow for the soup to simmer.

4.  After 1 hour, add the red cabbage and zucchini.  Cover and allow the soup to continue to simmer until the vegetables are tender, which should be about twenty more minutes.

5.  Add toasted bread slices to soup and remove from heat; let stand for 10 minutes.

6.  Stir in cheese.

7.  Divide soup among bowls.  Top each with ground pepper and additional olive oil.

And, as Keith would say ...

ENJOY!