Showing posts with label Smoked Paprika. Show all posts

Friday, March 8, 2024

Arayes

"Food can bring people together in a way nothing else could." 

-- Yottam Ottolenghi.

There is a reason why this post, which focuses on an Arabic dish, begins with a quote from an Israeli-born, British chef. The name of this dish, arayes, is the plural word for "bride" in Arabic. Some say the name is a reference to the "marriage" of the meat mixture with pita bread. An alternate explanation, offered by cookbook author Reem Kassis, is that "the culinary world of the Levant draws upon this poetic imagery." The culinary imagery painted by the combination of crispy pita bread and the rich meat mixture, results in a dish that is as beautiful as a bride.

The key to arayes is balance. One needs the right pita bread. (I realized this fact during the process of making this dish, because I think the bread I used was too thin and broke easily as I tried to stuff the pita.) There must also be an equilibrium between the bread and the meat. In doing research for this post, I found that there were a range of arayes, some thickly stuffed with meat and others that were more thinly stuffed. From what I could tell, the more thinly stuffed arayes are the more traditional way to prepare the dish. This is a point that draws support from Reem Kassis, who described arayes as "pita bread spread with a thin layer of spiced meat...."  

I prepared arayes for a reason. I cooked this dish and wrote this post in the midst of the Israel-Hamas war. That war began with unspeakable horrors on October 7, 2023, when Hamas fighters entered into Israel and carried out war crimes against innocent Israeli citizens. The war has continued, day after day, with the Israeli Defense Forces carrying out war crimes against innocent Palestinian civilians across the Gaza Strip. One of the worst crimes committed by the IDF involves not simply restricting food and aid into the Gaza Strip, which is starving the Palestinians, but destroying the food systems in the strip.  Not only does starvation present clear and present dangers right now, but it will also have long lasting effects upon the Palestinian people. The short term effects include muscle wasting, stunted growth, nd medical issues that include sepsis, meningitis, diarrhea and severe anemia. Longer term issues include cardiovascular disease, hypertension and metabolic disorders. Medical issues may even carry into future generations when pregnant women are subject to starvation, leading to medical issues for the children after birth.

This reality is very distressing to me. Food should never be used as a weapon, especially when it involves innocent civilians. To the contrary, food may very well be one of the most effective means of achieving peace. Food has the ability to create connections between groups of people, build relationships, and promote understanding.

Arayes provide an example of how we have more in common than we have in differences. There are many claims to the origin of this dish. Most of what I found traces those origins to Lebanon, but similar dishes (with as long of histories) can be found in neighboring Syria, Jordan and Egypt. Even the Palestinians lay claim to arayes. Yet, even with its Arabic roots, the dish has become very popular in Israel. The popularity began with a small restaurant known as M25, located in the Carmel Market of Tel Aviv. When the restaurant opened, it served basically three dishes: kebabs, minute steak and kebabs in pita. That latter dish became a version of arayes. Customers wanted a particular type of kebab in the pita, and the owner connected the description with arayes that he had in Nazareth, the largest Palestinian city in Israel. Eventually, M25 began to serve as many as 800 arayes per week. 

In the end, a simple dish demonstrates how much we have in common despite decades of division along religious, cultural and other lines. People of different faiths (Muslim, Christian and Judaism) and different cultures can come together to enjoy crispy, meat-filled pita breads. If they sit together long enough, they may find that they have more in common than what they have been told or led to believe. 

In fact, true peace will never come with a politician's words or a general's actions. It can only come when the people themselves come together, recognize what connects them and understand that those connections exceed what separates them. Food may not get us all the way there. But, it is a start. If people can gather around a proverbial table to share a meal, that is when discussions can begin. That could be the start. 

ARAYES

Recipe from Food & Wine

Serves 5

Ingredients:

  • 1/2 medium (about 8 ounces) yellow onion, chopped (about 2/3 cup)
  • 3 medium cloves garlic, chopped
  • 1 cup (about 3/4 ounces) loosely packed parsley leaves
  • 1 pound ground lamb or beef (lean) or 1/2 pound of each combined
  • 1 tablespoon tomato paste
  • 1 teaspoon smoked paprika
  • 1-2 teaspoons red chile paste, such as sambal oelek
  • 1 teaspoon black pepper
  • 1/2 teaspoon all spice, seven spice or Palestinian nine-spice
  • 1 1/2 teaspoons of kosher salt, plus 5/8 teaspoon divided
  • 5 6-inch pita bread rounds, halved crosswise
  • 2 tablespoons olive oil
  • Greek-style yogurt, for serving (optional)
  • Toum, for serving (optional)

Directions:

1.    Prepare the oven. Preheat an oven to 400 degrees Fahrenheit. Place a a broiler-safe wire rack in a baking sheet and set aside.

2.    Prepare the mixture. Place onion, garlic, and parsley in the bowl of a food processor and pulse until finely chopped into a rough puree, about 6 to 8 pulses, brushing down the sides of the bowl as needed. There should be about 2/3 cup of the onion mixture. Place in a medium mesh sieve set over a medium bowl. Press on the mixture to drain excess liquid. Discard the liquid. Combine the onion mixture and ground lamb (and/or beef) in a large bowl and mix until evenly combined. Add tomato paste, smoked paprika, red chile paste, pepper and allspice (or seven spice or nine spice) and 1 1/2 teaspoons of the salt and mix to combine. 

3.    Prepare the pitas. Spoon about 1/4 cup of the filling into each pita, spread and flatten so the filling is evenly distributed and reaches the edge of the pita. Brush some of the olive oil onto each side of the pita and sprinkle evenly with the remaining 5/8 teaspoon of salt. 

4.     Bake the pitas. Place the filled pitta halves onto the prepared baking sheet and bake on center rack until filing is cooked through and the pitas are crisp on each side, about 18 to 20 minutes, flipping the pitas halfway through cooking. If desired, turn the oven to broil and cook on each side until desired crispness, about 1 minute per side. Serve with yogurt or toum. 

PEACE.

Wednesday, January 24, 2024

Romesco Sauce

As the story goes, it all began in El Serralo, a neighborhood along the port of Tarragona. During the 1700s, fishermen would take ingredients that they had lying around -- such as almonds, bread, dried peppers, olive oil, salt and wine to create a sauce. That sauce would be served alongside whatever was left of their catch. 

As with most recipes, there may be as many variations on a romesco sauce as there are chefs and cooks who prepare it. However, there are three basic common rules. First, the base of the sauce usually consists of roasted tomatoes or roasted peppers (roasting the latter is slightly easier than roasting the former. Second, the peppers and tomatoes are pureed, thickened by the addition of almonds, and toasted bread. Third, the sauce is then emulsified with olive oil.  These rules get you to a sauce, which will be rich, and smoky, but it is what comes next that provides you with a truly wonderful sauce.

The variations in a romesco sauce relate to the additional ingredients that may make their way into the recipe. Ingredients such as garlic, chile flakes, and sherry vinegar. All of these ingredients add depth of flavor or heighten the piquancy of the sauce. One may also add paprika or smoked paprika, the latter if you really want to underscore the smokiness of the roasted peppers or tomatoes. 

One final note about this sauce: while its origins may lie with fishermen using the sauce to flavor fish and other seafood, a romesco sauce basically works with anything and everything. It is a great accompaniment to beef, chicken, turkey, and vegetables, as well as most fish and seafood. I prepared this sauce years ago to accompany grilled seafood, but the sauce showed its true versatility when I prepared it for our fondue dinner on New Year's Eve. 


ROMESCO SAUCE
Recipe from Gordon Ramsay's Cookery Course
Serves 4

Ingredients:
2 red peppers
1 thick slice of ciabatta or farmhouse white bread,
     crusts removed and torn into chunks
Olive oil
3 garlic cloves, peeled and roughly chopped
3 vine ripe tomatoes (like plum)  on the vine
1 teaspoon smoked paprika
1 teaspoon chile flakes
4 tablespoons of blanched almonds, toasted
     and roughly chopped
1 lemon, juiced
1-2 tablespoons of sherry vinegar
Sea salt, to taste
Ground black pepper, to taste

Directions:
1.  Prep the bell peppers.  Heat a grill until very hot.  Put the peppers on a foil lined baking tray and place under the grill.  Cook for 5 minutes turning regularly until he skin is blackened and blistered all over.  Transfer to a bowl and set aside to cool.  

2.  Continue making the romesco sauce.  Cook the bread chunks for 2 minutes in a small frying pan with a dash of oil, then add the garlic and cook for a further minute until the garlic is tender and the bread toasted.  By this stage, the peppers should have cooled and it will be easy to peel and rub off the charred skins.  Peel, deseed and roughly chop them, then place in a blender.  Roughly chop the tomatoes and add to the peppers with the bread and garlic.  Blitz to form a rough paste.

3.  Continue making the romesco sauce.  Add the smoked paprika, chile flakes, almonds, lemon juice, vinegar and a pinch of salt and pepper to the blender and blitz until well mixed.  Taste and adjust the seasoning.  With the motor running, slowly pour in 6 tablespoons of olive oil.  Taste and adjust the seasoning again if necessary.  Allow the sauce to come to room temperature and stir well before serving. 

PEACE.

Friday, September 3, 2021

Rago Suya

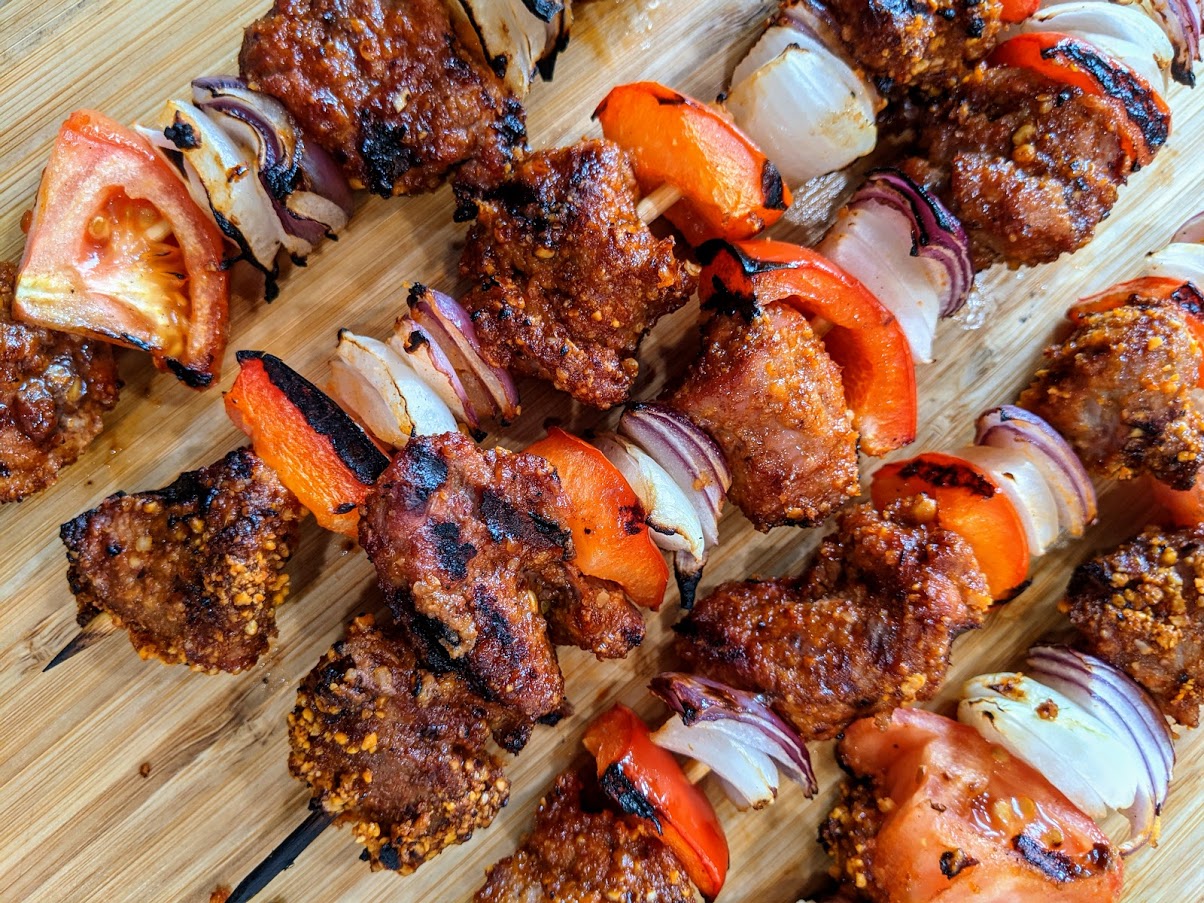
It is the most popular street food in the largest city, Lagos, of the most populous nation in Africa, Nigeria. Large chunks of meats strung on skewers that are drizzled with groundnut oil and then rubbed with a spice mix known as yaji or suya. The kebabs are known as Rago Suya. To find them, one need only follow the scent emanating from steel-drums-turned-grills behind makeshift stalls or food carts all across Lagos.

The vendors are usually men, often referred to as mai suya or mallam.  The title comes from the fact that it takes some skill to make suya, whether it is the slicing of the meat or the preparation of the spice blend.  Every mai suya has his own recipe for that spice mix. Yet, there are some common ingredients, such as ground peanuts, ginger and chiles. Vendors may also vary the proteins.  Although most suya is prepared with beef, some vendors use lamb, chicken and even offal, such as kidneys, livers and chicken gizzards.

While Suya is popular in Lagos, it originated amongst the Hausa in northern Nigeria. The skewered meat, with the spice mix, spread throughout Nigeria.  The seemingly omnipresence of the food stalls or carts of the mai suya, as well as the affordability of the grilled and smoked meat, has given this dish the power to unify a nation that is divided in so many ways. 

The skill and expertise of a mai suya or mallam can be divided into five steps.  The first step involves the protein, purchasing it from a local market.  The second step is to skewer the meat.  It would seem, based on my research, that a more authentic suya would involve sliced meat, but there are many recipes that call for the meat to be cut into bite-sized chunks.  The third step is to apply the suya mix to the meat on the skewers.  The skewers then marinate until the meat begins to change color, turning a dark red. The fourth step is to grill the skewers, preferably over charcoal. The final step is to apply some additional oil during the cooking process. Once the skewers are cooked, the meat is removed and cut into smaller pieces. 

I am not a mai suya or mallam but, I nevertheless came across a recipe for Rago Suya. I had some lamb that I thought would work well with the suya spice blend. The recipe basically follows the five step process, except for the use of bite-sized chunks rather than sliced meat, as well as the omission of the fifth step (the applying of oil during the cooking process), which I was okay with. After I completed this recipe, I realized why so many Nigerians love these skewers.  They were perhaps the best skewers that I have ever made. The experience made me want to become a mai suva or mallam and open my own cart in my neighborhood.  

RAGO SUYA

Recipe adapted from National Dish

Serves 2-4

Ingredients:

  • 1.5 pounds of lamb shoulder or leg, cut into 1 inch pieces
  • 5 tablespoons roasted peanuts
  • 1 teaspoon cayenne pepper
  • 1 teaspoon dried chile flakes
  • 1 teaspoon dried chile powder
  • 1 teaspoon smoked paprika powder
  • 1 teaspoon sea salt
  • 1 teaspoon ground ginger
  • 1 teaspoon ground garlic
  • 1 medium onion cut into large chunks
  • 1 medium red onion cut into large chunks
  • 1 large tomato, cut into large chunks
  • 1 red pepper, chopped into large chunks
  • 1 bunch fresh coriander/cilantro, roughly chopped for garnish
Directions:

1. Prepare the marinade.  Add all of the marinade ingredients (peanuts, cayenne pepper, chile flakes, chile powder, paprika powder, sea salt, ginger, garlic) into a spice grinder and blitz until as powdery as it can be made without turning the peanuts into a paste. This spice mix is called Suya.  Remove a third of the Suya mix and set aside.  Place the remainder of the Suya into a mixing bowl along with the lamb and make sure that it gets fully coated.  Allow the meat to marinate for 30 minutes. 

2. Prepare the kebabs. Heat up a grill on medium high heat. Take pre-soaked skewers, load them with an onion, pepper and piece of lamb. Repeat until there are 3-4 pieces of lamb on the skewers.  Repeat with the rest of the skewers. 

3. Grill the kebabs. Grill the kebabs for about five minutes, turning every couple of minutes, until the lamb is cooked and the vegetables have a slight char. 

4. Finish the dish.  Remove from the heat and serve on the skewer or remove and serve with Jollof rice, garnished with the chopped coriander/cilantro.

ENJOY!

Tuesday, January 12, 2021

Cola de Res al Mole (Oxtail Mole)

If I had to identify the one thing about cooking that most intrigues me, it is the mole. A mole is a traditional sauce that is a fundamental part of the cuisine throughout the Estados Unidos Mexicanos.  I have spent some time on my blog talking about the different types of moles and even a little about the history of mole sauces.  I even prepared a mole, a Mole Verde Zacatano, which is one of the simpler moles that comes from the State of Zacatecas.  

However, as much as these sauces have interested me, I have not been able to explore them as much as I would have liked.  I needed something to get myself back on track when it came to learning about these sauces.  That "something" just happened to be a cut of meat that I have never prepared before ... oxtail.

A long time ago, oxtail was actually the tail of an ox.  The ingredient was used in connection with the "nose to tail" philosophy of using all parts of an animal.  The tail often made its way into soups and stews, such as those that were first prepared by French Huguenots and Flemish who lived in Britain during the seventeenth century. Oxtails lend themselves to slow cooking, because they are full of collagen.  As that collagen breaks down, it infuses the liquid with a lot of flavor.  The use of oxtails, especially oxtail stew, has become a feature of many cuisines across Europe, Africa, Asia and the Caribbean. 

But it was one recipe that immediately caught my eye and returns us to the subject at hand: a recipe for Oxtail Mole (Cola de Res al Mole).  I now found myself back on the path of learning about these wonderful sauces.  Two Mexican States lay claim to the original mole sauces: Oaxaca and Puebla. (A third Mexican State, Tlaxcala, also has a claim, but most of the articles that I have read focus on the Oaxacan and Pueblan origin stories.) Puebla is best known for the mole poblano, while Oaxaca is known for seven moles: mole colorado, mole negro, mancha manteles, mole verde, mole amarillo, mole chichilo, and mole coloradito.  Each sauce is a labor intensive effort, following a general pattern that begins with the roasting of whole spices and continues with the grinding of those spices into a paste, the addition of stock at low temperatures until the sauce begins to form. 

I am not too sure where this recipe fits into the mole universe. The recipe comes from McCormick, the global corporation that manufactures and sells a whole range of spices.  I initially viewed the recipe with some suspicion.  After all, I did not think that a multi-national corporation would put much thought into a very particular element of Mexican cuisine. There was no explanation as to the source of the recipe, or its ties to the moles of any particular Mexican State. Nevertheless, the thought of preparing an oxtail mole won me over because it was so different than preparing oxtail stew. 

In the end, it was worth the effort to make this dish.  The recipe provided a good way to introduce myself to the use of oxtail. I can also sort-of notch another effort at making a mole-style sauce. It feels a little like skirting around Oaxaca or Puebla, trying to make an easy mole without diving into the full process of making one of the more traditional sauces.  Still, I have a lot of time to continue building on these experiences.  I just have to find that time.  

COLA DE RES AL MOLE

Recipe adapted from McCormick

Serves 4-6

Ingredients:

  • 4 pounds of oxtails, about 12 pieces
  • 1.5 tablespoons coriander seed, ground
  • 1.5 tablespoons sesame seed
  • 1 tablespoon freshly ground black pepper
  • 1 tablespoon ground Saigon cinnamon
  • 1 tablespoon sea salt
  • 2 teaspoons anise seed, crushed
  • 1.5 teaspoons smoked paprika
  • 4 tablespoons olive oil, divided
  • 2 cups carrots, coarsely chopped
  • 1 pound pearl onions, peeled
  • 1 cup red wine
  • 2.5 cups beef stock
  • 3 tablespoons tomato paste
  • 2 tablesoons sugar
  • 1 ounce semi-sweet baking chocolate, chopped
Directions:

1. Prepare the oxtails.  Preheat the oven to 325 degrees Fahrenheit.  Mix the seasonings (coriander, sesame seed, black pepper, cinnamon, salt, anise seed, and smoked paprika) in a shallow dish.  Coat the oxtails with seasoning mixture.

2. Brown the oxtails. Heat 2 tablespoons of oil in a 5-quart Dutch oven on medium high heat.  Add half of the oxtails, cook on all sides until browned.  Remove oxtails.  Repeat iwth the remaining two tablespoons of oil and oxtails.  

3.  Cook the vegetables.  Add carrots to pan, cook and stir on medium heat for 3 to 4 minutes, until golden brown.  Add pearl onions and garlic, cook and stir for 3 to 4 minutes or until lightly browned.  

4.  Prepare the base.  Add wine, stir to loosen browned bits in the bottom of the pan.  Stir in beef stock and tomato paste. Bring to boil. Return oxtails to pan.  Cover.  

5. Braise the oxtails.  Braise the oxtails in the oven for 2.5 hours or until the oxtails are tender.  Transfer oxtails and vegetables to a serving platter and keep warm .

6.  Finish the mole.  Stir sugar into pan.  Simmer 5 minutes or until sauce is slightly thickened.  Remove from heat.  Add chocolate and stir until chocolate is melted.  Skim fat from liquid.  Spoon sauce over the oxtails and vegetables. 


Friday, October 11, 2019

Chesapeake Paella

Recently, as I get myself back into cooking, I have been wanting to make dishes for which I have a strong affinity.  It may be a particular dish, or, particular ingredients.  The problem is trying to find a recipe from which I could work to bring those beloved components together.  I often spend a lot of time looking at recipes, thinking about the preparation set forth therein, and how I could change it or adapt it to something that I want to make and eat.

That is the process that I used when I came across a recipe for a simple shellfish paella.  I love paella, and, I have made that dish a couple of times in the past.  Those efforts were more "earthy," with the use of turkey, artichokes and green beans.  The thought of cooking a shellfish paella was intriguing to me.  But, the thought did not end there.  I went on to think about how I could change the recipe to incorporate some of the flavors and ingredients that I like.  My thoughts turned to familiar shellfish and seafood, such as crab, clams and oysters, all of which can be found in my beloved Chesapeake Bay.

And, the result of my thinking process is a Chesapeake Paella. There are certain ingredients that play a central role in the culinary history of the Chesapeake Bay: crabs, clams and oysters. That triumvirate of seafood would be the center of my paella.  The Chesapeake Paella was ready, at least in concept.

Making that concept a reality, required the solution to a big problem.  Each of the  main three ingredients is that they have wildly different cooking times.  Unshucked oysters become plump morsels in a couple of minutes.  Clams take several minutes longer, depending upon the size.  Soft shell crabs ordinarily take a few minutes in a saute pan, but they would take much longer in the paella pan.  So, I decided on a particular order and process.  The clams would go in first and be covered to allow the heat to start the cooking process.  When the clams started to open, then I would add the oysters and cover again to cook both at the same time.  While the clams and oysters were cooking, I would prepare the soft shells in a separate skillet, adding them to the paella when the crabs were almost finished.

The end result of this effort was a very good paella that drew its essence from the Chesapeake Bay.  I really liked this paella, but, with practice, I think that this could become a really good paella.


CHESAPEAKE PAELLA
Recipe adapted from Simple Shellfish Paella 
by Andrew Zimmern
Serves 6-8
Ingredients:
2 cups of paella rice
2 teaspoons pimenton (hot smoky paprika)
1 minced onion
2 tablespoons minced parsley
3 minced garlic cloves
2 pinches saffron
4 cups seafood stock
2 cups of clam juice
1 cup plus 1 tablespoon of white wine
1 cup of clam juice
8 ounces jumbo lump crab meat
8 ounces of little neck clams
8 ounces of raw oysters
2 soft shell crabs
1 tablespoon butter or olive oil
6 ounces of Spanish chorizo sliced thin

Directions:
1. Begin the paella.  Place a paella pan (12 inch or 16 inch) over medium heat for 2 minutes.  Add the olive oil.  Immediately add the onion, garlic, saffron, pimenton, rice and stir, cooking until all of the ingredients become toasty and aromatic.  Keep scraping the bottom of the pan to avoid scorching or burning of the ingredients, but still working toward carmelization of the ingredients.  

2.  Add the liquid.  First, add the wine and stir as you go.  Then add the clam stock and stir as you go.  Finish by adding the seafood stock, continuing to stir as the liquids simmer and start to be absorbed into the rice.  Lower the heat and continue to cook for about 10 minutes.

3.  Add the seafood. Add the crab meat and stir gently so as to not break up the lumps . Add the clams and asparagus, cover for a few minutes, until the clams begin to open. Remove the cover.  Add the oysters and cover again for only a few more minutes, until the oysters begin to firm.  Remove the cover.  Continue to cook for about 5 minutes.  

4.  Cook the soft shell crabs.  While you are adding the seafood to the paella, heat the 1 tablespoon of white wine and butter in a separate small pan.  Saute the soft shell crabs until cooked through, about 3 to 4 minutes on each side. 

5.  Finish the dish.  Once the rice is just past "toothy" but not mushy, and the remaining liquid is like a sauce, remove the paella from the heat.  Season with salt to taste and sprinkle with the parsley.

ENJOY!


Monday, December 17, 2018

Project Maryland BBQ: Part 3, The Sauce

Barbecue styles are not just about the protein, but, also about the sauce (or, in some cases, the lack of sauce).  Many well established barbecue styles have a particular sauce that helps to define that style. The best example of a sauce that defines a barbecue style can be found in northern Alabama. Think Big Bob Gibson's Barbecued Chicken with White Sauce.  Chicken smoked low and slow, finished off in a bath of a barbecue sauce that is part vinegar, part apple juice and part mayonnaise. 

And, in some cases, the sauce can draw the borders of the barbecue. The Carolinas provide the best example of those borders.  Carolina barbecue is pork centric, usually whole hog or pulled pork.  Nevertheless, there is Eastern Carolina barbecue, which is known for its thin, peppery vinegar sauce. If one traveled west toward Lexington, North Carolina, pitmasters add tomatoes to that vinegar sauce or, as they call it, the "dip," That tomato/vinegar sauce is the defining characteristic of Lexington style or Piedmont style barbecue.  And, if that person then travels south, he or she will find that pitmasters use mustard, which is thinned with the vinegar.  That mustard sauce is the cornerstone of South Carolina style barbecue.

Yet, all of the sauces that I have discussed are not even the most well known sauces.  When most people think about barbecue sauce, they think of Kansas City.  A thick sauce, with both sweet and tangy characteristics, that is often slathered on ribs. The sauce is usually made with ketchup, molasses, vinegar, and brown sugar (which gives you an idea where both the sweet and tangy come from), along with a variety of spices to add depth.   A variant of Kansas City style barbecue sauce could be found in Memphis, where the sauce is thinner, and more vinegar based.

With all of this said, the question is, if there was a Maryland style of barbecue, what sauce would be part of that style?

Eastern Carolina BBQ Sauce
One would think that, due to its proximity to the Carolinas, a Maryland-style sauce would be, at the very least, influenced by the use of vinegar, if not vinegar based. Vinegar base sauces have made their way, to differing extents, into Virginia.  So, it is not too difficult to imagine vinegar based sauces in Maryland.  Indeed, if one were to check out local BBQ joints in the Delmarva, he or she would probably fine examples of a vinegar BBQ sauce.  The sauce is not a true vinegar sauce as one would find in eastern Carolina.  Rather, it is probably closer to a Lexington barbecue sauce, because there is usually tomato in the sauce.

With the use of tomatoes (whether sauce or ketchup), I think that brings us closer to what the barbecue sauce would be with a Maryland style of barbecue. But, I don't think that the sauce would go so far as to be a thick, sweet or smoky sauce that one would find in Kansas City barbecue, or even in Memphis barbecue.  I think that the sauce would be a little more basic; tomatoes, apple cider vinegar, and spices.  In this regard, I think I would go there and add some Old Bay, because that spice mix is quintessential Maryland.

So, in the end, I decided to make a Maryland barbecue sauce.  I started with a simple sauce from the New York Times.  That sauce had good proportions of tomato (ketchup), vinegar (apple cider) and sugar (I used dark brown sugar, which I prefer in sauces), along with the use of smoked paprika, which gives a little hint of smoke to the finished product. The original recipe also provides for the use of cumin, and, it is a very cumin-forward sauce.  I decided to swap out the cumin with the Old Bay, which, surprisingly enough, does not stick out as much as the cumin did. The end result is pictured below and it worked out very well.


MARYLAND-STYLE BARBECUE SAUCE
Recipe adapted from NYT Cooking
Makes 1 1/2 cups

Ingredients:
2/3 cup ketchup
1/2 cup cider vinegar
1/4 cup brown sugar
2 teaspoons pimenton (smoked Spanish paprika)
1 teaspoon Old Bay
1 teaspoon kosher salt
1 teaspoon freshly cracked black pepper

Directions:
Combine all ingredients in a small saucepan, bring to a simmer over medium heat and cook for 5 minutes.

ENJOY!

Thursday, December 6, 2018

Kansas City Style Burnt Ends

Brisket and me have not had it always so easy.  I have smoked brisket a couple of times; but, despite my efforts, the end result isn't always so great. I've tried different ways to preserve the tenderness of the meat, such as injections of beef broth or mops of beef stock and ingredients, but the finished product is far from what I want or expect.  

I think the problem is that I have worked exclusively with the brisket flat. That piece is long, flat and very lean. It is difficult to smoke because it dries out and can become tough.  But the flat is just one part of the brisket; there is also the point.  The point is thicker and fattier.  It is far more forgiving to a amateur pitmaster like myself.  Together, the flat and point constitute an entire "packer brisket."  However, that packer typically weighs between 8 to 12 pounds.  I don't have the time, patience or appetite to eat an entire brisket point, at least right now. 

A while back, I decided to check out a local butcher cshop called Chop Shop Butchery.  I went there expecting to buy some pork, like a Boston butt, to smoke.  However, as I stared into the glass case, I saw brisket points.  My mind began to race. Do I want to do brisket?  How long had it been since I smoked a brisket? What I can I do with brisket point? I decided to answer that last question with a quick Google search.  The answer was simple: burnt ends. The quintessential Kansas City barbecue.

The history of burnt ends begins with that packer brisket. Some pitmasters removed and set aside the brisket points. The points were, so thought the pitmasters, too fatty to serve, caramelized and burnt.  The pitmasters and restaurants, like Arthur Bryant's, set aside the points and ends on the counter, offering them as a treat to customers while they waited for their brisket sandwiches. Customers ate  those fatty, caramelized pieces of brisket.  One such customer, a food writer and Kansas City native, Calvin Trillin, wrote, "I dream about those burnt ends."  Trillin further dubbed Arthur Bryant's "the best single restaurant in the world." After that, some restaurants took notice, and, collected the end pieces to sauce them once more time and serve them on bread.  Burnt ends made it on to menus and are now as BBQ as the brisket sandwiches themselves.

Although I have not made it to Kansas City (yet) or had the opportunity to eat at KC BBQ joints like Arthur Bryant's (yet), I have had burnt ends.  Those barbecue joints that are closer to where I live, and who strive to provide different kinds of barbecue, inevitably have burnt ends on the menu.  This at least gave me some idea of what the end result should look like.  Now, I had to try to make it myself.

Overall, I think that my first effort at making burnt ends was successful. It may not have been Arthur Bryant's successful, but it was amateur pitmaster in the Mid-Atlantic successful. The burnt ends had the smoke rings, along with some of the expected caramelization and bark that defines these little one-bite wonders. If there was anything that I could improve upon,  I think that the burnt ends could have been a little more caramelized.  That might require some additional time in the smoker at the end, or,m some refinement to the sauce recipe.

(You can learn a lot more about burnt ends from Burnt Legend, the Story of Burnt Ends, available at PBS.) 


KANSAS CITY STYLE BURNT ENDS
Recipe adapted for Brisket and Sauce from Hey Grill Hey
Serves several

Ingredients (for the Burnt Ends):
1 6 to 8 pound brisket point
2 teaspoons coarse ground kosher salt
2 teaspoons coarse ground black pepper
2 teaspoons garlic powder
1 cup beef stock
1 cup Kansas City Style BBQ Sauce (see below)
1/2 cup dark brown sugar

Ingredients (for the Kansas City Style BBQ Sauce):
14 ounce can crushed tomatoes
1 cup ketchup
3/4 cup brown sugar
1/2 cup apple cider vinegar
1/2 cup molasses
1 tablespoon smoked paprika
1 tablespoon salt
2 teaspoons ground black pepper
1 teaspoon chili powder
1 teaspoon garlic powder
1/2 teaspoon red pepper flakes
1/2 teaspoon ground mustard

Directions:
1.  Prepare the cook.  Preheat the smoker to 225 degrees Fahrenheit using wood charcoal.  

2.  Prepare the brisket point.  combine the salt, pepper and garlic powder.  Shake liberally on all sides of the brisket point.

3.  Smoke the brisket point.  Place the brisket point in the smoker, close the lid and smoke until the internal temperature of the meat reads 165 degrees Fahrenheit.  This step usually takes 6 to 8 hours depending upon the size and thickness of the meat.  Spritz with 1 cup of beef stock every hour during the initial smoke period. 

4.  Continue smoking the brisket point.  Once the brisket reaches 165 degrees, wrap tightly in butcher paper (or aluminum foil) and return to the smoker.  Smoke until the internal temperature reaches 195 degrees and then remove to a cutting board.  This typically takes another three hours

5.  Make the sauce.  Combine all of the ingredients in a medium sauce pan.  Whisk to combine.  Bring to a boil and then reduce heat to a simmer.  Simmer for 20 minutes.  Allow to cook completely before transferring to an air tight container.  You can refrigerate it overnight to get the best flavor. 

6.  Create the brisket ends.  Once the temperature of the meat reaches 195  degrees Fahrenheit, unwrap the meat and drain any liquid into an aluminum pan.  Cut the brisket point into cubes about 1 1/2 inches thick.  Place the cubes into the aluminum pan and toss with the BBQ sauce and brown sugar.  Work quickly during this step to prevent your brisket from cooling down too much.

7.  Finish the cook.  Set the uncovered pan back on the smoker and close the lid.  Continue smoking at 225 degrees Fahrenheit for 1-2 more hours, or until the burnt ends have started to absorb the BBQ sauce and caramelize on all sides and are very tender.

ENJOY!

Sunday, September 25, 2016

Blackened Planked Salmon

If someone were to ask, "what is your favorite way to prepare salmon," then I would probably answer grilling it on a cedar plank.  The use of wood planks to grill food goes back a very, very long time, originating with the Native Americans in the Pacific Northwest.  Women would then tack the salmon to long slabs of wood, usually alder or cedar, or they would tie the fish to the planks using vines.  Those wooden slabs were then placed over a fire and the salmon was allowed to cook slowly, absorbing the flavors of the wood and smoke.

That traditional practice may still be performed in some Native Americans in the northwest; however, in my case, the use of planks involves a cookie-cutter piece of cedar wood that gets soaked in water for more than an hour, fitted with a piece of salmon  and then placed on top of a fire or in a grill.  After about fifteen minutes or so, the plank is removed from the fire, the fish is removed from the plank and dinner is served.  The whole process seems far less idyllic than the process used by Native Americans.

Indeed, I am no stranger to using cedar planks.  I've made several salmon dishes in this manner.   I've made a traditional plank salmon (well, as traditional as traditional can get).  I've also made something fancier with planks and salmon, namely, the Imperial Salmon, a plank salmon with a crab imperial.   However, this time, I was looking for a different way to make planked salmon.  It got me to thinking and it did not take me long to think of something new.

As much as I am a fan of using smoke to impart flavors into meats, I am also a fan of blackening spices.  This recipe combines both ... blackened planked salmon.  It is a bayou meets the northwest thing, a combination of two sets of regional flavors that works in many different, but delicious ways.  To put it simply, it is the right combination of spice and smoke that can appeal to someone who, like myself, loves barbecue.


BLACKENED PLANKED SALMON
A Chef Bolek Original
Serves 2

Ingredients (for the salmon):
2 six ounce fillets of salmon
1 cedar plank

Ingredients (for the blackening spice mix):
1/2 tablespoon paprika
1/2 teaspoon smoked paprika
1/4 teaspoon cayenne pepper
1/4 teaspoon dried thyme
1/4 teaspoon dried oregano
1/4 teaspoon garlic powder
1/4 teaspoon onion powder
1/4 teaspoon salt
1/4 teaspoon black pepper

Directions:
1.  Prepare the spice mix.  In a bowl, mix all of the spice mix Generously rub the mixture on both sides of the salmon.  Cover the fish and let rest for one half hour.

2.  Prepare the salmon for the grill.  Preheat a grill on medium.  Brush the cedar plank on both sides with three tablespoons of oil.  Place the salmon on the plank and cover evenly with the onion slices.  The onions do not just add flavor, they protect the fish from burning while it cooks. So make sure that the onions cover both the tops and the sides of the fish.  Drizzle some oil over the onions.

3.  Grill the salmon. The grill should be hot enough to ignite the plank when you place the plank in the grill.  Let the plank burn around the fish.  Once the plank has burned, cover the grill.  Continue to grill the salmon until medium rare, or 130 degrees Fahrenheit, which should take about ten minutes. 

ENJOY!

Sunday, July 3, 2016

Spiced Shrimp and Tomato Kebabs

If you follow this blog long enough, you will learn that I love to make kebab recipes.  I have a special fondness for Persian kebabs, such as Kebab e Chenjeh or Advieh-e Khoresh kebabs.  I even search out relatively obscure kebab recipes, such as the Uighur Lamb Kebabs. Truth be told: kebabs are becoming my most favorite kind of food.

The only drawback to kebabs is that my beautiful Angel, Clare, does not eat red meat or even most meat.  This leads me to search for different kinds of kebabs to make.  I could make vegetable kebabs, but who wants a skewer with a bunch of plants?  A skewer that goes over a fire should have meat on it, at least in my humble opinion.  In any event, I look for different things that I know my Angel will eat ... like shrimp.

That led me to this recipe from Food & Wine magazine for Spiced Shrimp and Tomato Kebabs. The key to this recipe is the marinade, which combines a lot of flavors -- ginger, cilantro, basil, mint, cayenne pepper, paprika, lime and honey.  This marinade combines some heat with sweet, and herbal with citrus.  With the use of that citrus (lime juice, I erred on a shorter period of marinating time (about an hour to an hour and one half).  After all, I want kebabs, not ceviche.

The best thing about kebabs is how easy they are to make once the meat is marinated.  Just thread some sticks and throw them on the grill.  Add a side dish, such as the saffron rice that I used in this instance, and you have the makings of a delicious and fast dinner during the week. 


SPICED SHRIMP AND TOMATO KEBABS
Recipe from Food & Wine
Serves 10

Ingredients
1/4 cup thinly sliced peeled ginger
4 garlic cloves
1/4 cup packed cilantro leaves
2 tablespoons packed basil leaves
1 tablespoon packed mint leaves
1 teaspoon cayenne
1 teaspoon smoked paprika
2 tablespoons lime juice
2 teaspoons honey
2 teaspoon salt
2 tablespoons extra-virgin olive oil
40 large shrimp (about 2 pounds), shelled and deveined
1 pint grape tomatoes

Directions:
1.  Prepare the marinade. In a food processor, combine the ginger with the garlic, cilantro, basil, mint, cayenne pepper, paprika, lime juice, honey, salt and 2 tablespoons of olive oil and puree.  Scrape the marinade into a large bowl, add the shrimp, and toss to coat.  Cover and refrigerate for at least 30 minutes or up to 4 hours. 

2.  Prepare the skewers.  Thread the shrimp and tomatoes onto skewers.

3.  Grill the skewers. Light a grill and oil the grates.  Grill the skewers over high heart, turning once, until the shrimp are lightly charred and cooked through and the tomatoes are just beginning to burst, about 6 minutes.  Serve right away.

ENJOY!

Saturday, June 21, 2014

Spanish Black Grouper with Saffron Rice

For ichthyologists (those who study fish), it goes by the name of Mycteroperca Bonaci.  For everyone else, including fishermen and chefs, it goes by the name of Black Grouper.  Generally, grouper has been on my "bucket list" of fish to cook.  I have cooked with many different types of fish ... including bluefish, branzino, mahi mahi, pompano, red snapper, rockfish, and sheephead.  However, I have never cooked grouper before.

The reason why is that black grouper -- or any grouper for that matter -- is rare around where I live.  A search for the fish usually ends in failure.  Any sighting is usually found on the menu of a pricey restaurant or the seafood section of an upscale grocery store.  Those sightings are not only very rare, but pricey as well.  As a result, I have to wait for special occasions, like our recent vacation in the Outer Banks, to enjoy that fish.  (By the way, if you are there, you should check out the Diamond Schoals Restaurant in Buxton where they have a very delicious fried grouper sandwich on their menu.  They also have a seafood market where you can take some fresh fish "to go" and cook for yourself.)  That vacation really inspired me to cook with the fish; and, when I saw it in the seafood section of a grocery store, I took the bait and paid (a lot) for a pound of black grouper.

Photo is from Florida Museum of Natural History
The black grouper is a big, beautiful fish. According to the Florida Museum of Natural History and the Smithsonian Institution, black grouper can grow to more than four feet in length and over 170 pounds.  Most of this growth occurs over the first ten years of their life, but grouper can live for as long as thirty years.  As they grow, their skin develops interesting designs over their olive or gray bodies.  Dark rectangular blotches, and hexagonal bronze spots.  The fins have long black lines that offset and frame the large body of the fish.  These amazing fish are found along rocky bottoms and coral reefs between 32 to 98 feet in depth.

As with any fish, sustainability is an important consideration for me.  Sustainability is particularly important with respect to a fish like the grouper, which lives for a long period of time and, despite its rapid grown rate, its reproduction rate may not keep up with fishing pressures.  Fortunately, Seafood Watch notes that there are strict fishery guidelines that have helped to stabilize and even increase the black grouper populations near Florida and in the Gulf of Mexico.

With a pound of black grouper in my hands, the question quickly turned to how I should prepare this fish.  The fillets are thick and meaty, which, at least to me, means that they are perfect for a simple rub.  I decided to go with a Spanish-inspired rub.  I have always liked the combination of paprika and smoked paprika, along with other ingredients like parsley or garlic.  As the fish marinates in the rub, I decided that I would make a Spanish style rice ... starting with the basic ingredients of a sofrito -- bell peppers, onions, tomatoes, and garlic -- and then cooking the rice with those ingredients.  I also decided to add a very special ingredient (to go with the special protein) ... saffron.  As the rice cooked, I decided that the grouper should be broiled rather than pan seared or pan fried.  The reason is that I did not want to burn the rub.  After all, my goal was to make a Spanish Black Grouper, not a Cajun Black Grouper.

The end result was very delicious.  The thick fillets, with the large flaky meat, was delicious. The rub worked well with the fish and the rice, which was also very tasty.  To round out this wonderful meal, I paired a Muga Rioja Blanco with the Spanish Black Grouper with Saffron Rice.  The crisp nature of this wine, with its aromas of almond and wild herbs works perfectly with this dish.


SPANISH BLACK GROUPER WITH SAFFRON RICE
A Chef Bolek Original
Serves 2-4

Ingredients (for the Grouper):
1 pound of black grouper, cut into 2 to 4 fillets
1 1/2 teaspoons of paprika
1 1/2 teaspoons of smoked paprika
1 teaspoon of onion powder
1 teaspoon of garlic powder
1 teaspoon of dried parsley
1 teaspoon of kosher salt
1/4 teaspoon of crushed red pepper

Ingredients (for the rice):
1/2 large tomato, peeled and diced
1/2 yellow bell pepper, de-seeded and diced finely
1/2 orange bell pepper, de-seeded and diced finely
2 cloves of garlic, minced
1 pinch of saffron
1 cup of rice
2 cups of water, plus more if needed
A splash of white wine
Sea salt, to taste
Freshly ground black pepper, to taste
Sliced almonds
Fresh cilantro, chopped 

Directions:
1.  Prepare the fish.  Mix all of the dry ingredients in small bowl.  Apply the rub to all sides of the grouper.  Cover the grouper and place in the refrigerator until about fifteen minutes before cooking the fish.

2.  Prepare the rice.  Heat the olive oil on high heat in a deep pan with a cover.  Add the bell pepper and onion and reduce the heat to medium.  Continue to saute for a couple of minutes until the onion begins to soften.  Add the tomato and garlic and continue to saute, stirring occasionally, until the onion and bell pepper have completely softened.  Add the rice and stir constantly to slightly toast the rice.  Add the water and the wine, stir to make sure that the rice is covered by the liquid and bring to a boil.  Once the liquid is boiling, cover the pan, reduce the heat, and let it simmer until the liquid is absorbed by the rice.  Check occasionally to make sure that the rice is cooked through.  If the liquid is absorbed but the rice is still not cooked, add more liquid, about 1/2 cup at a time until the rice is al dente.

3.  Cook the fish.   Heat the broiler in the oven.  Place the fish under the broiler.  While the fish is cooking, toast the almonds in a pan (without any oil or butter) over high heat for about a minute, shaking consistently to avoid burning.  After about seven minutes, flip the fish and cook for about seven minutes more or until the internal temperature reaches about 145 degrees Fahrenheit.   Remove from the heat.

4.  Plate the dish.  Place some rice on the bowl.  Place the fish over the rice and garnish with the almonds and cilantro. 

ENJOY!
 

Monday, October 14, 2013

Grilled Seafood with a Romesco Sauce

A few weeks back, my beautiful Angel and I hosted our wine club dinner.  The theme of the Wine Club was "The F Word," or the recipes of Chef Gordon Ramsay.  I really wanted to focus on some of the cooking that inspires the Chef.  I have watched a lot of his shows, including The F Word and Gordon Ramsay's Great Escapes.  I also searched through many of his recipes to make sure each course would have distinct flavors and ingredients.

For the first course, we made Grilled Seafood with a Romesco Sauce.  The recipe is heavily influenced by Spanish cuisine.  With all of its coastline, from the Bay of Biscay to the Mediterranean Ocean, Spain is particularly well known for its seafood.  I have watched many a food show about Spanish cuisine, only to see the fresh seafood, such as sardines, tuna and squid.  

I was able to find some very large squid at a local Asian supermarket.  These squid were perfect because their thick bodies would stand up well to the grilling.  There are a couple drawbacks to using these large squid.  First, they are whole squid, which means they have to be cleaned.  The best thing to do is to first chop off the head, remove the beak and set aside the tentacles. After that, take a pair of poultry shears (or scissors) and cut down the top of the body very carefully.  You have to do your best not to disturb the internal organs.  (If you do, you could end up with a big mess.)  Once you have cut down the length of the body, you can remove the internal organs and everything else until you have a large squid steak.  You should then score the inside of the squid to make a hatch-like pattern.  This helps with the second problem.  The large squid tend to be tougher and a little chewier than the smaller ones that you usually find in a grocery store.  It is said that scoring the squid helps to make the large squid more tender to eat.  

As for the other principal component, romesco sauce originated in the Catalonian city of Tarragona. It is said that local fishermen made the sauce to be served with their catch.  The principal ingredients of the sauce -- roasted peppers, almonds, vinegar and olive oil -- are combined to produce a sauce that is not only perfect for seafood, but also works with any other protein (especially chicken or pork).  Romesco sauce even goes well with just some crusty, rustic bread.

Overall, this recipe produced a very good start to our wine club dinner.  While it may not have reached the standards of a Michelin star chef like Chef Ramsay, I think it both the flavors and the plating were fairly good for me.  


GRILLED SEAFOOD WITH A ROMESCO SAUCE
Recipe from Gordon Ramsay's Cookery Course
Serves 4

Ingredients (for the seafood):
4 medium to large squid, prepared and cleaned
12 king prawns, shell on
2 tablespoons of parsley, chopped (for garnish)

Ingredients (for the romesco sauce):
2 red peppers
1 thick slice of ciabatta or farmhouse white bread,
     crusts removed and torn into chunks
Olive oil
3 garlic cloves, peeled and roughly chopped
3 vine ripe tomatoes (like plum)  on the vine
1 teaspoon smoked paprika
4 tablespoons of blanched almonds, toasted
     and roughly chopped
1 lemon, juiced
1-2 tablespoons of sherry vinegar
Sea salt, to taste
Ground black pepper, to taste

Directions:
1.  Make the romesco sauce.  Heat a grill until very hot.  Put the peppers on a foil lined baking tray and place under the grill.  Cook for 5 minutes turning regularly until he skin is blackened and blistered all over.  Transfer to a bowl and set aside to cool.  

2.  Continue making the romesco sauce.  Cook the bread chunks for 2 minutes in a small frying pan with a dash of oil, then add the garlic and cook for a further minute until the garlic is tender and the bread toasted.  By this stage, the peppers should have cooled and it will be easy to peel and rub off the charred skins.  Peel, deseed and roughly chop them, then place in a blender.  Roughly chop the tomatoes and add to the peppers with the bread and garlic.  Blitz to form a rough paste.

3.  Continue making the romesco sauce.  Add the smoked paprika, chile flakes, almonds, lemon juice, vinegar and a pinch of salt and pepper to the blender and blitz until well mixed.  Taste and adjust the seasoning.  With the motor running, slowly pour in 6 tablespoons of olive oil.  Taste and adjust the seasoning again if necessary.  Allow the sauce to come to room temperature and stir well before serving. 

4.  Grill the seafood.  Heat a griddle pan over high heat until hot.  Lightly score one side of the squid in a diamond pattern before cutting into strips.  Toss the prawns and squid together in a little olive oil and season with a little salt and pepper.  Place the prawns on the hot griddle and cook for 2 1/2 to 3 minutes.  Starting diamond side up, cook the squid for about 1 minute on each side.  Leave it to curl up and give it a furhter minute until just cooked.

5.  Plate the dish.   Serve the seafood hot, garnished with parsley, and with the romesco pepper sauce alongside.

ENJOY!

Saturday, September 7, 2013

Turkey Paella

A few years ago, we got a paella pan as a wedding gift.  Making paella has been on my short list of things to do, but, I have had a hard time deciding on which recipe to make.  Basically, there are three types of paella: (1) Paella Valenciana; (2) Paella de Marisco; and (3) Paella Mixta.  There are, however, many more paella recipes that use a wide range of ingredients, including some that I have been wanting to cook with for a long time, such as rabbit.  That variety left me thinking and overthinking my first foray into paella.

It took a very stressful period at work to finally push me into making a paella.  Clare's parents were visiting and, given everyone eats turkey, I decided to make a paella.  Although I spent a lot of time thinking about making a true Spanish paella (focusing particularly upon a Paella Valenciana), I did something very un-Spanish.  I made a turkey paella.

The turkey is the centerpiece of this paella.  I used turkey thighs, because I think the darker meat has more flavor than turkey breast.  I also used a turkey sausage, which was made in a mild Italian style, in the place of chorizo.  Finally, I decided to use turkey stock rather than chicken or seafood stock.  The 1-2-3 combination of turkey thighs, sausage and stock guaranteed that the paella would have a good solid turkey flavor.  To round out the dish, I decided to use some traditional paella ingredients, such as roasted peppers, artichokes, and peas.

One last note: Paella is traditionally made with a particular type of rice, like Valencia or bomba rice.  However, if you are like me, you might not have that rice in your pantry.  A good substitute is arborio rice, which is the same type of rice you would use to make risotto.  Although you would normally stir arborio rice a lot when making risotto, the rice does not have to be stirred when making paella.   


TURKEY PAELLA
Recipe adapted from Saveur
Serves 6-8

Ingredients:
1 to 2  pounds boneless skinless turkey thighs, cut into 2" pieces
12 ounces of turkey sausage, cut into 1/3 inch slices
3 medium tomatoes, minced
1 small onion, minced
1 box of frozen artichoke hearts, thawed
8 ounces of fresh or frozen peas
3 jarred roasted red peppers, torn into ½"-thick strips
30 threads saffron, crushed (a scant ½ tsp.)
1 tablespoon of smoked paprika
3 dried bay leaves
7 cups of turkey broth
2½ cups short-grain rice, preferably Valencia or bomba
1/2 cup extra-virgin olive oil
Kosher salt, to taste
Freshly ground black pepper, to taste

Directions:
1.  Prepare the base of the rice.  Put the saffron and ¼ cup hot water in a small bowl and let sit for 15 minutes. Season turkey thighs with salt and pepper. Heat oil in a 16"–18" paella pan over medium-high heat. Add the turkey thighs and cook, turning occasionally, until browned, about 5 minutes.  Remove the thighs and add the turkey sausage.  Cook the sausage, turning occasionally, until browned for about another five minutes.  Add the turkey thighs back to the pan and then add the paprika, garlic, bay leaves, tomatoes, and onions.  Cook all of the ingredients, stirring often, until onions soften, about 6 minutes. Add reserved saffron mixture and broth.  Season with salt, and bring to a boil over high heat.

2.  Cook the rice and remaining ingredients.  Sprinkle in rice, distribute evenly with a spoon, and add artichokes, peas, and peppers. Cook, without stirring, until rice has absorbed most of the liquid, which should take about 15–20 minutes, although it may take longer.   Also, if you pan is like mine, which is larger than the burner, rotate the pan every few minutes to make sure that different parts of the paella are over the heat and the rice cooks evenly.)  Cook until the rice has absorbed the liquid and is al dente. Remove pan from heat, cover with aluminum foil, and let sit for 5 minutes before serving.

Overall, this paella was very delicious, and it paired very well with a good white wine, such as the Las Colinas del Ebro Garnatxa Blanca from Catalonia.  The use of turkey made for an interesting twist on a traditional Valencian dish.  It also provides an interesting inspiration for what to do with leftovers from Thanksgiving.  But, that will be left for another post.

ENJOY!