Showing posts with label Flour. Show all posts

Saturday, November 2, 2024

Lahmajoun (Lahmacun/Lahmajo)

This post has been a long time coming. The spark of inspiration goes back years, perhaps more than a decade. I was sitting at home watching Anthony Bourdain eating with someone at a small restaurant in Turkey, most likely Istanbul. He and his guest were eating a flatbread that had a layer of minced lamb and vegetables. Tony identified the flatbread as "lahmacun." Ever since that day, I have wanted to make that flatbread. However, a lot of days went by. Then the years passed. I still wanted to make this recipe, but I made a lot of  other ones instead (as this blog will attest). 

Perhaps the one obstacle in my mind was making the dough. Sure, I make pasta, but I don't really do a lot of baking or working with dough. Thoughts of how long it would take to make the dough, or what would happen if I screwed up the dough, became difficult to overcome. However, I recently decided that, on some time off from work, I would take the time to make the dough. Then other obstacles got in the way. It seemed that more days, weeks and years would go by without me making this flatbread. That was, until I had a batch of thawed pizza dough in front of me. That batch served as the springboard with which I would finally make lahmacun.

Or is it lahmajoun or lahmajo? There is a serious debate in which these two words -- lahmacun and lahmajo -- are at the very heart.  The debate asks the question of where did this flatbread originate? Was it Turkey, where it is referred to as lahmacun? Or, was it Armenia, where it is referred to as lahmajoun.

As it turns out, the answer requires some explanation. The original name derives from Armenian, in which lahmajo means "meat with dough." One account traces the dish back to the city of Aleppo, Syria, where Armenian merchants settled from areas such as Aintab, Urha and Cilicia. The Armenian community in Aleppo began preparing the dish, and local cooks offered it to customers as "lahmajoun." The dish became very popular throughout Syria and Lebanon (where it is called lahm bi ajin), as well as in Turkey, where it took on the name lahmacun

Of course, those in Turkey disagree with the above account. The Turkish version traces the flatbread's origin to the southern Turkish cities of Urfa and Gaziantep. (It should be noted that there were significant communities of Armenians who lived in both cities until the end of the nineteenth century.)

Setting aside the dispute over its origin, I decided to make the recipe for myself. The batch of pizza dough made the preparation of this dish a lot easier for me. I could just focus on preparing the spread. I relied upon a recipe from the World Central Kitchen cookbook, which came from a Lebanese chef (which, for this reason, I will refer to it as lahmajoun). I made only one change to the filling. Instead of using a mixture of half beef and half lamb, I decided to use all lamb. There were two reasons. First, I think lamb is more traditional (although there could be some debate about that). Second, ground lamb comes in one-pound packages and I did not want to have to buy a separate package of ground beef. 

In the end, I think that this was a very good first effort at making lahmajoun. I think when I return to this recipe, I will try some of the regional variations, as well as incorporate other ingredients. Hopefully, it won't take a decade for that to happen.

LAHMAJOUN (LAHMACUN/LAHMAJO)

Recipe adapted from Jose Andres, World Central Kitchen Cookbook, page 85

Serves 4-6

Ingredients (for the topping):

  • 1 batch store-bought, fresh pizza dough
  • 16 ounces ground lamb
  • 1 tablespoon tomato paste
  • 1 tablespoon ground allspice
  • 1 tablespoon kosher salt
  • 1 1/2 teaspoons Armenian red pepper paste or finely chopped roasted red peppers
  • 1 2/3 teaspoon sweet paprika
  • 1 pound plum tomatoes diced
  • 1 medium red onion, chopped
  • 1 small red bell pepper, chopped
  • 1/2 cup chopped fresh flat-leaf parsley
  • 1 medium garlic clove

Directions:

1. Make the topping. In a medium bowl, combine the beef, lamb, tomato paste, allspice, salt, red pepper paste, and paprika. Gently mix in the diced tomatoes, onions, bell peppers, parsley and garlic until well distributed - avoid overmixing. 

2. Prepare the oven. Heat the oven to the highest temperature, preferably with a pizza stone or foil lined sheet pan inside. 

3. Prepare the flatbread. On a lightly floured surface, divide the dough into 12 pieces (to do this, cut the ball of dough in half, then half again, then divide each quarter into 3 pieces). Roll each piece into a round about 8 inches in diameter and about 1/8 inch thick. Put 3 to 4 tablespoons of filling in the center of the round and use a spoon to spread it out nearly to the edge, leaving 1/4 to 1/2 inch border all around. 

4. Bake the flatbread. Depending on the size of the stone or baking sheet, bake the lahmajoun in batches until they start to brown but the dough is still soft enough to fold over - the meat layer will be completely cooked by the time the dough is done. There are no rules for the time and temperature. The hotter the oven and stone, the shorter the baking time and the tastier the lahmajoun. In a home oven that can reach 500 degrees Fahrenheit, it should take 6 to 8 minutes. While the flatbread is baking, you can grill long pieces of eggplant over an open flame until smoky, and season with sea salt.

5. Finish the dish. Serve warm. Lahmajoun are served folded over, sometimes with a squeeze of lemon, a yogurt dip or the traditional Armenian Ayran yogurt.  

PEACE.

Sunday, June 2, 2024

Pizzelles

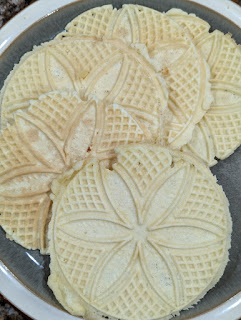
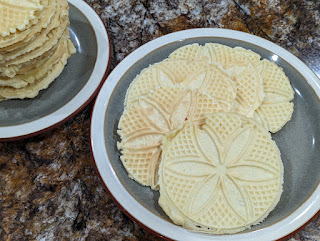
The pizzelle may be one of the oldest known cookie recipes. There are recipes that are said to date back to the 8th century B.C.E., which would go as far back as the founding of Rome (which took place around 753 B.C.E.). Yet, these cookies did not emerge on the streets of the city founded by Romulus and Remus. Instead, the cookies originated on the other side of the peninsula, in an area that would become known as Abruzzo. 

The story of the pizzelle is said to have begun in the village of Culcullo. The village and its residents were overrun with poisonous snakes. A man named Dominic rendered all of the snakes harmless. To thank that man, a celebration was held, which became known as the Festival of Snakes. Pizzelle cookies were made and eaten as part of the celebration. The man would later become Saint Dominic. The Festival of Snakes, as well as the Feast Day of San Dominico, continue to this very day to celebrate that story. Now, as people eat their pizzelles, they can watch snakes slither up and down a statute of Saint Dominic. (It is said if the snakes wrap themselves around the statue's head, it will be a good year for the crops.)

Over time, pizzelles were also made and eaten for other celebrations, notably Christmas and Easter. Indeed, my Italian ancestors - who came from Abruzzo - had a yearly tradition to make stacks and stacks of the waffle-like cookies at Christmas time. It was as much a part of the tradition as the holiday meals themselves. 

The process of making pizzelles is as old as the wafer-like cookies. Centuries ago, people used iron presses. The presses were usually adorned with some design, such as a snowflake; however, families could have irons decorated with the family crest, or other meaningful designs. The iron presses had a long handle, which one could use to hold the irons over hot coals. The batter was placed in the center, the press was closed. and pressure was applied for a very short time until the cookie was done. Fast forward several centuries and one can still find people using iron presses to make these cookies, just with electricity rather than coal. 

This recipe is relatively easy to make, but it takes a little time getting used to the pizzelle iron. Generally speaking, I find that using a small ice cream scoop works best, placing the batter in the middle of each part of the iron. I also find that holding the iron closed (rather than relying on the clip), gets better results. If the batter sticks to the iron, try a little spritz of olive oil to grease the irons. That also helped immensely in terms of making the cookies, although it did make it a little messier. A little mess is worth it in the end.

PIZZELLES

Recipe from Food Network

Serves many

Ingredients:

  • 3/4 cup sugar
  • 1/32 cup unsalted butter, melted
  • 2 tablespoons milk
  • 1 teaspoon vanilla extract
  • 1/2 teaspoon anise extract
  • 3 large eggs
  • 1 2/3 cups all-purpose flour
  • 1 1/2 teaspoons baking powder

Directions:

1. Whisk together the ingredients. Whisk together the sugar, butter, milk, vanilla, anise and eggs in a large bowl. Add the flour, baking powder and salt, and continue to whisk until the batter is smooth. Allow to stand at room temperature for at least 1 hour so the batter can hydrate.

2. Cook the pizzelles. Heat the pizzelle iron. Once the iron is hot, use a small ice cream scoop to place one scoop in the center of each side of the iron. Close the iron firmly and hold close for 30 seconds. Remove the cookies immediately and place to the side to cool. 

PEACE.

Thursday, January 26, 2023

Clam Pancakes (Fritters)

Sometimes the best-laid plans go awry. I came across a recipe for a traditional Heiltsuk clam fritter recipe (more on the Heiltsuk below). This recipe, as with most fritter recipes, called for a heavy breading that gets deep fried in a lot of oil. The combination of heavy breading and deep frying did not really appeal to me. 

I thought I could make a couple of fairly simple modifications and I would end up with a fritter that did not have a thick breading soaked in oil. The principal change was to pan fry the fritters in less oil. That is where things started to go wrong.

The key to a fritter is to submerge it in oil so that all sides firm up almost immediately. When the same dollop is placed into a pan, it tends to spread as only the bottom part begins to firm. One then ends up with a pancake, as opposed to a fritter. 

To be sure, there are fritters that look like mini-pancakes. However, the picture on this particular clam fritter recipe displayed round, golden balls. Not flat pancakes. 

Alas, I lose points for authenticity. It is a little disappointing for my first chance to learn about the Heiltsuk, a native American people who have inhabited the central coast of what is now British Columbia, Canada, since at least 7,190 B.C.E. The Heiltsuk identify as being form one of five tribal groups: the Seaward Tribe (Wuyalitxv), the Calm Water Tribe (Wuithitxv), the Rosco Inlet Tribe (Wuithitxv), the Yisda People (Yisdaitxv) and the Northern/Downriver Tribe (Xixis). They are bound together by not just language, but something more. It is something that can be found just under the surface.

An ancient clam garden. Source: Univ. of B.C.
That something is the clam, which plays an important role in the culture and diet the Heiltsuk people. For example, the Heiltsuk had a "clam dance," which is a ceremonial dance performed by girls who portray supernatural clams that come to life in order to make fun of the clam diggers who turn up empty. 

While the Heiltsuk did dig for clams, they also maintained clam gardens, which were rock-walled, intertidal terraces built by the indigenous people (like the Heiltsuk) along the Pacific shorelines. These gardens provided a more stable way to manage the shellfish and, in turn, provide food for the people. Indeed, there is at least one study that shows that there is a greater biomass (meaning there are more clams, such as littlenecks, butter clams and cockles) in a clam garden as opposed to an exposed beach. Each clam garden was relatively small. Nevertheless, clam gardens lined the coast much like condos line the southern Florida coastline. After all, in both cases, the real estate has a lot of value.

Since my plans already went awry, I decided that I would prepare a wojape to go with these clam pancakes (fritters). I got the idea from my daughter, who loves to eat her pancakes with wojape. This particular wojape was made from blackberries and raspberries, along with maple syrup (instead of honey). The maple syrup was a nod to the fact that I was trying to make a dish from a first nation in what is currently known as Canada. 

CLAM PANCAKES (FRITTERS)

Recipe from Raven Trust

Serves 4

Ingredients:

  • 2 cups flour
  • 3 teaspoons baking powder
  • 4 cups cleaned, diced clams
  • 1 1/3 cups diluted milk
  • 2 teaspoons salt
  • Pepper to taste
  • 4 eggs, well beaten.

Directions:

1. Prepare the breading. Sift dry ingredients together. Add beaten eggs to milk.  Pour egg mixture into flour and mix well. Add clams, mix well, then make them into small round balls.

2. Fry the fritters. Drop the balls into hot oil (350 degrees Fahrenheit). Then turn heat down low (250 degrees Fahrenheit) and cook slowly, browning both sides. Let drain on paper towel. 

PEACE.

Saturday, February 5, 2022

Around the World in 80 Dishes: Canada

Once again I find myself trying to design a challenge involving a country that is comprised of multiple provinces, each with its own interesting takes on cuisine. The country is Canada, which has ten (10) provinces and three (3) territories that span the entire northern expanse of North America. Within those thirteen regions, there are the first nations or indigenous peoples, and, those who came during the colonization of the lands, whether English (as in most of Canada) or French (as in Quebec). The range of cuisine is as broad as the geographic range of the country. The only question for me is where do I start?

I decided to approach this challenge as I did my challenge to cook a main course from Spain, that is, I start with a random address. From that point, I could build the challenge. The problem is that the random address generator provided me with half a dozen addresses, spread across the country. When I found a generator that would give me one address, the website put me in Melfort, Saskatchewan. A city in the middle of a Canadian province that itself is close to the middle of Canada. Now that I had my location, I could move on to the next question: what is the cuisine of Saskatchewan? 

For starters, Saskatchewan has the largest proportion of indigenous peoples to the general population of all the Canadian provinces.  There are seventy (70) First Nations in the province, with five linguistic groups: Nehiyawak (Cree), Dakota (Sioux), Dene (Chipewyan), Nakota (Assniboine) and Nahkawininiwak (Salteaux). Those nations have arrived in the area approximately 11,000 years ago.  They established complex societies on the plains, with cultures recognizing that they were a part of, but not central to all that was around them. The closeness to the land and the environment is a critical part of their beliefs and societies, which also included a recognition of the need to share food and other necessities. 

Over the centuries, other groups emigrated and migrated to the Canadian plains. One such group is the Doukhobors, ethnic Russians who, although Christian, rejected the Russian Orthodox church.  Doukhobors practiced a different kind of Christianity, one based more on spiritualism.  Doukhobors believe that the Bible is not enough, that they have to internalize the living spirit of God. They are pacifists who tended to live in their own communities, rejecting materialism but working together. Needless to say, the Russian government mistreated the Doukhobors, leading to their wish to emigrate to other countries.  The government agreed in 1897 to let them leave Russia, but with  three conditions: (1) they never return; (2) they pay their own way; and (3) their imprisoned leaders remained incarcerated before they could leave. Many accepted those conditions and they left for Canada, settling in southern Saskatchewan (as well as southern Alberta and British Columbia). Once they arrived, they established "colonies" in block settlement areas or reserves.  These included the "Thunder Hill Colony," the "Whitesand Colony," the "Good Spirit Lake Annex," and the "Rosthern Colony." 

I have decided that, for this challenge, I would make two recipes from these two ethnic groups. I would first make Bannock, which has its ties to Native American cuisine in the province.  I would then turn to the main course, Shishlik, or the kebabs of the Russian immigrants. This latter dish will satisfy the personal culinary challenge.

BREAD

Bannock is a type of bread that originated in Scotland, where is was known as bannach or "morsel." The Scottish prepared used wheat flour to make this bread, which is really like a big biscuit. They cooked the bread by a fire using a griddle known as a Bannock Stone.  Bannock could be made in other ways, such as frying it or baking it. 

Scottish explorers and traders brought bannock with them as they made their way across the new world, including the United States and Canada.  Some indigenous peoples, such as the Metis, adopted the bread and made it their own. Rather than using wheat, as the Scots did, the indigenous people used corn flour  or flour made from local plants to prepare the bread.  

For this recipe, I wanted to try to recreate the bread using recipes from Saskatchewan. One recipe paired the Bannock with chokecherry syrup. Chokecherries are tart and bitter little berries. The range of these little berries runs from the plains of Canada south to the northern United States. The berries served as an important part of the diet for indigenous nations who lived in that region. While I searched to find chokecherries online, I was unable to do so (most likely because I was making this recipe out of season). If one cannot find chokecherries, the recommended substitute is tart cherries. However, I could not find tart cherries in the store and I did not want to buy them online.  In the end, I decided that I would simply use some cranberries that I had in the freezer, which were left over from the holidays.  

BANNOCK (LUSKNIKN) WITH CHOKECHERRY SYRUP

Recipe from Jenni Lenard, available at Refinery29

Ingredients (for the bannock):

  • 3 cups whole wheat flour
  • 3 cups all-purpose flour
  • 3 tablespoons baking powder
  • 1 teaspoon salt
  • 1/8 cup brown sugar
  • 1/2 cup oil or melted lard
  • 3 to 3 1/2 cups cold water
Ingredients (for the Chokecherry Syrup):
  • 2 cups chokecherries, rinsed well (substitute tart cherries)
  • 2 cups water
  • 3 cups sugar
  • 1 tablespoon lemon juice
Directions:

1. Combine the dry ingredients. In a large bowl, combine both flours, baking powder, salt and brown sugar. 

2. Add the wet ingredients. Add water and oil and mix with your hands until all the dry ingredients are incorporated.  If making bannock on a stick, add the water gradually until the dough is the consistency of a thick biscuit dough. For baked bannock, use 3 1/2 to 4 cups of water. Turn out onto a floured counter and knead for a few minutes.

3. Bake the bannock. Form into a 12 inch by 12 inch circle and bake for 30 to 35 minutes at 375 degrees Fahrenheit until golden brown.

4. Make the Chokecherry Syrup. Take 1/4 cup of the berries and grind them using a mortar and pestle (this releases the flavor of the seeds).  Place a pot with the whole berries and the water.  Bring to a boil then reduce the heat and simmer for 30 minutes. Strain, pressing the berries to release extra juices.  You will need 12 cups to make the syrup, so pour extra hot water over the berries if needed.  Add the sugar and lemon juice to the chokecherry juice and cook over medium heat, stirring occasionally, 25 to 30 minutes until clear and thickened slightly. 

MAIN COURSE

Sometimes it seems inevitable that I would be making a kebab recipe as part of a challenge. Given the ubiquitous nature of skewered meats around the world, the challenge has been to try to find a kebab recipe that sets itself apart from the endless multitude of recipes on the internet.  

This recipe, Shishlik, accomplishes that feat, not because of any specific ingredients or cooking methods, but because of its history. As noted above, this recipe tells the story of a particular group of Russian immigrants, the Doukhobors, who made their way and eventually settled in Saskatchewan. As they built their communities, they continued their culinary traditions. This continuity helped to establish shishliki as a food for both family and community events in southeastern Saskatchewan, around the cities of Yorkton, Kamsack and Canora. 

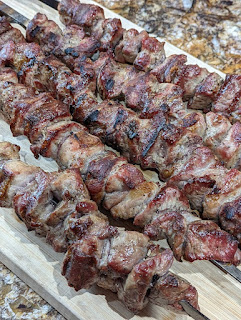
Shisliki is typically made with marinated and grilled lamb, although the recipe that I found leaves open the possibility of preparing skewers of chicken or pork. I decided to keep with the tradition and I used a leg of lamb to prepare this dish. The lamb cut into pieces, seasoned with salt and pepper, and then marinated with onions. (There are some recipes that use vinegar and/or lemon juice as part of the marinade, but I stuck with a fairly basic recipe). The lamb and the onions are left in the refrigerator to  marinate overnight, but, I should note that some recipes call for a longer period of time. For example, the town of Kamsack notes, on its website, the lamb should marinate for up to four days.  That is a little too long for me. I marinated the lamb for a much shorter time.  


SHISHLIK
Recipe from Saskborder
Serves 6

Ingredients:
  • 2 pounds of chicken, pork or lamb, cut into 1 1/2 inch cubes
  • Large onions sliced
  • Kosher salt
  • Freshly ground black pepper
  • Canola oil
Directions:

1.  Prepare the skewers.  Toss the meat and onions in a bowl and add vegetable oil until everything is coated.  Add the salt and black pepper and toss until everything is coated.  Place the meat in a bag and refrigerate it overnight.  

2. Grill the skewers.  Prepare a fire or heat a gas grill on high. Place the skewers next to the fire or on a cooler part of the grill. Turn occasionally and grill until cooked to the proper internal temperature.

*     *     *

In the end, I am happy that my personal culinary challenge is based on the Shishlik, rather than the Bannock. The challenge proved why I don't bake, as the bannock was not baked all the way through. I was still able to salvage enough of it to eat, but I figured that either I needed to make the bread thinner or it needed to bake longer. I also had to reduce the syrup for a longer period of time than what is called for in the recipe. Yet, the lamb skewers turned out perfectly, with pink meat in the center and crispy grilled edges to the lamb. Given the lamb counts as the main course, I can tally this challenge as a win. Until next time ... 

ENJOY!

Saturday, April 7, 2018

Around the World in 80 Dishes: Djbouti

My personal culinary challenge -- Around the World in 80 Dishes -- takes me to a country where making a main course may seem like a daunting task.  If you were to find yourself in this country, you would see a land of dry shrub lands, volcanic formations, and sandy beaches.  Indeed, it is the hottest piece of inhabited land in the world.  If you ventured into the country looking for water, you might come across a lake, known as Lake Asal, with the highest salt contents in the world.  The water would be undrinkable, but you could marvel at the chimney-like mineral formations created by the evaporation of the water.  If you haven't guessed it by now, you would be standing in the Republic of Djbouti.

A long time ago, the land constituting Djbouti was part of the legendary land of Punt.  (The ancient Egyptians referred to the land as "Punt," or "God's Land" because of the plentiful resources that could be found there.)  Fast forwarding through time, thee land was thereafter ruled by various sultans for hundreds of years from the thirteen century to the nineteenth century.  However, as that latter century came to a close, in 1894, a colonial power -- namely, the French -- established French Somaliland.  It remained a French colony for nearly 80 years.  Colonization ended with a referendum in 1977, which led to the establishment of a presidential republic and the present day country of Djbouti.  

The country has a diverse population.  The largest ethnic groups are the Somalis, who comprise 60% of the population and the Afar, who comprise 35% of the population. The remaining 5% consists of Ethiopians, Yemeni, and Europeans (mostly Italians and French).  

These cultures provide a window into the culinary influences that have shaped Djbouti cuisine.  That cuisine is a mix of Somali, Yemeni and French influences.  There are even some Indian influences in some of the dishes.  Proximity also has left its imprint on the cooking and dishes of Djbouti, with many Middle Eastern spices finding their way into the food eaten by everyday people.  Ingredients like cinnamon are added to spice blends, while saffron is also used in some dishes.   All of these influences played a role when it came to my decision as to the main course that I would make for my challenge.  I wanted to choose a dish that showed the diversity that can be found among the people of this small country.  

MAIN COURSE

That diversity is best illustrated by the dish of Skoudehkaris, which is often referred to as the national dish of Djbouti.  To make this dish, one sautes onions with a spice blend that draws from many Middle Eastern ingredients.  These ingredients include cumin, cinnamon and cloves, along with cardamom (an ingredient used in subcontinent cooking).  After the onions have softened, lamb is added and browned in the pot.  Tomatoes and water are then added to create a stew, which is then finished with some long rice, which helps to soak up some of the liquid.  The end result is a dish that draws from the land of Africa and the spices of the region to produce a dish that, in some respects, resembles a biryani from Pakistan or India.  


SKOUDEHKARIS
Recipe from Global Table Adventures
Serves 4

Ingredients:
1 pound of lamb, cubed
1 onion, chopped
1-2 tablespoons ghee or vegetable oil
1 teaspoon cumin
1/4 teaspoon cloves
1 teaspoon cardamom
1/4 teaspoon cayenne pepper
1/2 teaspoon cinnamon
1 can of diced tomatoes (14 ounces)
1 cup of water (more if needed)
1/2 cup of long grain rice
Freshly ground black pepper
Salt

Directions:
1.  Saute the onions.  Heat the ghee or oil in a large pot.  Add the onions and the spices (cumin, cloves, cardamom, cayenne, and cinnamon) and cook until soft and fragrant.  

2.  Brown the lamb.  Add the lamb and brown it a little.  (Push the onions out of the way so that the meat has contact with the pan.) 

3.  Cook the lamb.  Add the tomatoes and the water.  Cover and simmer for about 45 minutes, until the lamb is tender.  Add pepper and salt to season.

4.  Add the rice.  Add the rice and 1/2 cup of water if needed. Stir, cover and let simmer for about 20 minutes until the rice is tender.  

BREAD

After having made Skoudehkaris, I needed something to serve with the lamb and rice mixture.  The recipe that I used recommended Laxoox, which is a sponge-like bread.  Laxoox -- or Lahoh, as it is known -- is a bread that can be found in Djbouti, along with Somalia and Yemen.  Thus, the preparation of this bread, which is a lot like the injera prepared in Ethiopia, allows me to bring together the other culinary influences upon Djbouti cuisine.  Those would be the influences of the Somali and Yemenis.

Injera is typically made with teff flour, but the recipe for Laxoox calls for a combination of all purpose flour, wheat flour and millet flour.  If you are like me and you don't have millet flour, just use some more wheat flour.  The end product may not be as good as when you use millet flour, but, if you are like me, it works and saves you some money by not having to buy a package of a type of flour that you will not use in the foreseeable future.  


LAXOOX
Serves 4

Ingredients:
2 cups all purpose flour
1/4 cup wheat flour
1/4 cup millet flour
1 1/2 teaspoon yeast
1 teaspoon salt
1 teaspoon sugar
2 1/2 cups of water

Directions:
1.  Combine the ingredients.  Add the flour to a bowl.  Then sprinkle on the yeast.  After that, add the salt and sugar.  Add the water and whisk all of the ingredients.

2.  Refrigerate the dough.  Cover the bowl and refrigerate overnight.  Remove from the refrigerator and place on the counter for a few hours.  When the mixture begins to bubble or froth, it is ready.  

3.  Make the bread.  Heat some oil in a stainless steel or cast iron skillet.  Add a ladle of the mixture and use the ladle to spread it out to about 1/4 inch thickness.  Cook gently until the bubbles form and the surface dries out.  There is no need to flip, just cook until the underside is golden and it is cooked all the way through.

*          *          *

It has been quite a while since I have made a main dish from a country in Africa.  Six (6) of my thirty (30) challenges have involved African countries.  Of those six, I think that my preparation of Skoudekaris and Laxoox may have been the most successful challenge.  The Skoudekaris was very delicious.  The lamb was tender, the sauce had a good kick, and the Laxoox provided a wonderful tableau for the food. Overall, it was a big victory cooking the main dish of a very small country.

Time to prepare for the next challenge.  Until then ...

ENJOY!

Sunday, April 1, 2018

Detroit-Style Frog Legs

Sam Blythe, a columnist for the New York World, once wrote, "if you have never eaten frog legs in Detroit, you have something to live for, something for which to strive."  He wrote those words in 1905.  A mere five years later, according to Bill Loomis in his article When Frogs were King, "Detroit produced, shipped and consumed 12 tons of frog legs, 6 million pairs of legs (called saddles)."  Bill Loomis also noted that hotels in Detroit served 800 dozen saddles per day back at that time.  That is a lot of frog legs.  So much so that, one year later, the New York Times reported the seemingly obvious: "Detroit is famous for frog legs."  

That frog legs would feature prominently in the cuisine of Detroit does make some sense. After all, Detroit was originally settled by the French.  The Canadian French would head out on the hottest days of the summer along the banks of the St. Claire Flats or the marshes at Monroe near Lake Erie.  The fishermen used a variety of means to catch the frogs, such as tiny "cat and rat" shotguns with mustard seed shot or  a fishing line with a red flannel cloth as a lure (apparently bull frogs were attracted to that lure).  Some used frogging forks, spears and even clubs.  If one knew what he or she was doing, that person could catch as many as 200 frogs per day. 

Given those hauls, it is no wonder that the frog legs were found on many a menu at restaurants and roadhouses around Detroit.  Its introduction into Detroit cuisine was bottom up.  It first appeared on the plates of working class people, prepared in a very simple way.  The saddles were just dipped in milk, then flour and pan-sauteed in butter, and finished with some lemon juice and parsley.  That's it.  If you happened to be at one of the roadhouses around Detroit, which served more rugged and casual food, the cooks used crushed soda crackers for the breading before sauteing the frog legs in butter.  A diner could get a meal for just 20 cents, and, often times, it was an all-you-can-eat buffet of frog legs. 


Eventually, the saddles found their way onto plates placed on white tablecloths.  They also were prepared in a variety of ways.  According to Bill Loomis, Michigan cookbooks included recipes for frog leg salad, frog leg ravioli, picked frog legs, and a frog leg pie.

There were even criteria for what were the best frogs for cooking. The rule was that frogs had to be between 2 and 5 years old.  The problem is that it is fairly difficult to tell a frog's age.  (After all, the frog is not going to volunteer it to you.)  What is perhaps more likely is that the best frogs were determined by their size.  If the frog was too large (and presumably too old), its leg meat would be too tough with a fishy taste.  

However, too much of a good thing is definitely not good, especially for the frogs.  Over-frogging led to declines in the population around the Detroit area.   Even at its height during the first decade of the twentieth century, there were complaints about a dwindling numbers of frogs.  Demand had far exceeded the supply. There were efforts to stave off that decline.  For example, a law was introduced in 1913 that banned the hunting, sale, storage and service of frog legs at restaurants from June to November.  While hotels and restaurants in the city obeyed the law, the roadhouses did not.  Cooks at the roadhouses sold the frog legs under the counter.  Those roadhouses were too dependent upon the sale of frog leg dinners to stop serving them for five or six months a year.  It is recounted that, in 1915, a deputy game warden placed phony orders from roadhouses and returned with 1,000 dinners.   Demand and, eventually, pollution did the frogs in.  

Despite the fall of the frogs in Detroit, one can still find frog legs on menus at local restaurants.  Those frogs are not from the marshes at Monroe or the banks of St. Claire Flats.  Instead, the frogs are imported from India, Indonesia or Vietnam.

That is probably where the frog legs came from for this dish  I found frozen legs at my local Asian grocery store and thought I had to make a dish with them.  That is how I found the Detroit-Style Frog Legs.  An ingredient and a simple Google search resulted in an educational experience and a delicious dinner.  What a time that we live in!


DETROIT-STYLE FROG LEGS
Serves 2

Ingredients:
4 frog legs
1 cup of milk
1 cup of flour
4 tablespoons butter
1/4 cup fresh parsley, finely chopped
1 lemon, juiced
1 lemon, cut into wedges
Kosher salt, to taste
Freshly ground black pepper, to taste

Directions:
1.  Saute the frog legs. Dip the frog legs in milk, then in flour and saute them slowly over medium heat until golden brown all over, about 6 to 8 minutes.

2.  Finish the dish.  Remove the frog legs to a hot serving dish, season with salt and black pepper.  Sprinkle with the lemon juice and garnish with the finely chopped parsley.  Pour what is left of the browned butter in the frying pan over the frog legs and garnish the dish with a slice of lemon.

If you want to learn more about the history and role of frog legs in the cuisine of Detroit, check out the Hour Detroit article written by Bill Loomis, the Spendid Table interview of Bill Loomis, or one of his books.

ENJOY!

Saturday, March 22, 2014

Galopoúla me Dendrolivano

When looking for a recipe to cook, there has been one that always seems to appear in my searches ... Kotopoulo me Dendrolivano or Rosemary Chicken.  It is a relatively simple recipe from Saveur and it uses one of my favorite herbs, namely, rosemary.  However, I always had one obstacle ... my beautiful Angel, Clare, does not eat chicken.  I would set the recipe aside for a night when I would be cooking for myself and I would continue to look for something that I could cook and that Clare would eat.

One day I came across the recipe again, and, this time I decided to make it.  Rather than use chicken, I decided to make it with turkey, which Clare does eat.  So the recipe went from Kotopoulo me Dendrolivano (Rosemary Chicken) to Galopoúla me Dendrolivano (Rosemary Turkey).  (Please note I am not a native Greek speaker, so excuse me if I got the translation wrong.)  At long last, I would be making this recipe.

If I was making Kotopoulo me Dendrolivano, I would be looking for bone-in chicken quarters, consisting of both the thigh and leg.  Most supermarkets carry chicken broken down in that fashion.  Those markets do not usually carry turkey quarters.  It is usually a choice between legs or thighs.  Rather than make that choice, I went in a completely different direction.  I chose turkey cutlets. 

This  choice created some additional work.  First, I needed to do something to ensure that the cutlets, which come from the breast, would not dry out during cooking.  Second, I needed to revise all of the cooking times because, if I followed the times for cooking the kotopoulo, I would have wooden galopoúla that could have used to build triremes.  So, I decided that I would do a short and quick brine to help add some moisture to the cutlets.  I found a recipe that called for 1/4 cup of salt in 2 cups of water and used that as a rough guide.  Although the recipe called for the cutlets to remain in the brine for 3 hours or overnight, I just did it for a little more than one hour.  Three hours would probably have worked better, but overnight would have meant that we would have gone without dinner.

Once the cutlets were removed from the brine and patted dry, I turned to the remainder of the additional work.  The recipe called for braising the protein in the oven for at least 45 minutes. If I cooked the cutlets for this long, I would once again find myself cooking turkey planks better suited for purposes other than eating. (Remember those triremes?)  I decided to cut the cooking time by two-thirds and even a little more, reducing the braising time from 45 minutes to 10 to 15 minutes.  I also decided to do the braising on the stovetop in a covered pan rather than in the oven.  This is important because it allowed to watch the turkey and check it to ensure that it did not dry out.

One last note, the recipe calls for 1 cup of wine to be used to make the pan sauce.  When I make a recipe from a wine-producing country or culture, I try to use a wine that local cooks could have used.  In this case, I found a bottle of Skouras Anassa (2012), a blend of Viognier and Moschofilero, that sold for about $9.99.  The wine worked very well and made a great pairing for the dish.


GALOPOULA ME DENDROLIVANO
Recipe adapted from Saveur
Serves 2-4

Ingredients:
4 turkey cutlets
Kosher salt and freshly ground black pepper to taste
1/2 cup flour, for dredging
1/4 cup extra virgin olive oil
1 cup white wine
3 sprigs of fresh rosemary
2 fresh bay leaves
Juice of 1 lemon
1/4 cup of sea salt
2 cups of water

Directions:
1.  Brine the turkey.   Dissolve the 1/4 cup of sea salt in 2 cups of water in a large bowl.  Place the turkey cutlets in the water and make sure that they are completely submerged.  Cover the bowl and place it in the refrigerator for at least 1 to 2 hours, but 3 hours or more would be better.  When the brine is finished, drain the cutlets and blot them well to dry them.

2.  Prepare the brined turkey.  Season turkey generously with salt and pepper.  Put flour on a plate and dredge turkey in flour to coat, shaking off excess.  Heat oil in a 12 inch skillet over medium high heat.  Add turkey and cook, turning once until browned, about 5 minutes.  Add wine, rosemary and bay leaves.  Return the pan to the heat until the wine is reduced by half, about 2 minutes.  Add 1 cup to 1 1/2 cups of water and bring to a boil.

3.  Braise the cutlets.  Cover the pan and cook until the turkey is tender, about ten to fifteen minutes.  Uncover and stir in lemon juice.

4.  Plate the dish.  Place one to two cutlets on a dish and spoon the pan sauce over the turkey.

This was a great dish and I will definitely make it again ... perhaps I will also make Kotopoulo me Demrolivano as well.  Until then ...

ENJOY!

Saturday, February 1, 2014

Apple Crumble

I am not the only one who cooks in our family.  My beautiful wife, Clare, is also a great cook and a great baker.  Every once in a while, I ask my Angel to provide a guest blog post so that I can share some of the amazing and delicious things that she makes for family, friends and, of course, me.  She has already provided guest blog posts about Cuban Bread, Loyalist Bread, Salmon Burgers, Peach Cobbler, Parmesan Soufflé with White Wine Butter Sauce and Meatballs with Orechhiette, Kale and Pine Nuts.   So, without further ado,

A Guest Blog Post by Clare ...

When it comes to desserts, I am the one that makes them in our family.  Keith does not really make a lot of desserts; and, I think that is because he is not really into baking.  When it comes to cooking, he does not always measure things exactly.  He likes to "eyeball"the measurements.  This does not lend itself very well to baking, where exact measurements are much more important, particularly if you want to have a good dessert.

Then there are desserts that are more "Keith-friendly," that is, ones in which being off on a measurement or two would not spell ruin for the dish.  One such dish is this apple crumble, which I made as part of our Wine Club dinner back last September.  (Keith has been really busy at work and at home, which has left some recipes, like this one, waiting to be posted.)  The theme of the Wine Club dinner was The F Word, which was a dinner based on recipes by Gordon Ramsay.  This is Gordon's take on an Apple Crumble.  

The key to this recipe is that the apple is presented in two forms ... puree and chunks.  This helps to provide some interesting texture to the fruit in the dessert.  Gordon adds dried cranberries, which add some interesting flavor to complement the apples.  The granola topping, which adds that crunch one would expect with a crumble rounds out the dish. 

Over all, this is a delicious dessert and a great way to end that particular wine club dinner. 


APPLE CRUMBLE
Recipe from Gordon Ramsay's Cookery Course
Serves 4

Ingredients (for the apples):
6 tablespoons of caster sugar
Pinch of ground cinnamon
1 vanilla pod, seeds only
6 apples, cored but not peeled, 3 of them grated
     3 of them cut into chunks
3 tablespoons of dried cranberries
Zest of one lemon, juice of 1/2 lemon

Ingredients (for the crumble topping):
6 2/3 tablespoons of plain flour
2 tablespoons of demerara sugar
3 1/3 tablespoons of butter, chilled and cubed
Pinch of ground cinnamon
4 tablespoons of nutty granola or muesli

Directions:
1.  Prepare the apples.  Heat the oven to 390 degrees Fahrenheit.  Heat a small hob-proof baking dish. Add the caster sugar and heat for about 5 minutes until it caramelizes.  Add the cinnamon, vanilla seeds and grated apples and cook for 1-2 minutes.  Stir in the apple chunks, then mix in the cranberries, lemon zest and juice.  Remove from heat and set aside.

2.  Make the topping. Place the flour, sugar, butter and cinnamon in a bowl and rub together with your fingertips until the mixture resembles breadcrumbs.  Add the granola and mix fully until incorporated. 

3.  Bake the crumble.  Scatter the crumble topping over the fruit and heat the dish on the hob.  Once the apple mixture is bubbling, transfer to the preheated oven and bake for 12-14 minutes until the topping is a deep golden brown.  Remove and serve warm.

ENJOY!

Saturday, December 8, 2012

Around the World in 80 Dishes (Special): Tibet

As part of my Around the World in 80 Dishes culinary adventure, I decided that I would prepare four special challenges.  Each challenge would focus on a cuisine of a culture that does not have its own, formally recognized country. These challenges will also appear as part of my Beyond Borders project.

The first special challenge takes me to "Bod," which translates to "Tibet" or the "Tibetan Plateau."  That plateau is a vast stretch of land that has an average elevation in excess of 14,500 feet that is surrounded by even higher mountain ranges.  Several rivers cut through the plateau, including the Yangtze, Yellow, Indus, Ganges and Mekong Rivers. 

This geography has a definite impact upon agriculture.  Subsistence farming is the predominant form of agriculture, with Tibetans cultivating the few crops that can grow at that elevation.  The principal crop is barley, which, unlike wheat or rice, can fare well at higher altitudes.  The barley is ground into a flour to make a dough called tsampa, which is used to make bread.  The Tibetans also raise yaks, goats and sheep, which are an important part of their meat-eating tradition.  The eating of meat is necessary for the Tibetans, because the meat provides an important source of protein and fat that is not only useful, but necessary for life on the high plateau.

This meat-eating tradition also presents a dilemma, which has been documented Julia Moskin in an article published by the New York Times.  The majority of Tibetans practice Buddhism and abhor the taking of life ... any life.  This presents a problem when it comes to their cuisine, because it is full of yak, goat, and mutton dishes.  The "unofficial" dish is called Sha Momo or "Meat Momo," which is a dumpling made with a minced yak meat mixture.  While the unofficial dish may be a carnivore's delight, the Sha Momo represents a dilemma.  Nevertheless, the Tibetans have resolved that conflict.  Known as the "karmic load," Tibetans recognize that the killing of one yak is the same as killing one fish.  However, a yak feeds many more people than a fish.  Thus, if a creature must perish so that people can eat, Tibetans choose the yak.  Thus, Tibetans are able to minimize the "karmic load" by feeding many more people through the killing of many less creatures.

MAIN COURSE

Turning to the matter at hand, I decided that, for this special culinary challenge, I would make the "unofficial dish" of Tibet, Sha Momo. This is the first time that I made dumplings of this kind.  I have previously made Hushuur, as part of my challenge to make a main course from Mongolia.  Hushuur are a kind of "dumpling," shaped into half-moons and deep-fried.  Huushur are larger than Sha Momo and, looking back on the challenge, my Hushuur looked more like calzones when compared to the smaller, more refined Sha Momos.  And, I have to admit, the task seemed daunting.

Every Tibetan family has their own way to make momos; however, there are some general guidelines.  First, Sha Momos generally come in two shapes: round and the half moon.  I chose to make the round dumplings.  Second, the filling for Sha Momos obviously includes meat.  While I did not have any ground yak meat, I did substitute grass-fed, ground beef.  Third, momos can be prepared in different ways ... for a soup, steamed, or fried.  I decided to steam the momos.  With the parameters set, I moved on to making the momos from scratch....


SHA MOMO
 Recipe adapted from Yowangdu and National Public Radio
Makes 24 large dumplings or 32 medium dumplings

Ingredients (for the dough):
2 cups of unbleached flour or white all purpose flour
3/4 cup of just boiled water

Ingredients (for the filling):
3/4 pound ground beef (preferably chuck), coarsely chopped to loosen
1/2 cup finely chopped yellow onion
1/3 cup chopped Chinese chives or scallions (white and green parts)
2-1/2 tablespoons minced fresh ginger
3 cloves garlic, minced and crushed into a paste
1 teaspoon salt
3/4 teaspoon Sichuan peppercorns (or substitute black peppercorns),
     toasted in a dry skillet for 2 to 3 minutes, until fragrant,
     then crushed with a mortar and pestle
2 tablespoons canola oil
6 tablespoons water

Directions:

The dough after it has been kneaded.
1.  Make the dough.  Put the flour in the bowl and make a well in the center. Add 3/4 of a cup of hot water in a steady stream and use a wooden spoon to stir the flour. The goal is to evenly moisten the flour; and, it is okay to pause to stir the flour or to add water.  After the water has been added, knead the dough in the bowl to work out any lumps. If the dough does not come together easily, add water by the teaspoon. 

2.  Knead the dough.  After kneading the dough in the bowl, move the dough to a work surface.  Flour that only if it is necessary, and then use the flour sparingly. Continue to knead the dough with the heel of your hand for about 2 minutes. The result should be somewhat smooth and elastic.  Press on the dough and it should slowly bounce back, with a light impression of your finger remaining. Place the dough in a zip-top plastic bag and seal tightly closed, expelling excess air. Set aside to rest at room temperature for at least 15 minutes and up to 2 hours. The dough will steam up the plastic bag and become soft, which makes it easy to work with the wrappers. 

The filling before the liquid is added.
3.  Make the filling.  Combine the beef, onion, chives (or scallions), ginger, and garlic in a bowl. Stir and lightly mash the ingredients together with a fork or spatula.  In a separate bowl, stir together the salt, Sichuan peppercorns, oil, and water.  Pour the liquid mixture over the meat mixture and then stir with the fork or spatula to blend well. There should not be any visible large chunks of meat. To develop the flavors, cover with plastic wrap and set aside at room temperature for 30 minutes. The recipe makes about 2 cups of filling. (I had extra filling after I completed making the momos.)

4.  Make the dough wrappers.  Remove the dough from the bag. Put the dough on a lightly floured work surface and cut it in half. Put half back in the bag, squeezing out the air and sealing the bag to prevent drying.

Cutting the pieces for the wrappers.
Roll the dough into a 1-inch-thick log, and then cut it into the number of pieces required by the recipe. To cut even pieces, quarter the log first; the tapered end pieces should be cut a little longer than the rest. Weigh each piece of dough to be super precise, if you like. If your dough pieces are oval shaped, stand each one on a cut end and use your fingers to gently squeeze it into a round. The resulting squat cylinder resembles a scallop. This bit of advance work makes it easier to form a nice circle in the remaining steps.  (The forming of each piece into a round is not necessary, but you have some additional work when it comes to flattening the piece into a thin circle.)

To prevent the dough from sticking and to flatten it a bit, take each piece of dough and press one of the cut ends in flour, then flip it over and do the same on the other end; the dough will be sticky.

A small pan works well when flatting the pieces.
Next, flatten each piece of dough into a thin circle that is about 1/8 inch thick, either with rolling pin or with a heavy, flat-bottomed object.  Put the floured disk between the plastic squares and press down with the rolling pin or a heavy object to produce a circle about 1/8-inch thick. You may have to press more than once. Gently peel back the plastic from the wrapper.  Set aside the dough circle.  Repeat this process with the remaining dough pieces, setting each one to the side of the work area as you finish it. It is okay to overlap the wrappers slightly, but I tried to avoid any overlap of the dough circles because the dough was still a little sticky.

To finish the wrappers, take a wrapper and place it on the work surface, flouring the surface only as needed to keep the dough from sticking. Imagine a quarter-size circle in the center. This is what the Tibetans call the "belly" of the wrapper. the goal is to create a wrapper that is larger than its current size but retains a thick belly. This ensures an even distribution of dough after the wrapper's edge has been gathered and closed around the filling.

It is hard to see the "belly."
To keep a thick belly, use the rolling pin to apply pressure on the outer 1/2- to 3/4-inch border of the wrapper, as follows. Try to roll the rolling pin with the flat palm of one hand while using the other hand to turn the wrapper in the opposite direction. For example, as your right palm works the rolling pin in short, downward strokes from the center toward your body, the fingers of your left hand turn the disk counterclockwise about one-quarter of a turn between each stroke. Keep the thumb of the rotating hand near the center of the wrapper to guide the rolling pin and turn the wrapper.

If the wrapper sticks to the work surface or rolling pin, pause to dust the wrapper with flour and then continue. If you cannot get a wrapper thin enough on the first try, set it aside to relax for about 1 minute, and then roll again. Should the wrapper tear or be hopelessly misshapen, roll up the dough, let it rest for a few minutes, then press it again and roll it out. Resembling a flat fried egg, the finished wrapper does not need to be a perfect circle. Frilly edges are fine. The finished diameter of the wrapper depends on the dumpling. Wrappers are moderately thick and suitable for boiled, steamed, pan-fried, and deep-fried morsels.

As you work, line up the finished wrappers on your work surface; if you need extra space, use a baking sheet lined with parchment paper and dusted with flour. A bit of overlapping is fine, but avoid stacking the wrappers. When a batch of wrappers is formed, fill them before making wrappers out of the other portion of dough, or the wrappers may stick together as they wait for you. Alternatively, I filled the wrappers as I finished them, which provided more room on the work surface. 

The filling.
5.   Fill the wrappers.  Before assembling the dumplings, line steamer trays and/or a baking sheet with parchment paper. (If you are making the dumplings in advance, or plan to freeze them, lightly dust the paper with flour to avoid sticking.)

For each dumpling, hold a wrapper in a slightly cupped hand. Scoop up about 1 tablespoon of filling with a bamboo dumpling spatula, dinner knife, or fork and position it in the center of the wrapper, pressing and shaping it into a mound and keeping about 1/2 to 3/4-inch wrapper clear on all sides. Use your fingers to pleat and pinch the edge together to enclose the filling and form a closed satchel, or simply fold over to form a half-moon.

In the alternative, you can place the dough circle on the work surface and spoon a tablespoon of the filling into the middle of the circle.  You want the filling to sit on the "belly" of the dumpling.  You can then use your fingers to pull the sides up, pleat and pinch the edges of the momo together to form the satchel (or  fold the dough over to create the half-moon).

If you are steaming right away, place each finished dumpling in a steamer tray, sealed side up, and 1 inch away from the edge if you are using metal steamers. Repeat with the remaining wrappers, placing them in the steamer about 1/2 inch apart. If you don't have enough space on your steamer trays to steam all the dumplings at once, or if you are not steaming them right away, place the waiting ones on the prepared baking sheet, spaced a good 1/2 inch apart. 

Ready to steam.

6.  Steam the momos.  Steam the dumplings over boiling water for about 8 minutes, or until they have puffed slightly and become somewhat translucent. Remove each tray and place it atop a serving plate.

HOT SAUCE

One of the sauces or condiments that are served with Momos is called Sepen, which is a Tibetan hot sauce made from dried red chile peppers.  I tried to determine which chiles are used in Tibetan cuisine; however, apart from stories about the use of spicy chiles, I was unable to find the exact chiles.  I decided to use dried Sanaam chiles, which are grown and cultivated in nearby India.  Sanaam chiles have about 40,000 Scoville Heat Units. These chiles are definitely spicy, which falls within the description of the chiles used to make Sepen. If you do not like spicy foods, choose a pepper that has less Scoville Heat Units, like a guajillo, Anaheim or serrano chile. 


SEPEN (TIBETAN HOT SAUCE)
Recipe adapted from Lonsang Wongdu and
available at the New York Times

Ingredients:
1 cup whole dried small red chile peppers
1 teaspoon whole Sichuan peppercorns
     (optional, you can substitute black peppercorns)
1/2 cup coarsely chopped fresh cilantro stems and leaves
2 teaspoons minced garlic
2 tablespoons minced ginger

Directions:
1.  Rehydrate the peppers.  If possible, soak chiles overnight in plenty of cold water. If time is short, cover chiles with boiling water and soak for 20 minutes. Drain and discard soaking liquid. 

2.  Blend the ingredients.  If using peppercorns, coarsely grind in a mortar or spice grinder. In a blender or mortar, combine all the ingredients with 2 tablespoons of water and grind until smooth (the seeds of the chiles will remain whole). The finished sauce should be as thick as ketchup; thin with water as needed.

BEVERAGE

Finally, to round out the meal, I decided that I would make a beverage to enjoy either with the Momos or afterwards.  After doing a little research, I chose a recipe for Po Cha or Tibetan Butter Tea.  This recipe is basically a black tea with a little butter and milk.  This recipe is similar to the Suutei Tsai or Mongolian Milk Tea that I made as part of my challenge to prepare a main course from Mongolia. 

Ordinarily, I am someone who does not like milk or anything in my tea.  However, I have to admit that the addition of the butter and milk to this tea was actually good. 


PO CHA (TIBETAN BUTTER TEA)
Recipe from Recipes Wiki
Serves 4

Ingredients:
5 to 6 cups of water
2 bags of black tea
1/4 teaspoon of salt
2 tablespoons of unsalted butter
1/2 cup of milk or 1 teaspoon of milk powder

Directions:
1.  Prepare the water.  Boil the water, then turn down the fire.  Add two bags of tea in the water and boil again for a couple of minutes.  Take the tea bags out.

2.  Prepare the tea.  Pour the tea, salt, butter and milk into a blender.  Blend the mixture for two or three minutes.  Serve immediately.

*     *     *

In the end, my challenge to prepare a Tibetan meal was a success.  I was able to prepare the Sha Momo, and, they were very delicious.  I have to admit that I deviated a little from the recipe, especially when it came to assembling the momos, because I found it easier to prepare the momos placing them on the flat surface rather than stuffing and sealing them in my hands.  I also think I could have rolled out the skins a little more because the sides on a few were perhaps a little too thick. Still, for a rookie, I think I did a great job.

As for the rest of the meal, it was also an outstanding success.  The Sepen was a great condiment for the Sha Momo, as the heat from the chilies enhanced the flavor of the meat, garlic, and ginger flavors in the filling of the dumpling.  The Po Cha offered a smooth, milky escape from the heat of the Sepen.  It is the perfect beverage for the meal because, after cooling the heat from the chiles, the Po Cha allows the diner to start the process all over again.  (I should add that I found a recipe for a Tibetan rice beer, but, I did not have enough time to make it. That will have to wait for another day and another post.)

Notwithstanding my own personal critiques, I still think I successfully completed the challenge.  I now turn my attention to the next chapter of my culinary adventures, beginning with my 21st challenge, which will require me to make a main course from the cuisine of .... 

ENJOY!