Showing posts with label Parsley. Show all posts

Saturday, August 23, 2025

Poulet Basquaise

"The extent to which you can walk in someone else's shoes or at least eat their food, it's a plus for everyone." 
-- Anthony Bourdain

Although I have always been fascinated by other countries and other cultures, in many respects, Anthony Bourdain has been the one to introduce me to someone else's food. Whether it was No Reservations or Parts Unknown, I would watch intently as Bourdain traveled around the world and communed with people at a table eating food. It is one of the most basic ways to achieve a mutual understanding. 

One of the many places that Anthony visited was Basque country, a region that straddles both Spain and France. It was a place that returned to again and again. The reason, as he described it, was "my love for the Basque, for Basque culture, for my Basque friends, is absolute." If a region, its people and its culture can strike a feeling like that in Anthony Bourdain, then an exploration is a must. 

I have previously prepared dishes from Basque country, but mostly focusing on that part that lies within Spain. I wanted to cross the border into France, to learn more about the Basque who live in that country. Anthony Bourdain's recipe for Poulet Basquaise provided that opportunity. 

The dish, Poulet Basquaise, is said to have originated from the Soule province of southwestern France, which is deep in the Basque country. The original recipe called for creating a sauce from bread and vegetables; however, it evolved over time to require the use of a piperade, which is base of tomato, onion and bell pepper. The dish also features the espellete, a pepper grown in the region (but which can be hard to find elsewhere). While the use of espellete is a must in Basque cooking, adequate substitutes include paprika or, if you would like a little more heat, Aleppo pepper. The Basque are also known for their wines, which can sometimes be hard to find as well. If you cannot find a Basque white wine, an adequate substitute is Picpoul de Pinet, a wine that comes from the neighboring French region of Languedoc. (I used that wine because it is more available and, as an added bonus, reasonably priced.)

When one prepares a dish like this, it transports them to a kitchen of a house in a small village in Soule. A dish that brings together local produce, a chicken from a nearby farm or market, some wine in the house, and herbs from the garden to produce a dish that would be the centerpiece of the family dinner. Basque cuisine features heavily local ingredients, influenced by French cuisine more than Spanish cuisine. It evolved over time, as evidenced by the tomatoes and peppers in the piperade. But, just as French cuisine has influenced Basque cuisine, the reverse is also true, as this particular dish is not just popular in Basque country, but in other areas of France as well. 

The exploration will continue, both in Basque country and elsewhere. Stay tuned....

POULET BASQUAISE

Recipe from Food & Wine

Serves 4

Ingredients:

  • 1 whole chicken, cut into 8 pieces
  • Salt
  • Pepper
  • Pinch of cayenne pepper or piment d'Espelette
  • 2 tablespoons olive oil
  • 1 tablespoon butter
  • 2 red bell peppers, thinly sliced
  • 2 green bell peppers, thinly slice
  • 1 onion, thinly sliced
  • 1 can (16 ounces) Italian plum tomatoes
  • 1/2 cup white wine
  • 1 cup water
  • 1/2 cub chicken bouillon or 1/2 cup light chicken broth or stock
  • 3 sprigs of flat parsley, finely chopped
  • Rice pilaf, for serving

Directions:

1. Prepare the chicken. Season the chicken all over with salt, pepper and the cayenne pepper. Heat the oil in a large pot or Dutch oven over medium high heat, about 2 minutes. When the oil is hot, add the butter. When the butter has melted and the foam has subsided, add the chickens, skin side down and brown on that side only, about 5 minutes. Remove the chicken and set aside on the plate. 

2. Saute the vegetables. Add the peppers and onion to the pot and reduce the heat to medium low. Cook for about 10 minutes, then add the tomatoes and cook until the liquid is reduced by half. Stir in the wine, scraping to get up the good stuff. Cook until the wine is reduced by half, then add the water and bouillon cube or broth. Return the chicken to the pot, making sure to add all the juices on the plate. Cover the pot and simmer on low heat for about 25 minutes. 

3. Finish the dish. Transfer the chicken to a platter. Crank up the heat to high and boil the sauce until it has thickened and reduced, about 5 minutes. Season with salt and pepper and add the parsley. Pour the sauce over the chicken and serve with rice pilaf. 

PEACE.

Saturday, March 8, 2025

Arrachera Verde

My parents bought me Bricia Lopez's Asada, The Art of Mexican Style Cooking for my birthday. It is a cookbook that I have wanted for some time. I wanted to learn more about Mexican cooking, as well as to do more grilling and smoking of meats, seafood and vegetables. As I read the cookbook, I began to make mental lists of the recipes that I wanted to make. One of those recipes is Arrachera Verde. 

The name translates to green skirt steak, which raises a question and provides a nod to its preparation. First, the question is around the meat. While arrachera may mean "skirt steak," the recipe calls for flap steak. That latter is also known as bavette, a thin and chewy cut of meat that is very popular in France, Argentina and Uruguay.  However, I have found that flap steak is not very common or available, at least around where I live. So, I had to look for a substitute, which led me back to skirt steak. Flank steak is also a workable substitute. Both skirt steak and flank steak share many characteristics with flap steak, being thinner cuts, as well as more fibrous and chewy.

The nod goes to the marinade. Perhaps the most green of the marinades is chimichurri. Indeed, Bricia Lopez notes, Arrachera Verde utilizes a marinade that is inspired by chimichurri. The recipe calls for a lot of herbs -- basil, mint, parsley and oregano -- for the marinade. Other classic chimichurri ingredients, like garlic and olive oil, help to round out the marinade. As the photo to the right shows,  the marinade does look a lot like a chimichurri.

The one thing that I like about the marinade is that the recipe says that only thirty (30) minutes are needed before the meat is ready for the grill. (Obviously, one can marinate the meat overnight, but the fact that a short marinade period raises a question for me as to whether a long period is necessary - that may have to await another post.) More importantly, the short marinating period makes the recipe something that can be made as dinner on a busy weekday.

While this blog readily illustrates that I have made quite a few chimichurri recipes over the years, I have to admit that I have rarely made recipes that use flap steak, skirt steak or flank steak. That is another reason why I wanted to make this recipe. I wanted to use a cut of meat that has not been a regular part of my repertoire.

This recipe also led me to another recipe, Salsa de Pina Tatemada. This recipe takes a salsa two ways that are different. First, it incorporates grilled ingredients, like grilled garlic and red onions. Second, it incorporates pineapple, which I have to say I don't usually use when making salsas. But, this salsa really worked and it is amazing with the grilled skirt steak.

One last note, Arrachera Verde with Salsa de Pina Tatemada is best served with corn tortillas. That seems, at least for me, to take me to what asado really is in Mexico.

ARRACHERA VERDE

Recipe from B. Lopez, Asada at 74

Serves 4

Ingredients:

  • 1 cup loosely packed basil leaves
  • 1 cup loosely packed fresh mint
  • 1 cup loosely packed fresh parsley
  • 1/4 cup fresh oregano leaves
  • 2 Fresno chiles
  • 3 large cloves garlic, peeled
  • 1 lemon, zested and juiced
  • 1/4 cup olive oil
  • 1 teaspoon citrus vinegar
  • 2 tablespoons sea salt
  • 2 pounds flap steak
  • Warm tortillas, for serving
  • Salsa de Pina Tatemada, for serving

Directions:

1. Marinate the steak. In a food processor, add the basil, mint, parsley, oregano, chiles, garlic, lemon zest and juice, olive oil, vinegar and salt. Pulse until a smooth paste forms.  Pat the steak dry with paper towels and place it in a large bowl. Rub the paste mixture all over the meat. Cover and refrigerate for at least 30 minutes or overnight.

2. Prepare to grill. Remove the meat from the refrigerator to allow it to reach room temperature before grilling if possible. Start a charcoal or gas grill. The gas should be set to high. If using a pellet grill, preheat your grill to 450 degrees Fahrenheit for at least 15 minutes. If using charcoal, the coals should be red but entirely covered with gray ash.

3. Grill the steak. Remove the meat from the marinade and put it on the grill directly over the fire. Close the lid and cook, turning once, about 4 to 5 minutes on each side. Transfer the meat to a cutting board and let rest for 5 minutes. 

4. Finish the dish. Slice the meat against the grain. Serve with warm tortillas and the salsa. 

PEACE.

Saturday, February 22, 2025

Salsa de Pina Tatemada

Many towns are known from something or someone. When it comes to Loma Bonita, a town of about 41,000 people in Mexican State of Oaxaca, that something is the pineapple. Indeed, Loma Bonita is often referred to as the Pineapple Capital of the World.

The story of how Loma Bonita became that capital involves a yanqui named Frank Peters. Frank arrived in the area in 1906, working for an Illinois doctor who purchased land there. Frank later bought some land -- nearly 200 acres -- in the area for himself. Frank then planted pineapples on his land. And, by 1910, he was harvesting 20,000 pineapples per year. His success led to the purchase of more land (eventually reaching 7,400 acres) and, of course, many more pineapples. Things eventually went downhill for Frank Peters. The Mexican government seized most of his land in 1934.

While history may have been written about yanquis bringing pineapples to Oaxaca or Loma Bonita, one white man could not harvest all those pineapples. By 1952, the area was producing 40,000 to 60,000 tons of pineapples, which supported four nearby canneries. The focus primarily rests upon the growers, but it is the laborers whose work ensures that pineapple after pineapple, ton after ton, make it to the canneries and beyond. Those laborers are just as deserving of recognition for making the area, with Loma Bonita at its center, one of the most important pineapple exporting regions in Mexico. 

In Oaxaca, the pineapple is often used to prepare salsas. Those salsas are often cruda, incorporating raw pineapple, along with other raw ingredients like tomatillos. I came across a recipe from Salsa de Pina Tatamada when I made Arrachera Verde, which is a recipe for grilled flap steak (or, in my case, skirt steak). This salsa may be considered a variation of the traditional Oaxacan pina salsas in that the pineapples -- along with all of the other ingredients are grilled. 

I am a big fan of pineapple, but usually raw. However, I have to say that the use of grilled pineapple really worked in this recipe, because the heat brings out the sweetness and tames the citrus notes. That sweetness helps to balance the chiles in the salsa.

SALSA DE PINA TATEMADA

Recipe from B. Lopez, Asada at 195

Makes 2 cups

Ingredients:

  • 3 cloves garlic, peeled
  • 1 large red onion, minced
  • 1 medium pineapple, cored and cut into 3/4 inch slices
  • 2 habanero chiles
  • 2 tablespoons fresh lime juice
  • 1 teaspoon sea salt, plus more as needed
  • 1/4 cup olive oil
  • 1/2 cup flat leaf parsley, minced

Directions:

1. Start the grill. Start a charcoal or gas grill. Gas should be set to high. If using a pellet grill, preheat the grill to 425 degrees Fahrenheit for at least 15 minutes. If using charcoal, the coals should be red but entirely covered with gray ash.  

2. Grill the garlic and onion. Wrap the garlic and onion in separate aluminum foil packets. Place them on the grill until the garlic and onion have softened, about 15 to 20 minutes. 

3. Grill the pineapple and habanero peppers. Meanwhile, place the pineapple slices and habaneros directly on the grill. Cook until the pineapple has charred evenly on both sides and the skin of the habaneros has charred evenly too, about 5 to 10 minutes. Turn every 2 to 4 minutes for even cooking. When charred, remove everything from the grill.

4. Prepare the salsa. On a cutting board, chop the grilled pineapple into 1/4 inch cubes. In a serving bowl, mix the pineapple with the grilled onion and lime juice. Reserve. Add salt and garlic to a molcajete and grind until the garlic has dissolved into a paste. Next, slowly incorporate the habaneros and the olive oil, continuing to grind until you are left with a paste.  

5. Finish the dish. Add the habanero paste to the bowl of pineapple and onion, add the parsley, and stir to combine. Taste for salt, adding more as needed and serve. 

PEACE.

Saturday, January 25, 2025

Molho a Campanha

The "rule of three" takes many forms, including as a literary device. In this particular form, the rule represents an understanding that people better remember and understand concepts when presented in groups of three. It is the pattern -- and it takes at least three of something to create one -- that fixates itself in the human brain.  If one pays attention to the numbers in any method of communication, then they will be surprised how often words and concepts appear in groups of three. 

In many respects, food is a form of communication. The term, communication, can be defined (ironically) as a duality: the process by which we understand the world and the means (verbal or nonverbal) by which we convey that understanding to others. Food thus becomes a way that we communicate amongst ourselves; and, in doing so, it is one of the fundamental means by which we create cultures, whether through personal identity or group association. 

These concepts unfolded before me as I was preparing molho a campanha, which is basically a vinaigrette sauce prepared to accompany grilled dishes in Brazil. While the word molho translates from Portuguese to English as a "sauce," what I was preparing looked more like a salsa. The ingredients -- tomatoes, onions, and peppers -- confirmed that fact. Those three ingredients got me thinking about all of the other recipes that I have made from around the world where tomatoes, onions, and peppers (or chiles) constitute the basis of the dish. Indeed, if one looked at a basic pico de gallo (or salsa) from Mexico, its core ingredients are tomatoes, onions and peppers. Sometimes, they are the foundation of the dish, followed by the addition of other ingredients that results in a larger presentation. Sometimes, they are the dish, as is the case with pico de gallo or this molho. 

As with any means of communication, it can be used to bring people together, but it can also be used to differentiate. For example, a pico de gallo in Mexico is typically prepared with the addition of a citrus juice, such as lime juice; however, the molho a campanha is prepared with vinegar. The vinegar is better suited for flavoring and tenderizing grilled meats, such as beef, chicken and even fish (as the recipe below will attest). Such differences are minor, and, to most people, go unnoticed. They are more likely to note, as I did, the use of three -- tomatoes, onions and peppers -- and its similarity with other dishes that they have eaten. And, they are more likely to think about other groups of three, which, for me, gets me thinking about sofritos, mirepoix and the Cajun/Creole "holy trinity." All of those may be posts for a later date.

MOLHO A CAMPANHA

Recipe from Serious Eats

Serves 4 

Ingredients:

  • 1 large tomato, cored, seeded and cut into 1/4 inch dice (about 3/4 cup)
  • Kosher salt
  • 1/2 red onion, diced (about 1 cup)
  • 1/2 green bell pepper, stemmed, seeded and diced (about 3/4 cup)
  • 1/2 red bell pepper, stemmed, seeded and diced (about 3/4 cup)
  • 2 tablespoons chopped cilantro leaves and tender stems
  • 2 tablespoons chopped flat-leaf parsley leaves and tender stems
  • 2 tablespoons white wine vinegar
  • 1 tablespoon extra-virgin olive oil, plus more for oiling fish
  • Freshly ground black pepper
  • 2 pounds whole fish, such as branzino, mackerel or trout, scaled or gutted

Directions:

1. Prepare the tomatoes. Season tomatoes with 1 teaspoon of salt and toss to combine. Transfer to a fine mesh strainer or colander set in a bowl to allow to drain for 20 to 30 minutes. Discard liquid.

2. Prepare molho. In a medium bowl, stir together tomatoes, red onion, green pepper, red pepper, cilantro, parsley, vinegar and olive oil. Season with salt and pepper. Let molho stand for at least 30 minutes, or refrigerate for up to 24 hours. Return to room temperature before serving.

3. Prepare the grill. About 30 minutes before grilling, remove fish from refrigerator and let come to room temperature. Light one chimney full of charcoal. When all the charcoal is lit and covered with gray ash, pour out and spread coals evenly over half of coal grate. Alternatively set half of the burners of a gas grill to high heat. Set cooking grate in place. Cover and grill and allow to preheat for 5 minutes. Clean and oil the grilling grate.

4.  Prepare the fish. Thoroughly pat fish dry with paper towels. Season inside and out with salt and pepper. Rub fish all over with olive oil. 

5. Grill the fish. Set fish over hot side of grill and cook until bottom sides are browned, about 5 minutes. Using a carving fork (the tines of which can slide down between the grill grate) or a thin metal spatula, carefully attempt to lift fish from below; if it resists, allow to cook for 1 more minute and try again. When fish lifts easily from grill, turn onto other side and cook until an instant-read thermometer inserted into the thickest part registers 135 degrees Fahrenheit, about 5 minutes longer. If the skin begins to char before the fish is cooked through, transfer fish to the cooler side of the grill to finish cooking. Let the fish rest for 5 minutes.

6. Finish the dish. Serve the fish with the molho spooned over top.

ENJOY!

Wednesday, January 1, 2025

Around the World in 80 Dishes: Colombia

"In Colombian cuisine, every dish tells a story."

-- Harry Sasson (Colombian chef)

This part of my journey around the world in eighty (80) dishes takes me to the South American country of Colombia. The above quote from one of the most famous Colombian chefs, Harry Sasson, represents my starting point. It is an acknowledgement that, in Colombia, cuisine represents more than just food on a plate. Instead, to borrow someone else's words, it is "a narrative of tradition, culture and love passed down the generations." I can't believe a better way to start a culinary adventure.

This personal culinary challenge presents an opportunity to learn about some of those stories. The thing is, there are a lot of them to tell. Colombia is in many ways a "melting pot," in which many cultures -- both indigenous and non-indigenous -- have flourished in a range of environments, from the coastlines of the Caribbean Sea and the Pacific Ocean to the heights of the Andes Mountains and back down into the marshlands of the Orinoquia region or the forests of the Amazon. This wide range of people and places gives rise to an equally diverse set of cuisines.

For some background, Colombia is generally divided into six regions. Those regions are Caribe, Pacifico, Andres, Orinoquia, Amazonia, and Insular. The map to the right shows each of those regions. 

At first, I wanted to tell the stories of the indigenous people of Colombia, such as the Guambiano and Muisca peoples. That would take me to the Andes region of Colombia. Thoughts of stories about corn, potatoes, quinoa and beans started running through my mind. I have to admit that I encountered some difficulty in finding indigenous recipes that I could use to prepare the dishes. 

Given this difficulty, I decided to shift my focus from inland to the coastal regions. I decided to research and learn about both of Colombia's coastal regions: Caribe and Pacifico. (Perhaps also the Insular region, which happens to consist of islands in both the Caribbean Sea and the Pacific Ocean.) So, basically, this post will try to tell Colombian stories around seafood. 

APPETIZER

I decided to start with perhaps one of the lesser told stories of Colombia. It's neighbors, Ecuador and Peru, are well known for their tuna fisheries. Indeed, one city in Ecuador -- Manta -- boasts of the name, Tuna Capital of the World, because it has some of the highest tuna landings of any port on the Pacific Ocean. Much of the catch is yellowfin or skipjack tuna, with some bluefin tuna. Yet, Ecuador shares the Pacific coastline with Colombia. The thing is that Colombia's fishery is far less developed than its neighbors. For one thing, there are far less ports, and even less ports of substantial size, along the Pacific Coastline in Colombia. 

Yet, the waters boast of one of the more notable fish migrations: millions of sardines make a journey down the Pacific coastline from Panama south along Colombia.  As one would expect, that sizeable migration would attract the attention of others, namely predators. One of those predators happens to be the yellowfin tuna. The yellowfin provide a sustainable fishery for Colombians. As Matt Harris described the experience, being on the waters off of Colombia looking to fish yellowfin tuna: 

We scanned the water expectantly, rods at the ready and line stripped on the deck. Just as Jose predicted, we didn't have to wait long. Suddenly they were all around. Yellowfin. Everywhere. The feeding activity was astonishing. Everywhere we looked there were myriad busts as if dozens of hand-grenades were being thrown around the boat. The water was literally churning with activity, as hundreds of tuna fizzed through the waves like supercharged torpedoes, slicing through the bait-ball in a frenetic blizzard of mayhem and slaughter.

I strongly recommend reading the entire article, which was published in the magazine In the Loop, and which was very interesting. 

This story provides the opening to my first dish, an appetizer that features yellowfin tuna. The method of preparation is not so much Colombian, but it definitely draws its inspiration from the cuisine. The dish is Tomates Rellenos de Atun, or Stuffed Tomatoes with Tuna. 

TOMATES RELLENOS DE ATUN

Recipe from My Colombian Recipes

Serves 4

Ingredients:

  • 1-2 cans (6 ounces of tuna)
  • 1/8 cup chopped onion (red or yellow)
  • 1/8 cup chopped red bell pepper
  • 1/8 teaspoon salt
  • 1/8 teaspoon freshly ground black pepper
  • 1/2 tablespoon lime juice
  • 1/4 cup mayonnaise
  • 1/2 cup mixed corn, diced carrots, peas
  • 1 tablespoon chopped parsley, plus more for garnish
  • 4 medium sized tomatoes, cored and seeded
  • Lettuce leaves, for serving (optional)

Directions:

1. Prepare the filling. In a medium bowl, combine all of the ingredients, except the tomatoes and lettuce. Cover and chill for 1 hour.

2. Finish the dish. To serve, line a large plate with lettuce leaves, spoon tuna salad into tomatoes and garnish with chopped parsley. Arrange the tomatoes on top of the lettuce leaves and serve. 

MAIN COURSE

While I could have stayed along the Pacifico region of Colombia for my culinary challenge, I decided to "travel" to the other coastline, along the Caribbean Sea. This coastline is dotted with port cities like Cartagena, Barranquilla, and Santa Marta. The challenge requires me to prepare Cazuela de Mariscos, a dish with perhaps a few stories. One of them would take me across the ocean to Spain, where seafood stews abound in a country with 3,084 miles (4,964 kilometers) or coastline. By contrast, Colombia has only 1,800 miles (2,900 kilometers). 

However, I want to stay in Colombia, so I look for stories in places like Cartagena or Santa Marta. In the latter city, there is a place where people talk about some of the best seafood stews or casseroles around.  It is Plaza San Francisco. Vendors sell the stews in pots. But, the story actually begins early in the morning, when they gather the ingredients together at their homes, prepare the dish, and cook it over a wood fire. When the stew or casserole is ready, then they head to the plaza to sell their food to locals and tourists alike. 

A cazuela de mariscos is prepared with seafood that is local to the area, although that typically includes clams, shrimp and white fish. The recipe typically calls for the use of coconut milk and, in some cases, heavy cream. I decided to skip on the heavy cream for health reasons, but I saw that other recipes incorporated seafood stock and/or water. So, I used some of the stock from steaming the clams, along with some water. 

CAZUELA DE MARISCOS

Recipe adapated from My Colombian Recipes and Travel Food Atlas

Serves 4

Ingredients:

  • 1 tablespoon butter
  • 1 tablespoon olive oil
  • 1/2 cup chopped green pepper
  • 1/2 cup chopped red bell pepper
  • 1 cup chopped onion
  • 2 fresh garlic cloves minced
  • 1 cup grated carrot
  • 1/2 teaspoon paprika
  • 1 can (13.5 ounces) coconut milk
  • 1/2 cup white wine
  • 4 cups heavy cream (I substituted clam stock and water)
  • 2 pounds of jumbo shrimp, peeled and deveined
  • 12 littleneck clams, scrubbed
  • 2 pounds white fish, cut into 1 inch pieces
  • 1 tablespoon fresh parsley or cilantro
  • 1 tablespoon tomato paste

Directions:

1. Sauté the vegetables. In a large saucepan over medium heat, warm the olive oil and butter. Add the garlic, red pepper, garlic, green pepper and carrots and sauté, until tender and translucent, about 10 minutes, stirring occasionally. Add salt and pepper

2. Continue to prepare the stew. Add the cream and coconut milk. Bring to a boil. Add the seafood and cover, reduce the heat and cook about 2 minutes until the clams open. Remove from the heat, discard any open shells. 

3. Finish the dish. Add the wine and tomato paste, simmer for about 20 minutes. Garnish with fresh cilantro or parsley. 

*    *    *

It has definitely been a while since I did my last personal culinary challenge (which was The Gambia). This particular challenge went well; but more importantly, as much as I enjoyed preparing this meal, I also enjoyed researching the cuisine of Colombia. I think that I will be paying future "visits" to this country, so that I can try to prepare foods from other regions, like the Andes and the Amazon. Until then ...

PEACE.

Saturday, November 2, 2024

Lahmajoun (Lahmacun/Lahmajo)

This post has been a long time coming. The spark of inspiration goes back years, perhaps more than a decade. I was sitting at home watching Anthony Bourdain eating with someone at a small restaurant in Turkey, most likely Istanbul. He and his guest were eating a flatbread that had a layer of minced lamb and vegetables. Tony identified the flatbread as "lahmacun." Ever since that day, I have wanted to make that flatbread. However, a lot of days went by. Then the years passed. I still wanted to make this recipe, but I made a lot of  other ones instead (as this blog will attest). 

Perhaps the one obstacle in my mind was making the dough. Sure, I make pasta, but I don't really do a lot of baking or working with dough. Thoughts of how long it would take to make the dough, or what would happen if I screwed up the dough, became difficult to overcome. However, I recently decided that, on some time off from work, I would take the time to make the dough. Then other obstacles got in the way. It seemed that more days, weeks and years would go by without me making this flatbread. That was, until I had a batch of thawed pizza dough in front of me. That batch served as the springboard with which I would finally make lahmacun.

Or is it lahmajoun or lahmajo? There is a serious debate in which these two words -- lahmacun and lahmajo -- are at the very heart.  The debate asks the question of where did this flatbread originate? Was it Turkey, where it is referred to as lahmacun? Or, was it Armenia, where it is referred to as lahmajoun.

As it turns out, the answer requires some explanation. The original name derives from Armenian, in which lahmajo means "meat with dough." One account traces the dish back to the city of Aleppo, Syria, where Armenian merchants settled from areas such as Aintab, Urha and Cilicia. The Armenian community in Aleppo began preparing the dish, and local cooks offered it to customers as "lahmajoun." The dish became very popular throughout Syria and Lebanon (where it is called lahm bi ajin), as well as in Turkey, where it took on the name lahmacun

Of course, those in Turkey disagree with the above account. The Turkish version traces the flatbread's origin to the southern Turkish cities of Urfa and Gaziantep. (It should be noted that there were significant communities of Armenians who lived in both cities until the end of the nineteenth century.)

Setting aside the dispute over its origin, I decided to make the recipe for myself. The batch of pizza dough made the preparation of this dish a lot easier for me. I could just focus on preparing the spread. I relied upon a recipe from the World Central Kitchen cookbook, which came from a Lebanese chef (which, for this reason, I will refer to it as lahmajoun). I made only one change to the filling. Instead of using a mixture of half beef and half lamb, I decided to use all lamb. There were two reasons. First, I think lamb is more traditional (although there could be some debate about that). Second, ground lamb comes in one-pound packages and I did not want to have to buy a separate package of ground beef. 

In the end, I think that this was a very good first effort at making lahmajoun. I think when I return to this recipe, I will try some of the regional variations, as well as incorporate other ingredients. Hopefully, it won't take a decade for that to happen.

LAHMAJOUN (LAHMACUN/LAHMAJO)

Recipe adapted from Jose Andres, World Central Kitchen Cookbook, page 85

Serves 4-6

Ingredients (for the topping):

  • 1 batch store-bought, fresh pizza dough
  • 16 ounces ground lamb
  • 1 tablespoon tomato paste
  • 1 tablespoon ground allspice
  • 1 tablespoon kosher salt
  • 1 1/2 teaspoons Armenian red pepper paste or finely chopped roasted red peppers
  • 1 2/3 teaspoon sweet paprika
  • 1 pound plum tomatoes diced
  • 1 medium red onion, chopped
  • 1 small red bell pepper, chopped
  • 1/2 cup chopped fresh flat-leaf parsley
  • 1 medium garlic clove

Directions:

1. Make the topping. In a medium bowl, combine the beef, lamb, tomato paste, allspice, salt, red pepper paste, and paprika. Gently mix in the diced tomatoes, onions, bell peppers, parsley and garlic until well distributed - avoid overmixing. 

2. Prepare the oven. Heat the oven to the highest temperature, preferably with a pizza stone or foil lined sheet pan inside. 

3. Prepare the flatbread. On a lightly floured surface, divide the dough into 12 pieces (to do this, cut the ball of dough in half, then half again, then divide each quarter into 3 pieces). Roll each piece into a round about 8 inches in diameter and about 1/8 inch thick. Put 3 to 4 tablespoons of filling in the center of the round and use a spoon to spread it out nearly to the edge, leaving 1/4 to 1/2 inch border all around. 

4. Bake the flatbread. Depending on the size of the stone or baking sheet, bake the lahmajoun in batches until they start to brown but the dough is still soft enough to fold over - the meat layer will be completely cooked by the time the dough is done. There are no rules for the time and temperature. The hotter the oven and stone, the shorter the baking time and the tastier the lahmajoun. In a home oven that can reach 500 degrees Fahrenheit, it should take 6 to 8 minutes. While the flatbread is baking, you can grill long pieces of eggplant over an open flame until smoky, and season with sea salt.

5. Finish the dish. Serve warm. Lahmajoun are served folded over, sometimes with a squeeze of lemon, a yogurt dip or the traditional Armenian Ayran yogurt.  

PEACE.

Saturday, October 5, 2024

St. Helena Fish Cakes

If you find yourself in the middle of the Atlantic Ocean in the southern hemisphere, you may find yourself very far away and very close at the same time. You will most likely be far away from any significant land mass, as both South American and Africa are separated by thousands of miles of ocean. But, you may be very close to the island of St. Helena (and that is a big maybe).

St. Helena sits in the middle of the Atlantic Ocean in the Southern Hemisphere. It is over 1,200 miles from the African coast (where one would be standing in Namibia or Angola) and 2,500 miles from the South American coast (where one would be standing in Brazil). The island is figuratively and literally in the middle of nowhere. 

That isolation proved helpful when it came to banishing a certain Le Petit Caporal (i.e., Napoleon) in 1815 after he escaped his first imprisonment on the island of Elba. But, there have been people living on that ten mile by five mile long island since the late seventeenth century. Recent statistics place the number of people calling the island their home at over 4,400.  

Saints (source: St. Helena Info)
The people of St. Helena -- who refer to themselves as "Saints" -- descended from Europeans, who were mostly planters, government workers and ex-soldiers. Given St. Helena was part of the British empire, there are also people of Chinese ancestry, whose family members came to the island as workers, or of other Asian or African ancestry, whose family members were forcibly brought to the island as slaves. Together, the Saints have developed their own identity, culture and cuisine.

The cornerstone of Saint cuisine is the Fish Cake. Given St. Helena is an island surrounded by thousands of miles of ocean, one could expect that fish would have a prominent role in both the cuisine. The most prevalent fish in the Saint diet may well be yellowfin tuna. Saint cooks take fresh tuna, shred it down with a knife, and then prepare the fish cakes with mashed potatoes, onions, parsley, thyme and bacon. But, there is one ingredient that is just as important to the fish cake as the fish ... the chile. A Saint Fish Cake must have bite (that is, in the Saint vernacular, it must be spicy). Most recipes call for a "chile" or "chilli," but, depending upon the bite you are looking for, I would go with a jalapeno pepper (for less of a bite) or a serrano pepper (for more of a bite). If a serrano is not enough, there is alway the Scotch Bonnet or Habanero pepper.

In the end, the fish cake was very tasty, but I have to work on my preparation skills with this dish. I am used to making crabcakes, whose starch usually involves crackers. The use of mashed potato was part of the binding agent was new for me. I had some difficulty keeping the fish cakes together during the cooking process, but that can be improved when I make this dish again. 

Until then, I can just sit back and think about a short banished emperor sitting at a table on an island in the middle of nowhere. According to historical records, it took a while for Napoleon to get used to his new surroundings. Records published in 1824, which was after Napoleon's death in 1821, recounted that "fresh beef was so precious as to have occasioned restrictions upon its consumption." While fresh beef may have been hard to come by, one could picture Napoleon staring down at a table of full of fish cakes. And, thanks to artificial intelligence, we can now see a relatively close depiction of that fictional moment for ourselves. 

If you are as interested about St. Helena's island as I am, check out St. Helena Island Info at this website

ST. HELENA FISH CAKES

Recipe from Aberdeen News

Serves 4

Ingredients:

  • 1/2 pound Russet potatoes, peeled, quartered
  • 1/2 pound fresh tuna
  • Mild oil, such as canola
  • 1 small onion, finely chopped
  • 1 small clove of garlic, finely chopped
  • 1 slice bacon, diced
  • 1 tablespoon finely chopped fresh parsley
  • 1 teaspoon finely chopped fresh thyme
  • 1 fresh serrano chile, finely chopped
  • 1/4 teaspoon salt
  • 1/4 teaspoon black pepper
  • 1/4 teaspoon paprika
  • 1/4 teaspoon cayenne
  • 1 egg, lightly beaten
  • 1 lemon, zested.

Directions:

1. Boil the potato. Settle potato chunks in a large pot of salted water. Bring to a boil; cook until tender (poke one with a skewer, it should be easy work), about 18 minutes. Press potatoes through a ricer into a large bowl or smash with a potato smasher. Let cool. 

2. Prepare the tuna.  Use a sharp, heavy knife to finely chop the tuna (a little coarser than ground beef.). Use a fork to gently mix into the cooled potato. 

3. Saute remaining ingredients (except egg and lemon zest). Pour 1 tablespoon of oil into a large skillet. Heat over medium. Scrape in onion, garlic, bacon, parsley, thyme, chile and spices. Cook, stirring, until everything looks brown and tasty, about 8 minutes. Scrape ono a plate to cool. Wipe out skillet. 

4. Prepare the fish cakes. Scrape the cooled onion mix onto the fish and potatoes. Pour in egg, scatter on zest. Mix gently. Shape 8 pucks about 3/4 inch thick and 2 1/2 inches in diameter. Fry pucks until brown, about 2 to 3 minutes per side. Drain on paper towels.

PEACE.

Friday, March 8, 2024

Arayes

"Food can bring people together in a way nothing else could." 

-- Yottam Ottolenghi.

There is a reason why this post, which focuses on an Arabic dish, begins with a quote from an Israeli-born, British chef. The name of this dish, arayes, is the plural word for "bride" in Arabic. Some say the name is a reference to the "marriage" of the meat mixture with pita bread. An alternate explanation, offered by cookbook author Reem Kassis, is that "the culinary world of the Levant draws upon this poetic imagery." The culinary imagery painted by the combination of crispy pita bread and the rich meat mixture, results in a dish that is as beautiful as a bride.

The key to arayes is balance. One needs the right pita bread. (I realized this fact during the process of making this dish, because I think the bread I used was too thin and broke easily as I tried to stuff the pita.) There must also be an equilibrium between the bread and the meat. In doing research for this post, I found that there were a range of arayes, some thickly stuffed with meat and others that were more thinly stuffed. From what I could tell, the more thinly stuffed arayes are the more traditional way to prepare the dish. This is a point that draws support from Reem Kassis, who described arayes as "pita bread spread with a thin layer of spiced meat...."  

I prepared arayes for a reason. I cooked this dish and wrote this post in the midst of the Israel-Hamas war. That war began with unspeakable horrors on October 7, 2023, when Hamas fighters entered into Israel and carried out war crimes against innocent Israeli citizens. The war has continued, day after day, with the Israeli Defense Forces carrying out war crimes against innocent Palestinian civilians across the Gaza Strip. One of the worst crimes committed by the IDF involves not simply restricting food and aid into the Gaza Strip, which is starving the Palestinians, but destroying the food systems in the strip.  Not only does starvation present clear and present dangers right now, but it will also have long lasting effects upon the Palestinian people. The short term effects include muscle wasting, stunted growth, nd medical issues that include sepsis, meningitis, diarrhea and severe anemia. Longer term issues include cardiovascular disease, hypertension and metabolic disorders. Medical issues may even carry into future generations when pregnant women are subject to starvation, leading to medical issues for the children after birth.

This reality is very distressing to me. Food should never be used as a weapon, especially when it involves innocent civilians. To the contrary, food may very well be one of the most effective means of achieving peace. Food has the ability to create connections between groups of people, build relationships, and promote understanding.

Arayes provide an example of how we have more in common than we have in differences. There are many claims to the origin of this dish. Most of what I found traces those origins to Lebanon, but similar dishes (with as long of histories) can be found in neighboring Syria, Jordan and Egypt. Even the Palestinians lay claim to arayes. Yet, even with its Arabic roots, the dish has become very popular in Israel. The popularity began with a small restaurant known as M25, located in the Carmel Market of Tel Aviv. When the restaurant opened, it served basically three dishes: kebabs, minute steak and kebabs in pita. That latter dish became a version of arayes. Customers wanted a particular type of kebab in the pita, and the owner connected the description with arayes that he had in Nazareth, the largest Palestinian city in Israel. Eventually, M25 began to serve as many as 800 arayes per week. 

In the end, a simple dish demonstrates how much we have in common despite decades of division along religious, cultural and other lines. People of different faiths (Muslim, Christian and Judaism) and different cultures can come together to enjoy crispy, meat-filled pita breads. If they sit together long enough, they may find that they have more in common than what they have been told or led to believe. 

In fact, true peace will never come with a politician's words or a general's actions. It can only come when the people themselves come together, recognize what connects them and understand that those connections exceed what separates them. Food may not get us all the way there. But, it is a start. If people can gather around a proverbial table to share a meal, that is when discussions can begin. That could be the start. 

ARAYES

Recipe from Food & Wine

Serves 5

Ingredients:

  • 1/2 medium (about 8 ounces) yellow onion, chopped (about 2/3 cup)
  • 3 medium cloves garlic, chopped
  • 1 cup (about 3/4 ounces) loosely packed parsley leaves
  • 1 pound ground lamb or beef (lean) or 1/2 pound of each combined
  • 1 tablespoon tomato paste
  • 1 teaspoon smoked paprika
  • 1-2 teaspoons red chile paste, such as sambal oelek
  • 1 teaspoon black pepper
  • 1/2 teaspoon all spice, seven spice or Palestinian nine-spice
  • 1 1/2 teaspoons of kosher salt, plus 5/8 teaspoon divided
  • 5 6-inch pita bread rounds, halved crosswise
  • 2 tablespoons olive oil
  • Greek-style yogurt, for serving (optional)
  • Toum, for serving (optional)

Directions:

1.    Prepare the oven. Preheat an oven to 400 degrees Fahrenheit. Place a a broiler-safe wire rack in a baking sheet and set aside.

2.    Prepare the mixture. Place onion, garlic, and parsley in the bowl of a food processor and pulse until finely chopped into a rough puree, about 6 to 8 pulses, brushing down the sides of the bowl as needed. There should be about 2/3 cup of the onion mixture. Place in a medium mesh sieve set over a medium bowl. Press on the mixture to drain excess liquid. Discard the liquid. Combine the onion mixture and ground lamb (and/or beef) in a large bowl and mix until evenly combined. Add tomato paste, smoked paprika, red chile paste, pepper and allspice (or seven spice or nine spice) and 1 1/2 teaspoons of the salt and mix to combine. 

3.    Prepare the pitas. Spoon about 1/4 cup of the filling into each pita, spread and flatten so the filling is evenly distributed and reaches the edge of the pita. Brush some of the olive oil onto each side of the pita and sprinkle evenly with the remaining 5/8 teaspoon of salt. 

4.     Bake the pitas. Place the filled pitta halves onto the prepared baking sheet and bake on center rack until filing is cooked through and the pitas are crisp on each side, about 18 to 20 minutes, flipping the pitas halfway through cooking. If desired, turn the oven to broil and cook on each side until desired crispness, about 1 minute per side. Serve with yogurt or toum. 

PEACE.

Monday, January 1, 2024

A Chef Bolek Fondue

Fondue originated in Switzerland, most likely in the Valais region through which the Rhone River flows in southern Switzerland. The tradition emerged as Swiss farm families gathered around a hearth over which they melted hardened cheese in a pot called a caquelon. The family members would then dip pieces of stale bread into the cheese, which softened the bread and made it easier to eat. It was a way for these poor farming families to make the most out of what little they had. 

Although originating as a cucina povera dish, fondue made its way into cookbooks, with the first known written recipe dating back to 1699. That recipe was published in a cookbook under the recipe name of Kass mit Wein zu Kochen or "to cook cheese with wine."  Fondue even made its way into the cookbooks for the Swiss military. Over time, the farm family tradition would be elevated beyond as a national dish of Switzerland (or so the Schweizerische Kaseunion - or Swiss Cheese Union - wanted everyone to believe because it would lead to the sale of more cheese).  And, as the dish spread across the world, it would take on new preparations and new ingredients.

Nothing says Switzerland like an "envelope" of Lipton's Onion Soup Mix.

Indeed, the passage of time gave rise to other versions of fondue. One popular one is fondue au chocolat, which involves dipping those food bites (usually bread, cheese or fruit) in a pot of melted chocolate. To be sure, my kids love chocolate fondue because they love anything that has a nice, chocolate coating. Another version is known as fondue bourguignonne, also known as beef fondue. The cheese or chocolate is replaced with hot oil, which is perfect for dipping bite sized pieces of your favorite protein or, on occasion, a vegetable or mushroom. 

Apparently, a guitar is required for fondue.

It is this latter version of fondue that became part of my family's New Year's Eve tradition. We would gather around a pot of hot oil, which was also encircled with dishes containing raw pieces of beef, chicken, sausage, mushrooms, broccoli and other foods. We pierced each bite and dipped it into the oil, becoming our own cook for a few minutes. Over the years, it became clear that dipping a bunch of things in hot peanut oil is not necessarily the healthiest way to ring in the New Year. So the tradition evolved to using vegetable broth, which cooked the food without the added consequence of clogging an artery. 

Fast forward to today, my beautiful Angel suggested that we have a fondue to ring in the new year. After clarifying that cheese and chocolate would not be involved, the Chef Bolek began to emerge. Rather than unhealthy oil or plain vegetable broth, what if I made a court bouillon for the fondue pot? A court bouillon is a flavorful liquid that is often used to poach proteins, such as fish or seafood. It would provide a healthy alternative in which I could control the ingredients and, by extension, the flavors. I quickly found a good court bouillon recipe as a starting point. Then my mind started thinking about the sauces. 

The tradition in my family, as is the tradition typically for a fondue bourguignonne, would be to serve about three to four sauces as part of the meal. These sauces typically included a Béarnaise sauce, a Bordelaise sauce, and, if I recall correctly, a horseradish sauce. However, I wanted to take those sauces to the next level. I wanted to serve sauces from around the world. So, for a Chef Bolek Fondue, I drew upon my experience and made the following sauces: 

Argentinian Chimichurri: I recently completed the Around the World in 80 Dishes challenge for Argentina, which had me prepare chimichurri in two different ways. I decided to prepare one of those chimichurris, because the garlicky sauce goes well with beef, chicken and vegetables.

Catalan Romesco Sauce: This sauce goes well with just about any food, with the smoked paprika, almonds and sherry vinegar providing different flavors for the meal. I borrowed from a recipe that I prepared more than ten years ago, but I will post a new one in the near future.  

Sri Lankan Lunu Miris: An extremely fiery sambol with three chiles and freshly ground black pepper from the cuisine that curries everything, which is why I love Sri Lankan food. This sauce is really just for me; it is too spicy for everyone else. I will post the recipe in the near future. 

Vietnamese Nuoc Cham: I have spent a lot of time this year learning about Vietnamese cuisine. I have become a huge fan of nuoc cham because of how it balances the different flavor elements. I used this recipe in which I paired the sauce with raw oysters in place of a mignonette. 

With these sauces, one has a fondue Chef Bolek style. The recipe for the court bouillon is set forth below. 


COURT BOUILLON

Recipe from Rouxbe

Ingredients:

  • 5 cups cold water
  • 1 cup white wine
  • 2 ribs celery
  • 1 leek (white part only)
  • 1 small onion
  • 1 lemon
  • 1 bay leaf
  • 1 teaspoon whole peppercorns (white or black)
  • 2 teaspoons Kosher salt (or to taste)
  • 1 sprig fresh parsley

Directions:

Place the cold water and wine in a pot. Slice the celery into 1/8 inch slices. Cut the leek in half, wash, and thinly slice the white part. Dice the onion and add everything to the liquid. Cut the lemon and squeeze the juice into the liquid (keep the seeds out of the liquid). Add the bay leaf, peppercorns and parsley and bring to a simmer. Once the liquid comes to a simmer, turn off the heat. Cover with a lid and let steep for about 30 minutes. Strain the liquid and transfer to the fondue pot.  

Once the court bouillon is prepared, then it can be used for a fondue, with the sides served alongside all of the cut meats and vegetables. 

PEACE.

Friday, December 8, 2023

Around the World in 80 Dishes: Argentina

The posts that I love the most during my Around the World in 80 Dishes culinary challenge are those that involve cooking meat. I am an unabashed carnivore and, to this date, one of my favorite challenges involved Uruguay. I had to prepare Chivitos al Pan, a sandwich that could clog an artery on its own. 

I could truly feel at home in a large swath of South America - from Brazil to Uruguay and on to Argentina, where the cuisines are, to say the very least, meat-centric. For now, I will settle with my next personal culinary challenge, which requires me to make a main course from Argentina. 

The cuisine of Argentina actually begins with the indigenous people of the Andes, as well as the Guarani. I have already some experience with Guarani cuisine from my challenge involving neighboring Paraguay. These indigenous cultures contributed to Argentine cuisine through the use of potatoes, cassava, melons, peppers, squash, tomatoes, beans, quinoa and other native ingredients. These ingredients gave rise to dishes such aa, humita, which is made after milling maize, and cooking processes like curanto, a method used by the Mapuche to cook meat, vegetable or fruits over hot coals covered with linen or dry leaves.

The Spanish introduced cattle, goats and pigs during the colonial period, which became the foundation for the large cattle industry that has a prominent place in Argentine cuisine and culture. However, many of the cattle and horses escaped farms and ranches, finding independence in the countryside long before the people of what would become Argentina. 

A historic photo of a gaucho
(Source: Estancia Ranquilco)
As the cattle and horses roamed the plains, so did the gaucho. Some say the word "gaucho" comes from the Quecha word "huachu," which means "orphan," or "homeless." Others say it comes from the Guarani word for "drinker." Either way, the etymology of "gaucho" sheds some light on the early history of the Gauchos. They were solitary horsemen, wandering the Pampas in search of wild cattle or horses. To be a gaucho was to be part of a social class, one that was, at least at first, viewed with disdain. The Spanish colonial authorities viewed gauchos as cattle thieves, robbers and smugglers. As someone else summarized a gaucho: 

a colonial bootlegger whose business was contraband trade in cattle hides. His work was highly illegal; his character lamentably reprehensible; his social standing was exceedingly low.

Put simply, "gaucho" was an insult, often lobbed at people who lived in the countryside. 

All of that changed with the war for independence in 1810. As a Spanish general once described the gauchos during the war: 

The gauchos were men that knew the country, well mounted and armed.... They approached the troop with such confidence, relaxation and coolness that they caused great admiration among European military men, who were seeing for the first time these extraordinary horsemen whose excellent qualities for guerilla warfare and swift surprise they had to endure on many occasions.

The war saw gauchos go from being outcasts to revolutionary heroes. The gauchos continued to ply the plains after the war, hunting and trading while living off of the land. 

Ultimately, capitalism was able to accomplish what Spanish generals could not. Private owners began acquiring the livestock that lived on the Pampas, along with fencing off the land into huge estates. As the fences went up, the area for the gauchos to roam shrank. Soon, they were not able to live off the land as they once were. "In one generation," it has been observed, "the free-spirited gaucho was forced to become a ranchhand." 

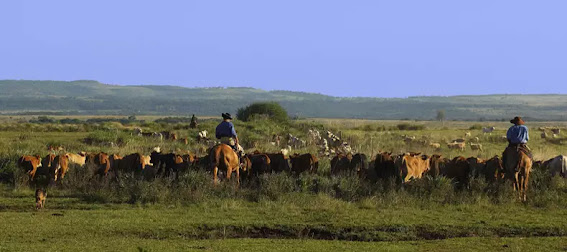
Modern day gauchos (Source: Audley Travel)

APPETIZER

In honor of the gauchos, this particular Around the World in 80 Dishes challenge will feature meat ... and more meat. For an appetizer, I decided to make Choripan or, as the Argentinians call it, "chori." The origins of this dish can be traced to the gauchos, who would grill chorizo - introduced to the region by the Spanish - over a fire in the countryside. Gauchos serve the grilled sausages with bread (pan) for convenience. The dish made its way into the cities, where it is now a common street food that can be found at food stalls or football matches

The recipe I found calls for the preparation of chimichurri as a condiment for the Choripan. The history of chimichurri is not very clear. Some historians have argued that gauchos created chimichurri to flavor the roasted meats. Others note that "chimichurri" is close to "tximitxurri," which is Basque for "a mixture of several things in no particular order." It may even predate the Spanish, as the Quechua had a similar word for a strong sauce that was used to preserve meats.

The Argentinian government has noted the popularity of this dish, estimating that over 500,000,000 choripan are consumed each year. There is even a Choripan World Cup, which is held annually in the city of Cordoba. 

ARGENTINIAN-STYLE CHORIPAN

Recipe from Saveur

Serves 4

Ingredients:

  • 4 fresh chorizo sausages, Argentinian style if possible
  • 4 6-inch hero rolls, split length wise, connected on one side like a hinge
  • 1/4 cup finely chopped fresh parsley leaves
  • 1/4 cup minced white onion
  • 1 clove of garlic, grated using a microplane
  • 1/4 cup of extra virgin olive oil, plus 3 tablespoons
  • 3 tablespoons red wine vinegar
  • 1/2 teaspoon Kosher salt
  • 1/4 teaspoon freshly ground black pepper

Directions:

1. Prepare the choripan. Preheat a grill over medium heat. Add the chorizo and let cook, turning occasionally with tongs as needed, until the sides are deeply seared and the center is fully cooked through. 30-35 minutes. 

2. Prepare the chimichurri.  In a medium bowl, add the parsley, onion and garlic. Stir briefly to combine. Add the olive oil, vinegar, salt and pepper, stirring well. Let rest for at least 15 minutes. (Chimichurri can be left out at room temperature for up to 12 hours before serving. 

3. Finish the dish. If desired, briefly warm the insides of the rolls over the grill. You can split the sausages lengthwise if desired as well. Place one cooked sausage into each roll. Slater one side of the roll and some of the sausage generously with chimichurri. Serve immediately. 

MAIN COURSE

A cornerstone of Argentine cuisine is asado, or the grilling of meats. The Asador - or cook - prepares the parilla, which is the grill. There are two parts to this grill: one section that houses the charcoal and wood, and another that has the metal grill upon which the meat - known as carne a la parilla - will be cooked. The meat is primarily beef, but lamb, mutton or pork may also find themselves being seared on the grill. As for the cuts or types, one could find chorizo, morcilla (blood sausage), vacio (flank steak), bife ancho (ribeye steak) and lomo (tenderloin). 

However, for this culinary challenge, I will assume the role of asador and prepare tira de asado, which are short ribs and which happen to be one of the more popular cuts to grill. The short ribs are not the typical ones that I can find in grocery stores around me. Instead, the Argentinians have their own style, which is a flanken cut across a three or four bone plate. It took a little time, but I was able to find the cut online (as it is the same type of cut used for South Korean kalbi). 

One last thing, as with the choripan, this recipe called for the preparation of "traditional chimichurri." The recipe underscores one understanding about chimichurri: there are as many versions of the sauce as there are cooks, gauchos or asadors. This recipe does not use onions, as the chimichurri sauce for the choripan, but it does use crushed red pepper. These changes result in a slightly thinner sauce that has a much stronger kick. That is definitely more to my liking. 

TIRA DE ASADO WITH TRADITIONAL CHIMICHURRI

Recipe for the ribs from Food and Wine

Recipe for the chimichurri from Food and Wine

Ingredients (for the short ribs):

  • 3.5 pounds of flanken cut, 3 bone beef short ribs
  • 1.5 tablespoons coarse sea salt

Ingredients (for the chimichurri):

  • 1/4 cup coarsely chopped parsley
  • 3 tablespoons red wine vinegar
  • 4 large garlic cloves, minced
  • 2 tablespoons oregano leaves
  • 2 teaspoons crushed red pepper
  • Kosher salt
  • Freshly ground black pepper
  • 1/2 cup extra virgin olive oil

Directions:

1. Prepare the chimichurri. In a food processor, combine the parsley, vinegar, garlic, oregano and crushed red pepper. Process until smooth. Season with salt and pepper. Transfer the sauce to a bowl and pour the olive oil over the mixture. Let stand for 20 minutes.

2. Grill the beef ribs. Preheat the grill (preferably a wood fire) to medium high (400 degrees Fahrenheit to 450 degrees Fahrenheit). Pat the ribs dry with paper towels. Sprinkle all sides of ribs evenly with salt, pressing salt into meat and rubbing it on bones. Arrange the ribs diagonally, spaced 1 inch apart on lightly oiled grates. Grill uncovered and undisturbed until bottoms of ribs are browned and release from grates, about 4 to 6 minutes. Flip ribs, and continue to grill uncovered until browned and a thermometer near the bone but not touching it registers 130 degrees Fahrenheit, about 2 to 4 minutes. Let rest for 5 to 10 minutes.

3. Finish the dish. Serve the ribs whole, or if serving with an assortment of meats for a larger group, cut each rib into thirds on the diagonal. Serve with chimichurri.

*     *    *

In the end, this challenge satisfied my inner carnivore. Any grilling challenge almost inevitably ends up in the top few of my most favorite challenges. I may not have been out in the middle of nowhere in the Pampas, but from my suburban backyard, I could at least spend a couple of hours as an Asador or a Gaucho. Until next time ...

PEACE.