Showing posts with label Mirin. Show all posts

Tuesday, April 2, 2024

Steamed Broccoli with Sesame Soy Dressing

My intense dislike of broccoli is not a secret. I have previously blogged about it. To quote myself: "I hate broccoli. I really hate broccoli." Yet, for some reason, I keep finding myself buying broccoli at the grocery store and searching the Internet for some way to make the green vegetable appealing to my palate.

Despite my feelings about broccoli, I know deep down that I need to eat more vegetables. According to the National Center for Biotechnology Information, broccoli contains antioxidants (like Vitamins A, C and K) and glucosinolates, which a body can convert into substances that fight cancer. Broccoli also contains compounds such as indol-3-carbinol and diindolylmethane, both of which help to regulate the immune response and reduce excessive inflammation. 

Recently, I just grabbed a few ingredients from the pantry and my steam basket. I decided that I would steam the vegetable and then toss it in a dressing made from soy sauce, mirin, black vinegar, and sesame oil. I then would garnish the broccoli with a mixture of toasted sesame seeds, toasted black sesame seeds and salt. The end result was decent, but not enough to change my position with respect to broccoli.

I guess some more purchases and surfing for recipes will be required. 

STEAMED BROCCOLI WITH SESAME SOY DRESSING

A Chef Bolek Original

Serves 4

Ingredients:

  • 1 large broccoli crown, florets trimmed and large ones halved
  • 2 tablespoons Tamari soy sauce
  • 1 tablespoon Mirin
  • 1 tablespoon black vinegar
  • 1/4 teaspoon sesame oil
  • 2 tablespoons toasted sesame seeds
  • 2 tablespoons toasted black sesame seeds
  • 1 teaspoon Kosher salt

Directions:

1. Prepare the dressing and the sesame seeds. Combine the sesame seeds and salt in a small bowl. Combine the soy sauce, mirin, black vinegar and sesame oil another bowl.

2. Steam the broccoli. Add water to a steam pot with a plate and bring the water to a boil and steam. Add the broccoli and steam until cooked, about five minutes. Remove from heat and remove broccoli to a bowl. Add the dressing and toss. Sprinkle with the sesame seeds. 

PEACE.

Wednesday, December 14, 2022

Yakitori Hatsu

This post is the final installment of the three-part, Yakitori-themed Kebab-apalooza. The prior two installments focused upon Yakitori Negima (chicken thigh kebabs) and Yakitori Sunagimo (chicken gizzard kebabs). Now, I take an additional step into the world of chicken offal with Yakitori Hatsu. Skewers of chicken hearts.

I am no stranger to preparing heart. To date, I have prepared Grilled Beef Heart with a Herbed Vinaigrette, Cuore di Agnello al Chianti (Lamb Heart Braised in Chianti), and Khalyat Alkadba Wal Galoob (Fried Heart and Liver). (That last one was the Around the World in 80 Dishes challenge to prepare a main course from Libya.)

Some say that the Yakitori Hatsu is as popular as Yakitori Negima. And, as with the latter type of skewers, Yakitori Hatsu is prepared with, as well as served with, a tare. That is a sauce made with soy sauce, mirin and sake. The tare provides a slightly sweet, yet salty complement to the earthy, mineral flavors of the chicken hearts. 

One practical note: I purchased a two pound package of chicken hearts from a local Korean grocery store. (It was the smallest package I could find.) Given the number of hearts that came in the package, I decided to thread the hearts horizontally onto the skewers, which increased the number of hearts that I could have on each kebab. I think the more traditional way of doing it would be to thread the hearts vertically. 

In the end, this recipe represents a strong finish for this three-part series, which was the first to focus upon the kebabs of one particular cuisine (as opposed to three separate kebabs from three different cuisines). This little journey has gotten me thinking about what other cuisines. Perhaps that will be the subject of the next Kebab-apalooza. 

YAKITORI HATSU

Recipe from Ang Sarap

Serves 4

Ingredients:

  • 20 chicken hearts
  • 1 1/2 tablespoons sugar
  • 2 tablespoons sake
  • 3 tablespoons mirin
  • 3 tablespoons soy sauce
  • 1/2 teaspoon ginger paste
  • 1 teaspoon corn starch

Directions:

1. Prepare the sauce. In a sauce pan mix together sugar, sake, mirin, soy sauce, ginger paste and corn starch. Mix well until free of lumps and then place on the stove top, using high heat boil the mixture and simmer for a minute. 

2. Grill the chicken hearts. Season the chicken hearts with salt and pepper, then place on skewers. Grill the chicken heart while brushing with the soy sauce mixture occasionally.  Remove from the grill and then serve immediately. 

ENJOY!

Tuesday, November 1, 2022

Yakitori Negima

Good food is very often, even most often, simple food.

- Anthony Bourdain

Bourdain's words provide an apt description for one of the simplest, but perhaps, greatest kebabs in the world ... Yakitori. Even the word is simple, translating to "grilled bird." Small bite sized pieces grilled over a charcoal grill, sometimes basted with a particular sauce or other times just a sprinkle of salt. These particular chicken skewers a truly a unique culinary experience. 

The history of yakitori dates back to the middle of the Meiji Period, around the 1880s and 1890s. (However, there are references to grilled chicken dishes going as far back as the Kamakura Period, the fourteenth century, and the term "yakitori" is said to have appeared in the oldest Japanese cookbook, Ryori Monogatari, which was produced during the Edo Period in 1643.)

Yet, it may have been pigs who led the way. Before yakitori become widespread, there was yakaton, which was pork offal skewers, which were first made in the Kanto Region of Japan (which includes, among others, the city of Tokyo). It is said that these pork offal skewers led the way for the chicken skewers that became yakitori. Food stalls -- or yatai --started popping up across Japan, from which vendors offered skewers of grilled innards from the expensive game birds served by from restaurants. The grilled skewers became a way for Japanese to enjoy grilled birds, which were often too expensive to bun the restaurants.

It took some time to get used to the smells of these stalls. For many Japanese, the smells of roasted or grilled meat was distasteful. Vendors began grilling their skewers using a particular type of coal, binchotan coal. This coal gets very hot, burns cleanly, but produces its own smoky aromas, which not only mask the smell of the grilled fowl, but also provide a smoky taste to the skewers. Vendors also started applying a tare, a sweet and salty sauce that added more aromas and flavors to the meat. 

There are many different types of yakitori, with each type focusing on a particular part of the bird or chicken. The most common yakitori is Yakitori Negima (ねぎま), which consists of bite sized pieces of chicken thigh skewered along with pieces of scallions or long onions. This particular yakitori includes the preparation of a tare, which is a sauce consisting of soy sauce, mirin, sake and sugar. The sauce is brushed on the skewers during the grilling process, as well as served alongside the skewers.

This recipe seemed like the perfect start for the trifecta of yakitori recipes that will serve as the latest installment of my Kebab-apalooza series. Come back and check as I head further back into the origins of yakitori, including the preparation of kebabs using chicken offal (like hearts and gizzards). 

YAKITORI NEGIMA

Recipe from Curious Cuisinere

Serves 4

Ingredients (for the chicken):

  • 8 bamboo skewers
  • 1 pound chicken thighs, cut in 1 inch pieces
  • 6 scallions, cut in 1 inch pieces

Ingredients (for the tare):

  • 1/2 cup soy sauce
  • 1/2 cup mirin
  • 1/4 cup sake
  • 2 tablespoons sugar

Directions:

1. Prepare the grill and the skewers. Preheat the grill to a medium-high to high heat, roughly 450 degrees Fahrenheit. Soak the skewers in water for 10 minutes.

2. Prepare the tare. In a small saucepan, mix the soy sauce, mirin, sake and sugar. Bring the mixture to a boil over high heart. Reduce the heat to medium heart and set it aside to cool slightly. Once cool, divide the sauce between two small bowls. One will be used for brushing the raw meat, one will be used for serving. 

3. Prepare the skewers. While the sauce is simmering and resting, remove the skewers from the soaking water and skewer the chicken and scallion pieces, leaving a little room at each end for easy turning.

4.  Cook the skewers. Cook the yakitori skewers over a hot grill for 2 minutes on the first side. Flip the skewers and cook for an additional 2 minutes on the second side. Flip the skewers again and brush them with the yakitori sauce. Flip and brush the skewers once more. At this point, the chicken should be firm and the sauce should be beginning to caramelize and create a nice glaze on the chicken.

5. Finish the dish. Transfer the cooked yakitori to a platter and brush them once more with the yakitori sauce (using a clean brush and the second bowl of yakitori sauce that has not been used for the chicken as it cooked).

Tuesday, February 15, 2022

Hamachi Kama

Most everyone eventually succumbs to social media advertising. They fall prey to the algorithms that utilize their browsing history to place advertisements for things that he or she might purchase. In my case, those algorithms place a lot of ethnic food ingredients, along with a variety of Buddhist-related items. (My love of learning about different cuisines, along with my increased interest in Buddhist meditation has no doubt played a role in the product placement on my timeline.)

Late last year, a certain Asian online grocery stores kept popping up in my timeline. The first item in the advertisement was Hamachi Kama, or yellowtail collars. Hamachi is the Japanese name for the yellowtail - or Japanese Amberjack.  The fish is commonly found in Japanese restaurants and sushi bars, where guests can find both raw and cooked preparations. However, the kama or collar (that is the section of the fish just behind the head and gills) is something truly special. It looks a bit unwieldly, like a little "u" with fins hanging off of it. 

If one did not know better, they would think that it is just a scrap that needs to be thrown away.  However, as the story goes, restaurant owners or cooks would keep the yellowtail collars, or Hamachi Kama, for themselves, friends or regular customers. The reason is simple. Far from a scrap, those collars have some of the fattiest and juiciest meat on the fish.

The Hamachi or Japanese Yellowtail
(Source: Clovegarden)

The collar is actually the clavicle bone of the yellowtail. There is collagen, connective tissue and a lot of fat in that part of the fish, which makes it very easy to cook and even forgiving to a certain extent if one overcooks the collar. And, the richness of the meat combined with the fact that a fish only has two clavicle bones means that the collars can be hard to find on menus. 

Yet, they can be easy to find online, as I have learned. I purchased a package of collars and immediately set out looking for a traditional recipe. Fortunately, the most traditional method of preparation is one of the simplest that I have ever come across. The collars are marinated in a combination of citrus juices (orange, lemon and lime), along with mirin and soy sauce. After marinating the collars for about a day, one just places them on a hot grill, basting the collars with the marinade. (I made a second batch of the marinade for the basting, rather than using the marinade in which the collars rested overnight.)  

That's it. The end result is one of the simplest, yet most delicious fish dishes that I have had in a very long time.  The only limit to me making this recipe as much as I can is the fact that I have to go back to that online store to purchase more collars.  

HAMACHI KAMA

Recipe from Hunter Angler Gardener Cook

Serves 4

Ingredients:

  • 1/3 cup lemon juice
  • 1/3 cup lime juice
  • 1/3 cup orange juice
  • 1 cup soy sauce
  • 1/4 cup mirin or other rice wine
  • 4 yellowtail collars
  • Sesame Oil

Directions:

1. Prepare the marinade. Mix the lemon juice, lime juice, orange juice, soy sauce and mirin in a heavy plastic bag or lidded container.  Add the yellowtail collars. Marinate overnight or up to 1 day. If the collars are not submerged, then them periodically so that they get good contact with the marinade.

2. Prepare the basting sauce. Pour the marinade into a small pot and bring it to a boil. Reduce it by half and set it aside. 

3. Grill the collars. Pat the collars dry with paper towels and coat with a film of sesame oil.  Get your grill nice and hot and clean the grates.  Grill the collars over high heat, basting with the reduced marinade, for about 10 minutes to 20 minutes, depending on how large the collars are and how hot the fire is. The collars must be fully cooked and a little charred.  Serve with steamed rice and a salad.

ENJOY!

Thursday, November 18, 2021

Kaki Gohan

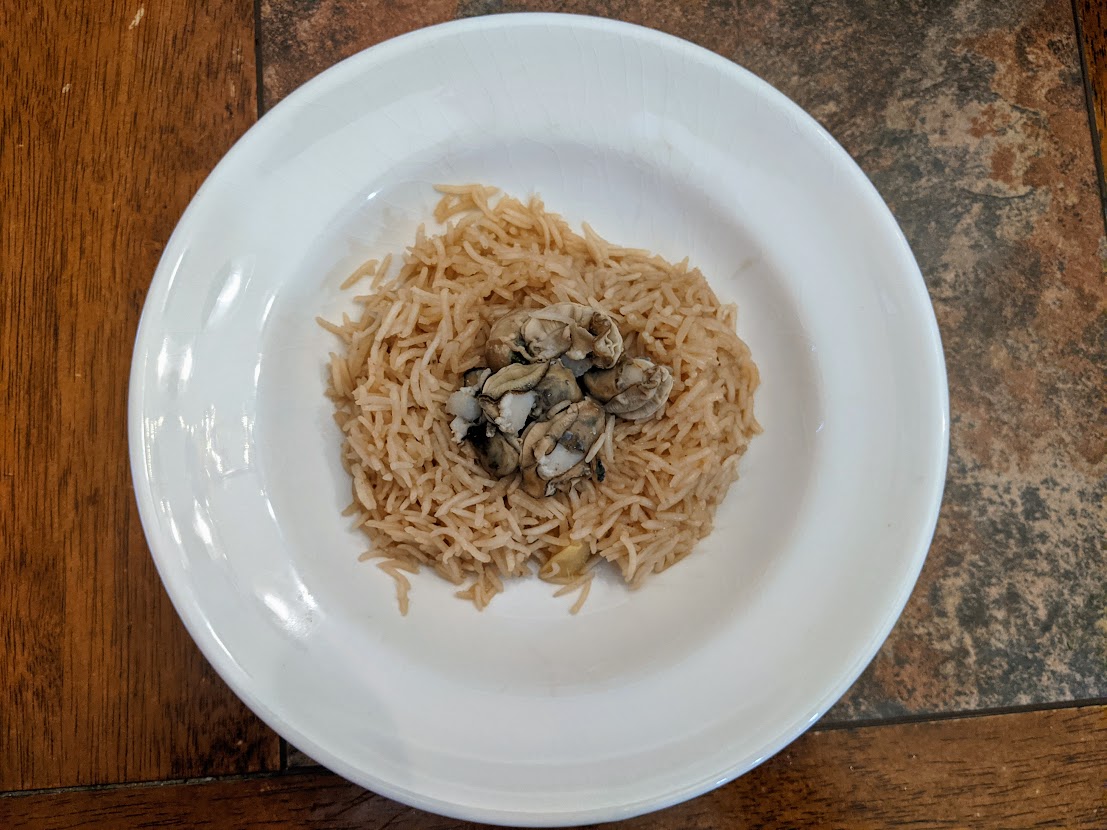
It is known as seasoned rice with oysters, or Kaki Gohan, and it comes from Japan. The rice is seasoned with a water that includes of sake, soy sauce and mirin, as well as the oysters' liqueur. This recipe offered a different way for my beautiful Angel and I to try oysters. And, while it was my first attempt at the dish, this recipe illustrates why it is important to make dishes over and over again. It is all a part of the cooking process. 

The directions call for the oysters to be placed in a boiling broth of water, sake, soy sauce and mirin. This much is very interesting, as it could impart a lot of flavor to the oysters themselves. However, oysters cook very fast, shrinking in size and increasing it toughness. Thus, it takes skill and a good eye when making this recipe to avoid a result that would not be as tasty as it could be.  I followed the recipe, but I ended up with oysters that looked like they had been steamed or grilled. They did not look like the oysters in the picture that came with the recipe.

Looking back on this particular cook, I think I know what I should have done. I need to approach the recipe from a different angle. One way is to use the typical means of preparing an octopus. Recipes will tell you that you should not simply plunk an octopus in boiling water, as it will curl up and become difficult to work with. However, if you carefully dip the octopus into the boiling water three times, that helps to firm up the octopus without it shrinking and curling into a round of tentacles. I think a similar approach could be used with oysters in this recipe.  Once the water and other ingredients come to a boil, the oysters could be dipped a few times, for a minute or two, until they firm up along the edges and become opaque. At that point, I think the oysters would retain their meatiness and texture, while having just a hint of the soy sauce, sake and mirin. 

I will follow up with this post when I have a chance to make this dish again and let you know how this alterative approach works.  In any event, this recipe was a welcomed change from eating raw oysters.  

KAKI GOHAN

Recipe available at Uncut Recipes

Serves 4

Ingredients:

  • 2 jars oysters
  • 2 cups rice
  • 2 cups water
  • 3 tablespoons sake
  • 3 tablespoons soy sauce
  • 2 tablespoons mirin
  • 2 thin pieces of ginger root
  • 1/2 teaspoon salt

Directions:

1. Prepare the rice. Wash all of the rice, as well as you can to remove all of the starch.  Drain and set aside.

2. Prepare the oysters. Wash all of the oysters, gently in salted water.  Pat dry.

3. Prepare the ginger. Cut the ginger root into thin, skinny pieces.  

4. Prepare the broth. In a pot, add the water, salt, soy sauce, sake, and mirin. Bring to a boil.  Add the oysters and cook for three minutes.  Remove the oysters and set aside.

5. Cook the rice. Put the rice in the bowl of a rice cooker.  Add enough of the seasoned liquid to the rice to reach the line of 2 cups and cook the rice. After rice is cooked, add the oysters and leave for 10 minutes. Then mix and serve.

ENJOY!

Thursday, October 3, 2019

Chesapeake Bay Oysters with Green Mignonette Sauce

It is common to serve a mignonette sauce with raw oysters.  It is a sauce typically made with minced shallots, vinegar and and freshly cracked black pepper. Personally, I think a mignonette sauce is boring.  I almost never use it when I order raw oysters at a restaurant; and, at home, I usually don't bother making it.  

Occasionally, I look for a way to take a boring mignonette sauce and make it into something that I would actually want to grace a raw oyster that is sitting in its shell.  On rare occasions, I try to come up with my own mignonette sauce.  In the end, I more often than not just use a little Tabasco Sauce or grated horseradish with my oysters.  No sauces.

A while back, I came across a recipe for a green mignonette sauce.  The recipe actually looked interesting and, if I dare say so, it looked tasty.  While shallots are used in the recipe, rice wine vinegar and mirin are used as substitutes for vinegar.   The addition of jalapeno and fresh parsley give the mignonette sauce a little character and kick.  Blended together, with a little lemon juice, the result is a sauce that was worth putting on an oyster. 


CHESAPEAKE BAY OYSTERS WITH GREEN MIGNONETTE SAUCE
Recipe adapted from from Veryvera
Serves 2-3

Ingredients:
1 dozen Chesapeake Bay oysters, rinsed and shucked
1/4 cup rice wine vinegar
1/4 cup mirin
1 tablespoon minced jalapeno
1 tablespoon chopped shallots
1/4 cup flat leaf parsley, chopped
Juice from 1 lemon

Directions:
1.  Prepare the sauce.  Blend all of the ingredients in a blender.  Pour into ramekins to serve with the oysters.  

2.  Finish the dish.  Provide each guest with a ramekin of the sauce.  Spoon a little of the sauce over each oyster.

ENJOY!

Thursday, April 11, 2019

Bulgogi-Style Squid

For the few avid readers of my blog, you might have noticed a trend in some of the posts.  That trend involves South Korean-inspired recipes.  (I say inspired because, let's admit it, I am not a professional chef, and, I am a total rookie at cooking South Korean food).  It began with my personal culinary challenge to cook a main course (and two appetizers) from South Korea, which was part of my Around the World in 80 Dishes.   That was followed by an effort to Ojingeo Bokkeum (South Korean Spicy Squid).  And, then, there was the efforts at experimentation, first with Gochujang Chicken and now this recipe, a effort to create a Bulgogi-style squid. 

I realize none of this actually comes close or even approximates true South Korean cuisine, but, there is something about the use of peppers -- whether Gochujang or Gochugaru -- that has gotten my attention.  The heat of the chiles used in South Korean cuisine are different than the chiles used in other cuisines, such as the Piri-Piri chile, the Ancho chile, or my beloved Hatch chile. 

This recipe goes in a different direction, away from the chiles toward bulgogi.  I have made one bulgogi recipe in the past ... Flank Steak Bulgogi.  I noted in that post that flank steak is technically not the right cut of beef for Bulgogi. (It is ribeye.)  Now, I am throwing everything to the wind and using perhaps one of the most un-Bulgogi of ingredients: namely, squid. This was an experiment in creativity and, for a first time, it worked out fairly well.  The sweet (honey and sugar) combined with the salty (soy sauce), tied together by garlic, ginger and sesame to produce a fairy tasty dish.  


BULGOGI-STYLE SQUID
A Chef Bolek Original
Serves 4

Ingredients:
2 pounds of squid, cleaned, slice bodies in 1 inch pieces 
      tentacles
3 tablespoons soy sauce
1 tablespoon lemon juice
1 tablespoon brown sugar
1 tablespoon honey
1 tablespoon rice wine or mirin
1 tablespoon minced garlic
1 teaspoon grated ginger
1 tablespoon sesame oil
Freshly ground black pepper
1/2 teaspoon sesame seeds

Directions:
1. Prepare the squid.  Combine the soy sauce, lemon juice, brown sugar, honey, rice wine (or mirin), garlic, ginger, and sesame oil.  Add the squid and toss.  Cover and refrigerate for at least 1 hour. 

2.  Cook the squid.  Heat a pan over medium high to high heat.  Add the squid in batches and cook covered for about 3 to 4 minutes or until translucent.  Once the squid is cooked, serve with rice and a side, like broccoli.

ENJOY!

Friday, June 1, 2018

Flank Steak Bulgogi

I know,  I know.  Bulgogi is not supposed to be made with flank steak. It should be thin slices of ribeye.  Using flank steak in bulgogi is like the foodie thing to do ... take something traditional and try to do something different with it.  But, in my defense, my beautiful Angel bought me five pounds of flank steak and I had to do something with it.  Something different.  Something bulgogi.

I am not going to get into the history of bulgogi, because that is for another post (like one in which I actually use thin slices of ribeye).  What I will say is that I was looking to make a creative dish, because I intended to use some (and eventually used all) of the flank steak for a dinner for my parents.  I wanted a dish that they would remember.

But, I have to admit, it was not just about making a great meal for my parents.  I really wanted to try bulgogi.  I never have had it (and, despite my effort, I will say I still have never had it).  A nice bulgogi dinner at a Korean BBQ joint is definitely on my to-do list.  And it has been on that list for a very, very, very long time.

So, with five to six pounds of flank steak (which, if you didn't know, is about 1/3 of the flank steak from your average cow), I decided to do a hackneyed idiom and kill two birds with one stone: satisfy my desire to try bulgogi and make a memorable meal for my parents. I scoured the internet for a bulgogi recipe that utilizes flank steak and, surprise, there were a few.  I picked the one that I liked the most, which was from the blog or website of Korean Bapsang, "a Korean Mom's Home Cooking."   The interesting twist to this recipe is the use of pineapple juice.  That is an ingredient that I would not have expected with South Korean cuisine.  Pineapples, not sea pineapples (that is a completely different post for probably a different blog - cue, Andrew Zimmern).   But, I digress ...

The rationale behind using the pineapple juice is to tenderize the flank steak.  As it turns out, pineapple contains an enzyme bromelain, which is used to tenderize meat.  That enzyme is found in fresh pineapple, but not canned pineapple because the canning process damages and destroys the enzyme.  Don't bottle with powdered pineapple (does that actually exist?) or bottled pineapple juice. The recipe calls for a can of pineapple, which runs counter to what I just wrote.  But, if you can get an actual pineapple, and you can juice the hell out of it, use that juice to marinate the beef.

In the end, this is a great recipe if you want a quick way to make bulgogi without adhering to the traditional expectations of the dish and you want to cut a few corners in order to feed your family now rather than in several hours.  It is definitely worth it.


FLANK STEAK BULGOGI
Recipe from Korean Babsang
Serves 4

Ingredients (for the steak):
1 flank steak (about 1.5 to 2 pounds)
2 scallions

Ingredients (for the marinade):
5 to 6 tablespoons soy sauce
3 tablespoons sugar
2 tablespoons rice wine (or mirin)
4 tablespoons juice from a can of pineapple
1 tablespoon minced garlic
1 to 1.5 teaspoons finely grated ginger
2 tablespoons sesame oil
2 teaspoons sesame seeds
1/8 teaspoon pepper

Directions:
1. Prepare the meat.  Slice the meat (about 1/3 to 1/4 inch thick) against the grain at a steep angle.  Combine all of the marinade ingredients in a bowl and mix well.  Add the meat and mix well until evenly coated.   Marinate for at least 1 hour. 

2.  Cook the meat.  Heat a grill pan over high heat and add a few slices.  Lower the heat as necessary.  The marinade may burn if the heat is too high.  Cook until the meat is is cooked through and slightly caramelized, one or two minutes per side. 

3.  Finish the dish.  Serve the meat with any of the accompaniments associated with bulgogi.  In this case, I served it with thinly sliced red onions, scallions and carrots, with lettuce to serve as a wrap.

ENJOY!