Showing posts with label Lemons. Show all posts

Saturday, June 7, 2025

Persian Roast Lamb

Persian cuisine has a very long history and, within that history, there has has been a long tradition of roasting lamb. That tradition has been dated as far back as the Achaemenian dynasty, which rule from approximately 770 B.C.E. to 330 B.C.E. At its height, around 550 B.C.E. to 330 B.C.E., the Achaemenid Empire stretched from southeastern Europe and northeastern Africa all the way to the edges of the Indian subcontinent. This empire encompassed many different groups -- Greeks, Egyptians, Babylonians, Lydians, and others -- who were able to retain their identities and their cultures.

One of the many legacies of the Achaemenid rulers revolves around food. Rather than requiring conquered peoples to assimilate into the empire, the Achaemenid rulers incorporated aspects of their cultures into the empire, especially when it came to food. The empire adopted the Greek methods of producing olive oil, the Egyptian practices of cultivating grain, and the Mesopotamian baking recipes. 

It was during the Achaemenid dynasty that some of the earliest accounts of roasted lamb could be found. The Achaemenid kings were known for their grand feasts and elaborate dining traditions. Claudius Aelianus wrote in his Varia Historia that one would eat with a knife in the right hand and a piecce of bread in the left hand. The food was cut with the knife and then placed on the bread. As for the food itself, another writer -- the Macedonian writer Polyaenus -- wrote in the second century B.C.E. that the ingredients of a dinner featured "sweet grape jelly, candied turnips and radishes prepared with salt, candied capers with salt, from which delicious stuffings weremade, terebinth (from pistachio nuts) oil, Ethiopian cumin and Median saffron." Other fruits and nuts would have graced the tables as well, including dates, pomegranates, figs, apples, raisins and almonds. The main course of the royal feasts featured among other things, roasted lamb and saffron-infused rice. 

By contrast, the masses across the empire generally ate grilled meats, flatbreads and porridge. 

The traditions and cuisine of the Achaemenid empire constitute a noteworthy part of the history of Persian cuisine. The dishes of that time focused on a balance between sweet, sour and savory, which  was achieved through the use of spice mixes, fruit-based sauces and other methods. That balance continues to this day in Persian dishes. 

Drawing from this culinary history, I wanted to prepare a Persian-style roasted lamb. I found a recipe online that tracks the balance of sweet, sour and savory which defined the Achaemenid cuisine. That balance could be found in the marinade, whose ingredients include pomegranate molasses, honey, lemon juice, cumin, saffron, and turmeric. I opted for an overnight marinade given I was woking with a six pound boneless leg of lamb. I have to say that the lamb cooked faster than the times indicated in the recipe, which I think would probably be more accurate for a bone-in leg of lamb. 

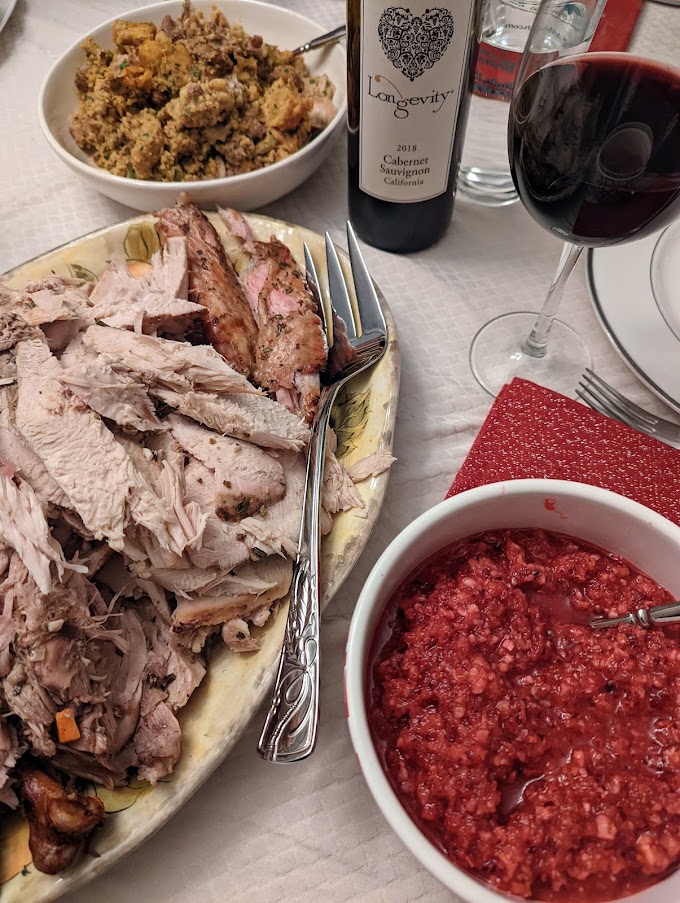
In the end, I had my own little Persian feast when the lamb was finished. The table not only featured the sliced leg of lamb, but also jeweled rice and a Shirazi salad. Both of these dishes made excellent sides, adding a lot of colors and flavors to complement the meat. 

PERSIAN ROAST LAMB

Recipe from Lin's Food

Serves 8

Ingredients:

  • 1 leg or shoulder of lamb, about 3.5 to 4.5 pounds
  • 1 large onion, sliced in rings
  • 1 cup chicken stock, vegetable stock or water
  • 5 cloves of garlic, finely minced or crushed
  • 4 tablespoons pomegranate molasses
  • 2 tablespoons honey
  • 1 tablespoon extra virgin olive oil
  • 1 lemon, juiced
  • 1 tablespoon ground cumin
  • 1 teaspoon turmeric
  • 1 teaspoon ground black pepper
  • 2 strops of fresh rosemary leaves, pounded or finely chopped
  • 1 pinch saffron
  • 2 tablespoons hot water 
  • Pomegranate seeds, for garnish

Directions:

1. Prepare the saffron. Tip the saffron in a mortar with a small pinch of salt. Crush the saffron with the peste, goung round and round. Add the hot water and leave it to soak while you get everything else ready. 

2. Prepare the marinade. Combine the garlic, pomegranate molasses, honey, olive oil, lemon juice, liquid saffron, ground cumin cumin, turmeric, black pepper and rosemary. Mix well. Set aside.

3. Prepare the lamb. With a small knife, make a half dozen small slashes straight down into the lamb, especially around the thicker parts. Rub the marinade all over the lamb, pushing down into the cuts and into the meat folds. Cover the lamb and allow to marinate for at least 2 hours or overnight.

4. Roast the lamb.  Heat the oven to 350 degrees Fahrenheit. Line the roasting pan or baking dish with the sliced onions. Sit the lamb on the onions. Pour the stock or water in, making sure to pour it on the onions and not the lamb. Cover with foil and roast for 1 hour by which time the lamb should be almost done. Take the cover off and roast for another 30 minutes, so that the meat will be pink. 

5. Finish the dish. When the lamb is done, there will be a little sauce or gravy that can be served separately. You can choose to get separate the excess fat, but that is not required. Slice the roast and serve on a platter with the onions.

PEACE.

Saturday, December 14, 2024

Chef Bolek's Picanha with Chancho en Piedra

My love for churrasco -- that is, beef grilled over an open fire -- often leads me to places like Fogo de Chao or Texas de Brazil. It also leads me to seek out smaller, family owned churrascarias or other Brazilian and Argentinian restaurants. Those dining experiences, especially the ones at the large chain restaurants, often involve one server after another carrying a skewer of grilled meat.  There is the server with costela (or beef ribs), followed by the server with beef ancho (or ribeye), the server with fraldinha (bottom sirloin), the server with alcantra (top sirloin), and then the server with filet mignon. However, there is always one server that I try to find in the restaurant ... the person with the picanha or what is also referred to as the sirloin cap or cullote. 

However, my efforts to find picanha outside of a national chain restaurant, or even a smaller family-run restaurant, had encountered some difficulty. This particular cut is not one that is typically stocked on the shelves of a supermarket. One has to dig a little deeper and work a little harder to find it. This work necessarily involves identifying a trusted butcher. Fortunately, for me, there is one -- Chop Shop Butchery -- which I highly recommend. A simple question - do you have picanha - led to the purchase of a very nice cut of meat. 

That cut is identifiable by the strip of fat along the top, which, when grilled properly, helps to baste and  flavor the meat. The story of picanha can be traced back to the Bixziga neighborhood of Sao Paulo, Brazil during the 1950s. The cut did not make its way onto a menu until Dinhos offered a roasted picanha. The cut took off in Brazil and eventually made its way (along with Brazilian immigrants) to Portugal and then to the United States. 

The preparation of picanha is rather simple: flaky sea salt is really all that is needed before cooking the meat. The meat is roasted on a spit in Brazil or grilled in Argentina, and, either way, it can be cut into smaller pieces or the whole cut could simply be roasted. Given it was my first time, and recognizing that I probably did not have the right skewers to spit roast the meat, I decided to roast the whole cut. I seasoned the cut with sea salt, but I also used some merken especial, a chile rub used by the Mapuche, to provide a smoky kick to the meat. I grilled it to 135 degrees, well short of the 145 degrees for medium rare, given the shape of the cut. This approach ensured that the narrower edge of the cut would not be overcooked. 

My version of Chancho en Piedra

Finally, when one serves picanha or any grilled meat as part of a churrasco, it is accompanied by a chimichurri sauce.  I have made many a chimichurri sauce in my time. There are a few recipes on this blog, like this one and these two. So, I can say that a chimichurri is my own go-to sauce for grilled or roasted meats. However, for this occasion, I wanted to do something different. 

My search led me to pebre, which is a Chilean condiment made with cilantro, olive oil, onion, garlic and chiles. If one adds freshly chopped tomatoes to their pebre, it becomes chancho en piedra (which translates to "pig on a rock"). This salsa-like side is traditionally prepared using a molcajete or a mortar and pestle to create a consistency that looks more like a sauce. However, I have seen versions where the chancho en piedra has more texture, akin to a chunky-like salsa. I generally prefer the latter when it comes to salsa, so I opted with that approach. I also substituted one of the green chiles for 1/2 tablespoon of merken especial to tie the side with the grilled meat. These modifications resulted in a side that seemed, in my humble opinion, was a better accompaniment for slices of grilled picanha. 

CHEF BOLEK'S PICANHA WITH CHANCHO EN PIEDRA

Picanha recipe adapted from Barbecue Bible

Chancho en Piedra receipt from Food Comas

Serves several

Ingredients (for the picanha):

  • 2 pound slab of picanha (top sirloin) with 1/2 inch of fat on top
  • Merken especial
  • Coarse salt (sea or kosher)

Ingredients (for the Chancho en Piedra)

  • 1 bunch cilantro, finely chopped
  • 1 medium onion, finely diced
  • 2 green chiles, seeded and finely diced or 1 tablespoon Merken
  • 2 cloves garlic, minced
  • 2 tablespoons olive oil
  • Salt to taste
  • Pepper to taste
  • 1 tablespoon white vinegar
  • 1 tomato, peeled and finely diced
  • 1/2 lemon, juiced

Directions:

1. Prepare the Chancho en Piedra. In a bowl, add the oil, garlic, onion, coriander, tomatoes, chiles (or merken) and veingar. Add the salt and pepper to taste. If necessary, add a tablespoon of olive oil. Set aside.

2. Prepare the picanha and the grill. Cut the picanha crosswise (across the grain) into slices that are 1.5 inches thick. Dust the picanha with merken on all sides. Set aside while you set up the grill for direct grilling. Heat the grill to high. Brush and oil the grill grate.

3. Grill the picanha. Arrange the meat pices fat side down on the grill. Direct grill until fat is partially rendered, crisp, and brown, 2 to 4 minutes. Turn each piece of meat on its side and grill until brown, about 2 minutes per side. Grill the bottom the same way. You are looking for medium rare. An instant read thermometer inserted into the narrow end to the center of the meat should read about 125 to 135 degrees Fahrenheit.

4. Finish the dish. Transfer the picanha to a cutting board, fat side up and let rest for a couple of minutes. Carve it into thin slices across the grain, including a bit of fat and a bit of meat in each slice. Serve with the Chancho en Piedra.

P.S. While writing this post, I discovered that there is also Chancho en Piedra, the Chilean experimental, funk band. Their music is actually pretty catchy. My only regret - apart from not being able to speak Spanish - is that I did not learn about this band earlier. I could have played the music in the background while preparing chancho en piedra, the sauce.

PEACE.

Saturday, October 5, 2024

St. Helena Fish Cakes

If you find yourself in the middle of the Atlantic Ocean in the southern hemisphere, you may find yourself very far away and very close at the same time. You will most likely be far away from any significant land mass, as both South American and Africa are separated by thousands of miles of ocean. But, you may be very close to the island of St. Helena (and that is a big maybe).

St. Helena sits in the middle of the Atlantic Ocean in the Southern Hemisphere. It is over 1,200 miles from the African coast (where one would be standing in Namibia or Angola) and 2,500 miles from the South American coast (where one would be standing in Brazil). The island is figuratively and literally in the middle of nowhere. 

That isolation proved helpful when it came to banishing a certain Le Petit Caporal (i.e., Napoleon) in 1815 after he escaped his first imprisonment on the island of Elba. But, there have been people living on that ten mile by five mile long island since the late seventeenth century. Recent statistics place the number of people calling the island their home at over 4,400.  

Saints (source: St. Helena Info)
The people of St. Helena -- who refer to themselves as "Saints" -- descended from Europeans, who were mostly planters, government workers and ex-soldiers. Given St. Helena was part of the British empire, there are also people of Chinese ancestry, whose family members came to the island as workers, or of other Asian or African ancestry, whose family members were forcibly brought to the island as slaves. Together, the Saints have developed their own identity, culture and cuisine.

The cornerstone of Saint cuisine is the Fish Cake. Given St. Helena is an island surrounded by thousands of miles of ocean, one could expect that fish would have a prominent role in both the cuisine. The most prevalent fish in the Saint diet may well be yellowfin tuna. Saint cooks take fresh tuna, shred it down with a knife, and then prepare the fish cakes with mashed potatoes, onions, parsley, thyme and bacon. But, there is one ingredient that is just as important to the fish cake as the fish ... the chile. A Saint Fish Cake must have bite (that is, in the Saint vernacular, it must be spicy). Most recipes call for a "chile" or "chilli," but, depending upon the bite you are looking for, I would go with a jalapeno pepper (for less of a bite) or a serrano pepper (for more of a bite). If a serrano is not enough, there is alway the Scotch Bonnet or Habanero pepper.

In the end, the fish cake was very tasty, but I have to work on my preparation skills with this dish. I am used to making crabcakes, whose starch usually involves crackers. The use of mashed potato was part of the binding agent was new for me. I had some difficulty keeping the fish cakes together during the cooking process, but that can be improved when I make this dish again. 

Until then, I can just sit back and think about a short banished emperor sitting at a table on an island in the middle of nowhere. According to historical records, it took a while for Napoleon to get used to his new surroundings. Records published in 1824, which was after Napoleon's death in 1821, recounted that "fresh beef was so precious as to have occasioned restrictions upon its consumption." While fresh beef may have been hard to come by, one could picture Napoleon staring down at a table of full of fish cakes. And, thanks to artificial intelligence, we can now see a relatively close depiction of that fictional moment for ourselves. 

If you are as interested about St. Helena's island as I am, check out St. Helena Island Info at this website

ST. HELENA FISH CAKES

Recipe from Aberdeen News

Serves 4

Ingredients:

  • 1/2 pound Russet potatoes, peeled, quartered
  • 1/2 pound fresh tuna
  • Mild oil, such as canola
  • 1 small onion, finely chopped
  • 1 small clove of garlic, finely chopped
  • 1 slice bacon, diced
  • 1 tablespoon finely chopped fresh parsley
  • 1 teaspoon finely chopped fresh thyme
  • 1 fresh serrano chile, finely chopped
  • 1/4 teaspoon salt
  • 1/4 teaspoon black pepper
  • 1/4 teaspoon paprika
  • 1/4 teaspoon cayenne
  • 1 egg, lightly beaten
  • 1 lemon, zested.

Directions:

1. Boil the potato. Settle potato chunks in a large pot of salted water. Bring to a boil; cook until tender (poke one with a skewer, it should be easy work), about 18 minutes. Press potatoes through a ricer into a large bowl or smash with a potato smasher. Let cool. 

2. Prepare the tuna.  Use a sharp, heavy knife to finely chop the tuna (a little coarser than ground beef.). Use a fork to gently mix into the cooled potato. 

3. Saute remaining ingredients (except egg and lemon zest). Pour 1 tablespoon of oil into a large skillet. Heat over medium. Scrape in onion, garlic, bacon, parsley, thyme, chile and spices. Cook, stirring, until everything looks brown and tasty, about 8 minutes. Scrape ono a plate to cool. Wipe out skillet. 

4. Prepare the fish cakes. Scrape the cooled onion mix onto the fish and potatoes. Pour in egg, scatter on zest. Mix gently. Shape 8 pucks about 3/4 inch thick and 2 1/2 inches in diameter. Fry pucks until brown, about 2 to 3 minutes per side. Drain on paper towels.

PEACE.

Monday, July 1, 2024

Poul Nan Sous

"People often think of Haiti as a place where you are not supposed to have any joy. I want to show that this is a place where you can have joy. 

-- Edwidge Danticat

These words caught my attention because of their truth. The public discourse about Haiti in recent days, weeks, months and even years, focuses on the negative. And, to be sure, there have been a lot of negative things going on in Haiti for most of its existence (which dates back to 1804, when it became the first independent, African-American country in the Western Hemisphere). 

Haitian-American Edwidge Danticat's observation reminds me that there is more to Haiti than all of the bad news. There are stories of independence, resilience, resourcefulness, and, there are stories of joy. One such story that I found over and over as I did some research for this post revolves around the dish, Poul Nan Sous.

One can find quite a few recipes for this dish, which translates from Poul Nan Sous into "Chicken in Sauce." Many of those recipes often come with memories of eating the dish with family. For example, Gregory Gourdet wrote in Food & Wine that this dish would greet him whenever he visited his "Memere" (forgive me for I can't get the accents). Others recount this dish in a very similar way, tying it to memories of family meals, where loved ones would gather together and be able to enjoy the stewed chicken as it rested in a spicy, garlicky sauce. 

Yet, Poul Nan Sous is not only a source for joyful memories, it also has greater significance. As Chef Chris Viand explains, the chicken is marinated in an epis, which he refers to as the "go-to marinade" for Haitian cuisine. The marinade typically consists of habanero peppers, multi-colored bell peppers, garlic, lime juice, olive oil, scallions, parsley and thyme. Not only can this marinade be used to prepare meat, but it is also used in preparing rice dishes. 

As is the case with any recipe, there can be as many variations as there are cooks. The recipe I used to prepare Poul Nan Sous had a more simplified epis, as there were no bell peppers or parsley (all of which were added later in the stew), but there was the addition of other citrus (lime juice and orange juice). The chicken was marinated with onions, with is common throughout all of these recipes. And, while each cook may have their own way to prepare the stew, the one thing that unites them is that the resulting dish must have a deep color. One does not want their guest to respond, "si vyann lan two blan" (or, "the meat is too white"). 

In the end, I prepared this dish and I can see why it becomes the focal point of a person's memory around family meals. The chicken took on, not just the color of the stew, but the kick from the Scotch Bonnet peppers, the garlic and the citrus of the marinade. In the end, I was left wanting some bread that I could use to sop up the leftover liquid from the stew. This will be a dish that I will make again ... and again ... and again.


POUL NAN SOUS

Recipe from Food & Wine

Serves 4 to 6

Ingredients (for the marinade):

  • 3 pounds mixed bone-in chicken thighs and drumsticks, patted dry
  • 3 tablespoons kosher salt
  • 1 juicy orange, halved
  • 1 juicy lime, halved
  • 1 juicy lemon, halved
  • 2 medium yellow onions, halved and thinly sliced
  • 8 garlic cloves, sliced
  • 2 Scotch Bonnet or habanero chiles, cut in half and sliced thin
  • 1/4 cup fresh thyme leaves

Ingredients (for the stew):

  • 1/3 cup extra virgin olive oil
  • 1/2 cup tomato paste
  • 1 tablespoon kosher salt
  • 2 red bell peppers, seeded and deveined, cut into long, thin slices
  • 2 yellow bell peppers, seeded and deveined, cut into long, thin slices
  • 2 cups chicken stock, salted homemade or store bought
  • Small handful of roughly chopped parsley

Directions:

1.    Marinate the chicken. Put the chicken pieces in a large bowl and season with salt. Squeeze the citrus halves over the chicken and then spend a minute or so rubbing the cut sides of the citrus against the chicken. Add the onions, garlic, chile and thyme and toss well, rubbing the chicken as you do. Cover and marinate in the fridge for at least 12 hours or up to 48 hours. 

2.     Reserve the marinade. Preheat the oven at 375 degrees Fahrenheit. Remove the chicken from the marinade, guiding any stuck-on aromatics back into the bowl. Set a strainer over a small mixing bowl. Pour the marinade through the straining reserving the solids and the liquids. 

3.     Brown the chicken. Heat the oil in a wide heavy, ovenproof pot (such as a 3 1/2 quart braiser) over medium high heat until just shimmery. Cook the chicken, skin side down, occasionally turning the drumsticks but not the thighs, until the skin is a deep brown, about 8 minutes. Transfer the chicken pieces to a plate. 

4.     Prepare the stew. Reduce the heat to medium low and add the tomato paste and salt, and cook, stirring often, until it turns several shades darker, about 3 minutes. Add the bell peppers and reserved solids from the marinade and cook, stirring occasionally until the peppers soften slightly and take on a little color, about 8 to 10 minutes. 

5.     Finish the dish. Return the chicken to the pan, skin side up and in a single layer. Then take a minute to pile the peppers, onions and other aromatics on top of the chicken. Then evenly pour in the reserved liquid from the marinade, along with the stock. Cook in the oven, basting every 15 minutes to coat the chicken with the peppers and sauce, until the sauce has thickened slightly and the meat pulls off the bone with a gentle tug from a fork, about 1 hour. Garnish with parsley and serve.

PEACE. 

Monday, January 1, 2024

A Chef Bolek Fondue

Fondue originated in Switzerland, most likely in the Valais region through which the Rhone River flows in southern Switzerland. The tradition emerged as Swiss farm families gathered around a hearth over which they melted hardened cheese in a pot called a caquelon. The family members would then dip pieces of stale bread into the cheese, which softened the bread and made it easier to eat. It was a way for these poor farming families to make the most out of what little they had. 

Although originating as a cucina povera dish, fondue made its way into cookbooks, with the first known written recipe dating back to 1699. That recipe was published in a cookbook under the recipe name of Kass mit Wein zu Kochen or "to cook cheese with wine."  Fondue even made its way into the cookbooks for the Swiss military. Over time, the farm family tradition would be elevated beyond as a national dish of Switzerland (or so the Schweizerische Kaseunion - or Swiss Cheese Union - wanted everyone to believe because it would lead to the sale of more cheese).  And, as the dish spread across the world, it would take on new preparations and new ingredients.

Nothing says Switzerland like an "envelope" of Lipton's Onion Soup Mix.

Indeed, the passage of time gave rise to other versions of fondue. One popular one is fondue au chocolat, which involves dipping those food bites (usually bread, cheese or fruit) in a pot of melted chocolate. To be sure, my kids love chocolate fondue because they love anything that has a nice, chocolate coating. Another version is known as fondue bourguignonne, also known as beef fondue. The cheese or chocolate is replaced with hot oil, which is perfect for dipping bite sized pieces of your favorite protein or, on occasion, a vegetable or mushroom. 

Apparently, a guitar is required for fondue.

It is this latter version of fondue that became part of my family's New Year's Eve tradition. We would gather around a pot of hot oil, which was also encircled with dishes containing raw pieces of beef, chicken, sausage, mushrooms, broccoli and other foods. We pierced each bite and dipped it into the oil, becoming our own cook for a few minutes. Over the years, it became clear that dipping a bunch of things in hot peanut oil is not necessarily the healthiest way to ring in the New Year. So the tradition evolved to using vegetable broth, which cooked the food without the added consequence of clogging an artery. 

Fast forward to today, my beautiful Angel suggested that we have a fondue to ring in the new year. After clarifying that cheese and chocolate would not be involved, the Chef Bolek began to emerge. Rather than unhealthy oil or plain vegetable broth, what if I made a court bouillon for the fondue pot? A court bouillon is a flavorful liquid that is often used to poach proteins, such as fish or seafood. It would provide a healthy alternative in which I could control the ingredients and, by extension, the flavors. I quickly found a good court bouillon recipe as a starting point. Then my mind started thinking about the sauces. 

The tradition in my family, as is the tradition typically for a fondue bourguignonne, would be to serve about three to four sauces as part of the meal. These sauces typically included a Béarnaise sauce, a Bordelaise sauce, and, if I recall correctly, a horseradish sauce. However, I wanted to take those sauces to the next level. I wanted to serve sauces from around the world. So, for a Chef Bolek Fondue, I drew upon my experience and made the following sauces: 

Argentinian Chimichurri: I recently completed the Around the World in 80 Dishes challenge for Argentina, which had me prepare chimichurri in two different ways. I decided to prepare one of those chimichurris, because the garlicky sauce goes well with beef, chicken and vegetables.

Catalan Romesco Sauce: This sauce goes well with just about any food, with the smoked paprika, almonds and sherry vinegar providing different flavors for the meal. I borrowed from a recipe that I prepared more than ten years ago, but I will post a new one in the near future.  

Sri Lankan Lunu Miris: An extremely fiery sambol with three chiles and freshly ground black pepper from the cuisine that curries everything, which is why I love Sri Lankan food. This sauce is really just for me; it is too spicy for everyone else. I will post the recipe in the near future. 

Vietnamese Nuoc Cham: I have spent a lot of time this year learning about Vietnamese cuisine. I have become a huge fan of nuoc cham because of how it balances the different flavor elements. I used this recipe in which I paired the sauce with raw oysters in place of a mignonette. 

With these sauces, one has a fondue Chef Bolek style. The recipe for the court bouillon is set forth below. 


COURT BOUILLON

Recipe from Rouxbe

Ingredients:

  • 5 cups cold water
  • 1 cup white wine
  • 2 ribs celery
  • 1 leek (white part only)
  • 1 small onion
  • 1 lemon
  • 1 bay leaf
  • 1 teaspoon whole peppercorns (white or black)
  • 2 teaspoons Kosher salt (or to taste)
  • 1 sprig fresh parsley

Directions:

Place the cold water and wine in a pot. Slice the celery into 1/8 inch slices. Cut the leek in half, wash, and thinly slice the white part. Dice the onion and add everything to the liquid. Cut the lemon and squeeze the juice into the liquid (keep the seeds out of the liquid). Add the bay leaf, peppercorns and parsley and bring to a simmer. Once the liquid comes to a simmer, turn off the heat. Cover with a lid and let steep for about 30 minutes. Strain the liquid and transfer to the fondue pot.  

Once the court bouillon is prepared, then it can be used for a fondue, with the sides served alongside all of the cut meats and vegetables. 

PEACE.

Saturday, March 25, 2023

Vietnamese Grilled Whole Fish

There are a wide variety of fish dishes in Vietnamese cuisine, which is only to be expected given the country has 3,260 kilometers of coastline. There are also several major rivers that run through the country, such as the Song Da, Song Chiang, and, of course, the Mekong River.

One of the most interesting subset of dishes are the whole fish dishes. Setting aside the relatively easy preparation, I find that it is the sauces that one prepares alongside the whole fish to be one of the truly interesting aspects of Vietnamese whole fish dishes. The sauces provide an extra level of flavor that often enhances whatever spices, herbs and citrus are stuffed into the fish. 

Take, for example, chef and author Charles Phan, who has quite a few whole fish recipes out there. My parents gave me his cookbook, Vietnamese Home Cooking, as a gift. I decided to make the whole fish recipe in that cookbook, which is set forth below. The fish was delicious, but it was that dipping sauce that, for me, completed this dish.

The dipping sauce represents what the Vietnamese call "Ngũ Hànhor the five tastes. It is an excellent balance of those tastes, namely, spice, salt, bitter, sour and sweet. The chiles provide the spice; the lime juice offers the bitterness; the fish sauce contributes both the sour and the salt; and, the sugar provides, as you can guess, the sweet. The balance in this dipping sauce led me to dipping every bite-sized morsel of the fish into the sauce. 

VIETNAMESE GRILLED WHOLE FISH

Recipe from Charles Phan, Vietnamese Home Cooking at pg. 181

Serves 2

Ingredients (for the fish):

  • 1 (1 1/2 to 2 pound) whole branzino, cleaned with head and tail intact
  • Kosher salt
  • Freshly ground black pepper
  • 1 by 1-inch piece of ginger, cut into thin coins
  • 2 large Thai basil sprigs
  • 2 large cilantro sprigs
  • 3 thin lemon slices
  • 3 thin lime slices
  • 2 tablespoons canola or olive oil

Ingredients (for the dipping sauce):

  • 2 1/2 tablespoons freshly squeezed lime juice
  • 2 tablespoons fish sauce
  • 2 teaspoons sugar
  • 1 teaspoon peeled and minced fresh ginger
  • 1/4 teaspoon minced garlic
  • 1/4 teaspoon minced Thai chile

Directions:

1. Prepare the grill.  Prepare a hot fire for direct heat grilling in a charcoal grill (you should be able to hold your hand 1 to 2 inches above the grate for only 2 to 3 seconds). When the coals are ready, place a cast iron griddle or large cast iron frying pan on the grill grate and let it preheat until very hot.

2. Prepare the fish. While the fire is reaching temperature, rinse the fish in cold water and pat dry with paper towels. Season the inside with salt and pepper and then stuff the cavity with the ginger, basil, cilantro and lemon and lime slices. Drizzle the oil on both sides of the fish and set aside. 

3. Make the dipping sauce. To make the sauce, in a small bowl, stir together lime juice, fish sauce, sugar, ginger, garlic, and Thai chile until the sugar has dissolved. Set aside.

4. Grill the fish. When the griddle or pan is very hot, add the fish and cook it without moving for about 6 minutes until the skin is a deep golden brown and no longer sticking to the griddle. To check, gently try to lift the fish; of it does not release easily, continue to cook until it does. 

5. Continue to grill the fish. With a large, wide spatula centered at the middle of the fish, flip the fish and cook on the second side until golden brown. After 1 minute, begin checking to see if the fish is done. Insert a knife into the fish and wiggle it gently; the flesh should be barely clinging to the bone. If you feel resistance, continue cooking, repeating the test until the flesh offers no resistance.

6. Finish the dish. Transfer the fish to a plater and serve immediately. Accompany with the dipping sauce. 


Sunday, February 12, 2023

Ceylon Curry of Oysters

This recipe is a reminder that we have the British to blame for what is known as "curry." (I say that half-sarcastically, half-seriously.) The word "curry" is the anglicized version of kari, a word from the Tamil language for "sauce" or "relish for rice." The British used the word "curry" to describe basically every sauce and every relish for rice. They used the word not just for those dishes in India, but also for dishes made in a similar fashion across the British empire. 

The point is that, by lumping everything together as "curry," one takes away the individuality of the underlying dishes and the cuisines from which they originate. A "curry" from the subcontinent (such as from India or Sri Lanka) is different than a curry from Southeast Asia (such as from Thailand or Vietnam). Curries also differ significantly within countries, such as from Uttar Pradesh to Tamil Nadu in India or among the different ethnic minorities of Myanmar. 

Another aspect of westernization is apparent in the recipes themselves, in which the authors substitute more readily available ingredients for those used by the locals. This substitution was done perhaps out of necessity (as some ingredients were not available to western cooks) or a misunderstanding of the ingredients.

All of these thoughts are embodied in this recipe, Ceylon Curry of Oysters. The recipe originated with a person named Darmadasa, who worked at the East India Curry shop, which was located on East 57th Street in New York City. I used the past tense because both Darmadasa and the shop could be found on East 57th Street in the late 1930s, long before the emergence of Whole Foods, BLT Steak, or Mr. Chow. Darmadasa's recipe became public through a newspaper article written by Charlotte Hughes. Ms. Hughes declared that, "everybody in India, apparently, eats curry." She added that, while curries are difficult to make, "American cooks with pioneering spirits can master curry dishes." 

Hughes included some recipes with her article, including this oyster curry. Yet, as some have noted, her recipe had been Westernized, with substitutions of ingredients that would not have been used by Sri Lankan cooks. For instance, Hughes included "green pepper" in her recipe (most likely a reference to the bell pepper). However, the "green pepper" used by Sri Lankan cooks would have been more likely one of the more piquant varieties, such as a serrano pepper or a Thai (bird's eye) chile. She also called for the use of butter (in place of coconut oil), bay leaves (in place of curry leaves or pandan leaves) and "curry powder" (as opposed to identifying the various spices that would be included in making the masala).  

I made the Charlotte Hughes' Westernized version of Darmadasa's recipe. However, I added a few of my own changes to that recipe. The first change is a nod to the recipe's Sri Lankan roots. I substituted "curry powder" with roasted curry powder, which is, as far as I can tell, an ingredient that is unique to Sri Lankan curries. The second change goes to the method by which the oysters are "cooked" in the curry." The original recipe calls for the oysters to be placed in the curry and cooked for 3 to 4 minutes. That will cause the oysters to shrink and, depending upon the size of the oyster, may result in tough, chewy, little nuggets. I decided that I would add the oysters at the very end of the cooking process. By adding the oysters at this time, I rely upon the residual heat in the curry liquid. The oysters will not be completely raw, but they will also not be completely cooked. Such a result is fine given that oyster can be eaten raw.   

CEYLON CURRY OF OYSTERS

Recipe adapted from New York Times Cooking

Serves 2-3

Ingredients:

  • 2 tablespoons butter or coconut oil
  • 4 small shallots, finely chopped
  • 1 clove garlic, minced
  • 1/2 serrano chile or Thai chile, seeded and minced
  • 1 tablespoon roasted curry powder
  • 1 large pinch turmeric
  • 1 cinnamon stick
  • 3 cloves
  • 1 bay leaf
  • 1 cup coconut milk
  • Salt
  • 12 oysters, shucked, liquor reserved
  • Juice of 1/2 lemon

Directions:

1.  Saute the shallots, garlic and chiles. In a medium saucepan over medium heat, melt the butter. Add the shallots, garlic and chiles, and saute until softened and starting to brown, about 2 to 3 minutes. Stir in the curry powder, turmeric, cinnamon stick, cloves and bay leaf. Cook for 1 minute. 

2. Saute the oysters. Reduce the heat to low and add the coconut milk and 1/2 teaspoon of salt. Simmer for 3 minutes. Add the oyster and their liquor; simmer until the oysters are just firm, 3 to 4 minutes. Take the pan off heat and add the lemon juice and salt to taste. Serve over rice or on hoppers.

Saturday, September 17, 2022

Whole Roast Fish with Lemongrass and Ginger

There is something about a whole fish that is either roasted or grilled. The entire fish - head to tail (minus the innards), laying on the plate, inviting the diner to peek below the skin to see the flaky, flavored meat. Working one's way down the filet and then lifting the backbone to reach the other fillet resting on the plate. It is perhaps the best way to enjoy fish because the cooking process ensures the maximum amount of flavor, given the fish is cooked with the bones and the skin. 

As much as I love whole fish, it is a preparation that I have rarely done. There are quite a few reasons; however, the main one is that I had some difficulty in finding whole fish that I would want to cook in this manner. Most standard grocery stores don't carry a large selection of whole fish. Some higher end stores have the selection, but it comes with a rather hefty price. All of this changed when I started shopping at the local Asian markets. Those stores had a large selection of whole fish.

I recently decided to take advantage of that selection. I purchased four whole sea bass because I wanted to make a New York Times recipe for whole roast fish with lemongrass and ginger. This particular recipe reminded me of my recent forays through southeast Asian cuisine. The lemongrass and ginger reminded me of Burmese (or Myanmar) cuisine, which utilizes these ingredients provide freshness to their curry dishes. The use of habanero chiles evokes Laotian cuisine, which boasts of dishes that have a spicy kick. The coconut milk draws parallels to Thai curries. All of these ingredients come together for a completely unique dish, which is why the recipe caught my attention. 

This recipe worked very well with sea bass. It could also work well with any other mild white fish. Truth be told, that would most likely come in the form of whole Tilapia, but it might work well with speckled trout or rainbow trout. Other mild white fish, such as cod, grouper or halibut are rarely sold whole and, if so, are well beyond the budgets of most people (including me). 

WHOLE ROAST FISH WITH LEMONGRASS AND GINGER

Recipe from New York Times Cooking

Serves 4

Ingredients:

  • 2 1/2 pounds of whole fish, scaled and cleaned (about 3 branzino)
  • 6 tablespoons of neutral oil (such as grapeseed or canola oil)
  • 1 1/2 tablespoons Kosher salt
  • 1 stalk lemongrass (about 2 1/4 ounces tougher outer part discarded, chopped)
  • 1 (2-inch) piece of ginger, scrubbed and chopped
  • 4 scallions, green parts sliced and white parts trimmed and left whole
  • 1 scotch bonnet chile, with or without seeds, chopped
  • 1 shallot, peeled and and chopped
  • 2 lemons
  • 1/2 teaspoon ground turmeric
  • 1/2 cup full fat coconut milk
  • 10 cilantro sprigs, cut crosswise
Directions:
1. Prepare the fish. Preheat the oven to 425 degrees Fahrenheit.  Pat the body and inside of the fish dry, and space the fish evenly apart on an unlined sheet pan.  Using a sharp knife, cut two diagonal slits, 2 inches apart, into the skin of each fish, making sure not to cut through to the bone. Repeat the slits on the other side.  Drizzle both sides and the inside with 3 tablespoons of oil and season with 1 1/2 tablespoons salt. 

2. Prepare the marinade. Working in batches if necessary, transfer the lemongrass to the bowl of an asanka or a mortar.  Use the pestle to pound the lemongrass pieces until fragrant.  Move the crushed pieces to one side of the mortar bowl or the asanka.  Add the ginger pieces and repeat the process until they are crushed.  Combine the ginger and the lemongrass.  Add the scallion greens and the scotch bonnet chile.  Use the pestle to crush and combine these with the lemongrass mixture.  Add the shallot and the zest of 1 lemon, crush and combine with the paste.  Stir in the turmeric and coconut milk.  (Makes about 1 1/4 cup marinade.)  As an alternative, you can use a food processor, adding the ingredients in order and pulsing them together.  Stir in the turmeric and coconut milk.

3. Continue to prepare the fish. Slice the zested lemon into 3 or 4 rounds. Spread the marinade generously over both sides of each fish and about 2 tablespoons into each cavity.  Place a lemon slice, the white end of a scallion and some cilantro sprigs in each cavity.  (At this point, the fish can be left to marinate for up to 30 minutes or covered and refrigerated overnight.) Drizzle the tops of the fish with the remaining oil.

4.  Roast the fish. Roast the fish until firm and cooked through, rotating the sheet pan once halfway through the process, about 22 to 25 minutes.  Slice the remaining lemon into wedges.  Serve the fish over steamed rice or alongside a hearty salad with lemon wedges for squeezing.

ENJOY! 

Friday, November 26, 2021

Arista-Style Turkey with Tuscan Chestnut Stuffing (Savage Boleks' Thanksgiving 2021)

It is interesting how a decision to depart from a tradition could, itself, turn into a tradition.  Nearly two years ago, I decided to try prepare a Christmas dinner that was different than what the traditional Italian holiday meal that my family has prepared for more than fifty years. I prepared a turkey in the style of a Tuscan pork roast. That experience gave rise to a blog post, Turkey in the Arista Style with Tuscan Bread Stuffing. My beautiful Angel loved the meal so much, both the turkey and the stuffing, that I have made the dish a few times since that holiday dinner. And, now, it has officially become the traditional Thanksgiving dinner for the Savage Boleks. 

Yet, a turkey in the arista style is itself a departure from tradition in another sense. Since the dawn of the thirteenth century, an arista has always been a pork roast. That roast evolved over time to what it is today: a mass of porcine goodness covered in a rub consisting primarily of rosemary and garlic, along with other ingredients, such as lemon, cloves and/or fennel seeds. While recipes change, the one constant is that the protein used in an arista comes from some part of a pig, either a roast or the loin. The use of a turkey is a break from that tradition. Yet, it is a good break. The reason is simple: much like pork, turkey meat provides a tableau upon which all of the flavors used in the rub come together to provide a culinary image of Tuscan flavors.  If pork is the other white meat, then turkey is the other, other white meat.

The arista-style turkey is just the beginning of this new Savage-Bolek tradition. Another important aspect is the stuffing and, because I make so much of it, the dressing. (As you may know, it is stuffing if it is stuffed in the bird; it is dressing if it is baked alongside the bird.) This stuffing is a culinary mélange of Tuscan flavors and aromas. It begins with the bread, which is focaccia. The bread is cut up and toasted until the moisture is removed. One then adds in diced pancetta (or, if that person is me cooking for my beautiful Angel, diced turkey bacon), along with diced turkey heart, liver and gizzard (that is, all of the giblets in the package provided with the turkey). This step is followed by the addition of the traditional elements of a stuffing, namely, diced onion, celery and carrots. Finally, just before the liquid (turkey stock) is added, one adds a heaping 1/4 cup of rosemary, sage and the chestnuts. after the liquid is added, the ingredients are mixed well, left to marry for an hour and then stuffed into the bird or placed in a dish to be baked.

This stuffing or dressing is perhaps the best stuffing that I have ever made. One does not have to take my word for it, my beautiful Angel has made similar proclamations. This stuffing or dressing pairs perfectly with the ingredients used to make the arista-style turkey. There are major connections in terms of flavor, with the use of turkey bacon and rosemary. Yet, the stuffing or dressing adds to the flavors of the turkey with the use of sage and chestnuts. 

The recipe set forth below is not the same recipe that I used back in 2019. I have made some modifications based upon my subsequent efforts to make this dish. The two major changes are as follows: (1) I have incorporated the juice from the zested lemons into the marinade, as a way to utilize all of the ingredients; (2) I increased the amount of times that I baste the turkey with the juices and butter from once every hour to once every 40 minutes; and (3) I added an uncovered/covered/uncovered sequence to roasting the bird. While this additional work extends the cooking time a little, it is definitely worth it if you are trying to get crispy, brown skin on  the bird. 


ARISTA-STYLE TURKEY
WITH TUSCAN CHESTNUT STUFFING
Turkey recipe adapted from Reinhardt Hess & Sabine Salzer, 
Regional Italian Cuisine, pp. 148-49
Tuscan Bread Stuffing Recipe adapted from Tasting Table
Serves many

Ingredients (for the turkey):
1 whole turkey (about 12 pounds)
4 lemons, zested and juiced
8 to 10 sprigs of rosemary
10 cloves of garlic
4 teaspoons of fennel seeds
4 pinches of ground cloves
Kosher salt
Freshly ground black pepper
Olive oil
1 stick of unsalted butter

Ingredients (for the stuffing):
1 1/2 pounds ciabatta bread, cut into 1 inch cubes
8 ounces pancetta, small dice
1 package turkey liver and gizzards (from 1 large turkey)
2 medium carrots, peeled and small dice
2 celery stalks, small dice
1 large yellow onion, small dice
2 sticks unsalted butter
1/4 cup heavy cream
3 cups turkey stock + 2 cups of turkey stock
1 cup roasted chestnuts, roughly chopped
1/4 cup minced sage
1/4 cup minced rosemary
Kosher salt, to taste
Freshly ground black pepper, to taste

Directions:
1.  Prepare the turkey.  Rinse the turkey well.  Pat the turkey dry.  Separate the skin from the turkey so that you can apply the rub directly onto the meat. Combine the lemon zest, rosemary, fennel seeds, ground cloves, garlic, salt and black pepper into a small bowl.  Mix well. Juice the lemons and pour into a separate bowl.  Whisk in olive oil with the lemon juice and then add it to the small bowl with the dry ingredients to create a paste. Add additional olive oil, if necessary, to create that paste.  Continue to mix.  Once the paste has the desired consistency, apply it to all parts of the turkey, including under the skin.  Reserve some of the rub for basting. Allow the turkey to rest for at least 2 hours in the refrigerator.

2.  Prepare the stuffing.  Preheat the oven to 225 degrees Fahrenheit.  Lay out the bread on a baking sheet and bake until dry, about 25 to 30 minutes.  Transfer the bread to a huge bowl.  While the bread is baking, heat the pancetta in a medium skillet over medium-high heat. Cook, stirring often until the pancetta is crispy and the fat has rendered, about 8 to 10 minutes. Using a slotted spoon, transfer the pancetta to the bowl with the bread.  Drain the fat into a separate bowl. Add back 1 to 2 tablespoons of the fat to the pan and add the liver and gizzards.  Cook the ingredients, turning as needed until golden and cooked through, about 4 to 5 minutes for the liver and 8 to 10 minutes for the gizzard.  Transfer to a cutting board and roughly chop, then add to the stuffing bowl.

3.  Continue to prepare the stuffing.  Add a little more of the pancetta fat back to the pan.  Add the carrots, celery and onion to the pan.  Sweat the ingredients until softened, 6 to 8 minutes.  Transfer the vegetables to the stuffing bowl.   Add the butter to the pan and cook until it begins to brown and has a nutty aroma.  6 to 8 minutes.  Turn off the heat and stir in the cream to warm through.  Add the butter mixture to the stuffing bowl with the remaining ingredients (namely, the turkey stock).  Using your hands, mix the stuffing to incorporate.  Let sit at room temperature for 1 hour. 

4.  Prepare to roast the turkey.  Preheat the oven to 400 degrees Fahrenheit. Stuff the turkey's cavities with the stuffing, and place the remaining stuffing in a baking dish.  Roast the turkey for about 3 hours or until the turkey's internal temperature reaches 160 degrees. I roast the turkey uncovered for about the first hour and twenty minutes, cover the bird for the next hour and twenty minutes, and then leave the bird uncovered for the rest of the time. Baste the turkey approximately every 40 minutes with melted butter that has some of the rub mixed into it.  Once the turkey reaches that temperature, remove the turkey from the oven and cover it.  Place the baking dish full of dressing in the oven and cook for about 30 minutes to 45 minutes, or until the dressing begins to crisp on the surface.  Remove the stuffing and set on the stove to cool.

5.  Prepare the au jus.  Drain the liquid from the roasting pan into a separator.  Pour the juices into a pot, along with 2 cups of the turkey stock. Taste and adjust the seasonings with salt and pepper if necessary.  Bring to a boil under medium high heat and reduce to a simmer.  Allow to simmer until you are ready to serve. 

6.  Finish the dish.  Spoon the stuffing and dressing into a serving bowls (one for the stuffing and another for the dressing).  Slice the turkey and place on a serving dish.  Serve immediately.

ENJOY!

Saturday, November 21, 2020

Pan-Fried Whole Trout

Heritage is sometimes an interesting subject, especially for me.  One side of my family comes from Italy.  Anyone who peruses this blog, especially in its early days, would see the Italian influences in what I cook. This influence draws heavily from my childhood, as I can remember my grandparents making homemade pasta dinners.  When I say homemade, I mean basically everything - the sauce, the sausage, the meatballs, and even the pasta were all made by their hands.  My culinary vacation through Emilia-Romagna and Tuscany further fueled my Italian-inspired cooking.

The other side of my family comes from the Czech Republic or, as it may be commonly referred to  today, Czechia. To be sure, that side of the family had more roots in the United States.  The memories of their cooking are not as strong (which is something that makes me sad).  Unlike my culinary vacation in Italy, I studied abroad in Prague, spending more than three months living and eating there. To be sure, that was during my college days, when the desire to cook was not strong. I ate a lot of Czech food, but I also had my fair share McDonalds or Little Ceasar's (I was suprised to find them there and it was a connection to home). 

Needless to say, the Czech influences are not as present on this blog. In an effort to learn more about those dishes, I bought The Best of Czech Cooking. I perused the book and came across some fish recipes. There are over fifty different species of freshwater fish swimming in the rivers througout central Europe.  In Czech waters, carp reigns as king. There are other fish, such as perch, sander (walleye), catfish and, of course, trout. 

Not only can trout be found in the rivers, but it is also part of an acquaculture industry in the Czech Republic. That industry goes back as far as the 13th or 14th century, althought it grew much quicker in the 16th century.  Landowners began to build ponds to raise fish. They focused on carp first, but have branched out to other species, like trout.  Over time, the industry became quite large.  Indeed, the Cezch Republic is one of the largest producers of fish in the European Union.  However, the Czech people have one of the lowest rates of fish consumption in the European Union. 

Still, there are fish dishes in Czech cuisine, as evidenced by my cookbook.  I chose one of those dishes: pan-fried trout. This is a very simple dish, requiring only five ingredients. Those five ingredients -- fish, flour, lemon, parsley and butter -- come together to make a simple, yet very tasty dish. Indeed, given how easy it is to make this dish, it is surprising that Czechs don't eat more fish. 


PAN-FRIED TROUT
Recipe from The Best of Czech Cooking, pg. 26
Serves 2

Ingredients:
2 small trout (1 pound each)
Salt and freshly ground black pepper
3 tablespoons flour
4 tablespoons (1/2 stick) butter
2 tablespoons chopped fresh parsley
1 lemon

Directions:
1.  Prepare the fish.  Clean and gut the fish if it has not already been prepared.  Wash the fish in cold water and then dry it with paper towels.  Season the trout with salt and pepper and cover with flour.

2.  Fry the fish.  Melt 3 tablespoons of butter on medium high heat in a large frying pan.  When the butter has melted and is quite hot, shake off the excess flour from the trout and put them into the pan.  Fry them until lightly golden on one side, 4 or 5 minutes, shaking the pan occasionally to make sure the fish does not stick.  Turn the trout over, add the remaining 1 tablespoon of butter, and fry until golden on the other side.  Add the parsley and juice from half of the lemon.  Cook for another few seconds.  Serve with additional parsley and lemon wedges.

ENJOY!

Saturday, September 28, 2019

Around the World in 80 Dishes: Tonga

It is hard to believe that it has been nearly a year since I last undertook one of the challenges that is part of my Around the World in 80 Dishes.  That last challenge was to cook a main course from the country of Ghana.  The dish was Jollof Rice with Goat, one of two dishes that I have made with goat (the other was a Guyanese Goat Curry).  As I return to this challenge, I wanted to do something completely different, something completely new. 

As I perused my previous challenges, I noticed that I have not made a dish from any of the nations in what could be referred to as Polynesia, Melanesia or Micronesia.  These three names refer to the regions of islands in the Pacific Ocean.  Polynesia consists of a variety of islands, including the countries of Samoa, Tonga and Tuvalu.  Melanesia includes Papua New Guinea, the Soloman Islands, Fiji and Vanuatu.  Micronesia includes the Marshall Islands and Kiribati. After giving it some thought, as well as a review of recipes, I decided that my next challenge would be to make a main dish from the Kingdom of Tonga.

As with most islands in the Pacific Ocean, Tonga had a rich history long before the arrival of the colonizing powers such as the Dutch, British, French or even the Americans. The earliest evidence of settlement among Tonga's 169 islands dates back to between 1,500 to 1,000 B.C.  This settlement is believed to have been part of the Lupita, who were the predecessors to the Polynesian peoples that eventually settled on the island.  That latter settlement was dated to around 888 B.C.  Tonga grew in power and influence, led by a line of succession of rulers known as the Tu'i Tonga.  The "Tu'i Tongan" empire reached its height in the 12th century, and began to decline thereafter.

Speeding up the history lesson, the Tongans eventually came into contact with Europeans, first Dutch explorers in 1616 and later the British, the Spanish and the Americans in 1840.  Fast forward a few hundred years and Tonga became a protected territory of the United Kingdom in 1900, which lasted until 1970. During this time period, as was true throughout its history, Tonga retained its sovereignty and was the only island nation to retain its monarchy. This independence sets Tonga apart from other Pacific nations.  

MAIN COURSE

While I love to discuss history, the challenge is to cook a main course based upon the cuisine of a country.  The cuisine of Tonga, like any country, is defined by where it is located and what one could find there.  As a collection of islands in the Pacific Ocean, one would expect that seafood plays a key role in the cuisine.  To be sure, there are a wide range of seafood dishes, but, one dish that I kept coming across is 'Ota 'Ika, which I decided would be centerpiece of this challenge.

Put simply, 'Ota 'Ika is a Pacific Islander version of ceviche. It consists of fish marinated in citrus (usually lime juice) for a period of time, usually an hour or so.  What sets aside this dish from the Latin American versions of ceviche is that 'Ota 'Ika is served in coconut milk.  The sweetness of the milk balances the citrus of the lemon juice.

'Ota 'Ika is traditionally prepared in Tonga with the moki or blue cod, which is a species of trumpeter fish.  However, that particular species of trumpeter fish is found in the waters around Australia, New Zealand and, of course, Tonga.  In other words, it was not available where I live.  I tried to find alternatives, such as Trevally, but I still had the same problem.  Eventually, I decided to use a fish that is used for ceviche, such as snapper.

One last note, check to see if the fish is "cooked through."  If the pieces are still raw in the inside, let it rest in the citrus for longer, up to 24 hours.


'OTA 'IKA
Recipe from the Otango Daily Times
Serves 6 to 8

Ingredients:
2 pounds of fresh fish (such as moki or blue cod)
Juice of 4 to 5 lemons
3-4 spring onions, chopped
1 small cucumber, peeled, seeded and cut into pieces
2-3 tomatoes, chopped
2 bell peppers, sliced
1 2/3 cup of coconut milk
Salt and pepper to taste

Directions:
1.  Prepare the fish.  Wash the fish, cut into small bite-sized pieces and put into a bowl.  Squeeze the lemons and pour the juice over the fish.  Mix well, cover and place in the refrigerate to marinate for at least a half an hour to an hour or overnight.  

2. Prepare the vegetables.  Chop the spring onions and tomatoes.  Slice the peppers.  Peel the cucumber, slice in half lengthwise and scrape out the seeds with a teaspoon.  Cut the cucumber into bite sized pieces.  

3.  Finish the dish. Take the fish from the refrigerator, add the cucumber, tomatoes, peppers and spring onions.  Pour over the coconut cream over and mix well. Taste, adding salt and pepper as needed.  Serve chilled with taro, cassava and kumara.

*     *     *

It's been a long time since I did a ceviche.  The last time may have been when I did my challenge to prepare a main dish from Ecuador, which was Black Bass ceviche.  My effort to produce 'Ota 'Ika was not much of a success.  I followed the directions, but the fish was not "cooked" all the way through. It turns out my "small bite size pieces" were not small enough and/or it needed more time or citrus juice to complete the process.  While I am a big fan of sushi, I was not going to take a risk.   Not every dish can be a success, but I learned a lesson (which is just as important) ... make sure small bite sized pieces are indeed small, bit sized pieces.  

Until next time ... 

ENJOY!