Showing posts with label Serrano Chiles. Show all posts

Saturday, August 16, 2025

Chile Verde Guacamole

If one looks at a guacamole recipe, they will most likely see an ingredient list that includes avocados, as well as perhaps tomatoes, onions, and cilantro. Almost all of those recipes have lime juice as an ingredient. But, as it turns out and I soon learned, that not all guacamole is prepared with lime juice. 

That happens to be the case in the Mexican State of Sonora. Chefs and cooks prepare their guacamole with out the added juice. Instead, they use other ingredients to provide additional layers of flavor, such as roasted anaheim chiles, to to enhance the "heat" of the dish, such as serrano chiles. 

A preparation of guacamole without lime juice may seem out of the ordinary (at least it did to me). However, I like to think that the Sonorans may be holding onto something that reflects a more traditional method. Something that goes back centuries. 

Allow me to explain.  The domestication of avocados in Mexico can be dated back at least 5,000 B.C.E. The dish that we know as "guacamole" is not as old, with its history going back to 14th to 16th centuries. At this time, the Aztec empire controlled much of central Mexico. History has accounts of Aztecs preparing a spread consisting of mashed avocados, along with added tomatoes, onions and chiles. That spread pretty much sums up guacamole. The name of that spread, ahuacatl  (avocado) and molli (sauce), gives us the term "guacamole." The Aztecs did not use lime juice, even though they did use that ingredient in other dishes. So, in a sense, the Sonoran way of preparing guacamole tracks the traditional and historical method of the Aztecs, at least with regard to the absence of lime juice. 

One final note: this particular Sonoran guacamole recipe adds two types of chiles - a roasted Anaheim chile and a serrano chile. The latter chile obviously provides heat to the dish and, if a serrano is too much heat for you, then you can substitute a jalapeno pepper. But, don't use a green pepper, you need to have some kick in the guacamole. The former chile chile provides some smoky and even sweet elements.  If you cannot find Anaheim chiles, you can substitute a poblano pepper. 

CHILE VERDE GUACAMOLE

Recipe from NYT Cooking

Yields 3 cups

Ingredients:

  • 1 fresh Anaheim chile
  • 1 serrano chile, finely chopped
  • 3 tablespoons finely chopped white onion
  • 2 tavblespoons coarsely chopped cilantro leaves and tender stems
  • 1 teaspoon kosher or sea salt, plus more to taste
  • 3 ripe avacados, haved and pitted, diced and mashed

Directions: 

1. Prepare the Anaheim chile. Place the Anaheim chile on a small baking sheet covred with aluminum foil. Roast it under the broiler, flipping a couple of times, until the chile is wilted and its skin is completely charred and wrinkly. (Alternatively, you can char the chile direclty on a hot comal or a cast-rion pan set over medium heat, or a grill set to high.)

2. Continue to prepare the Anaheim chile. Place the charred Anaheim chile in a plastic bag and close it well. Let it steam and sweat for 5 to 10 minutes. 

3. Prepare the rest of the ingredients. As the Anaheim chile steams, add the serrano chile, onion, cilantro and salt in a bowl or molcajete, and mash until combined. add the avacado and continue to mix and mash until you have formed a chunky puree.

4. Finish the dish. Once the Anaheim chile is cool to handle, remove fromthe bag, slip off the charred skin adn make a slit down the side and remove the seeds and stem. You could rinse the chile under a thin stream of water to help remove the seeds or rinse it off by dipping it into a bowl of water. Finely chop the Anaheim chile. Add to the avocado mixture and stir to combine. Season to taste with salt. 

PEACE.

Saturday, July 12, 2025

Grilled Octopus, Roasted Salsa Verde, Tomato Piquillo

For the past several years, my work would take me to Fort Lauderdale, Florida. Most of those trips involved a stay at the Hilton Fort Lauderdale Beach Resort. Each stay inevitably included at least one lunch and/or dinner at a restaurant within the hotel. The restaurant is Sun Surf Sand or S3. 

I spent each occasion sitting at a table on the outside patio of the restaurant, staring at the Atlantic Ocean whose waves rose up to the beach across the street. I rarely spent much time looking at the menu, because I always knew what I wanted. It was an octopus dish, prepared with a salsa verde and a tomato piquillo. 

During my last trip to Fort Lauderdale, I probably ate that dish three times over the course of two weeks. It is perhaps the best dish on the restaurant's menu and it was always something that I looked forward to when I was in town. A plate of nice sized octopus pieces and large beans, brought together with the salsa verde and highlighted with the tomatoes and leafy greens. 

When I returned home, I decided that I would try to prepare this dish myself. I purchased some pre-cooked octopus tentacles (which makes preparation of this dish really easy), and all of the other ingredients. While I could try to prepare the dish as I remembered it at S3, I decided to do things a little differently. First, I decide that I would grill the octopus tentacles. That would provide a slight crunch that could contrast with the beans and the tomatoes. I also decided to prepare a roasted salsa verde. This required a quick roasting of the tomatillos, chile and garlic before blending them together with the cilantro to create the sauce. 

In the end, I am glad I made this dish. It made for a delicious, light lunch. Given how easy it is to make, it will be made again and again in the future. 

GRILLED OCTOPUS, ROASTED SALSA VERDE, TOMATO PIQUILLO

A Chef Bolek Original

Serves 4

Ingredients (for the octopus):

  • 1 pound octopus tentacles
  • Olive oil
  • 1 can of gigante beans or butter beans
  • Handful of micro-greens 

Ingredients (for the sala verde):

  • 1 pound tomatillos, husked and rinsed
  • 1/4 cup fresh cilantro, minced
  • 1 garlic clove, peeled
  • 1 serrano or jalapeno pepper, stem removed
  • Sea salt

Ingredients (for the Tomato Piquillo):

  • 1 cup grape tomatoes
  • 1/4 piquillo pepper

Directions:

1. Complete initial preparation. Rinse the beans under cold water and set aside. Rinse the microgreens under cold water, set aside. 

2. Prepare the salsa verde. Spread tomatillos out on a baking pan. Roast tomatillos about four inches under the broiler for about 6 minutes until they start to brown on one side. Flip the tomatillos and continue to roast them for another 6 minutes. Remove the tomatillos and set aside to cool. Once they are cool, add the tomatillos to a blender wtih the cilantro, chile, and garlic. Blend until you reach your desired consistency, season with sea salt.

3. Prepare the tomato piquillo. Finely dice and mash the piquillo pepper into a paste. Add the tomatoes to a bowl and then the pepper paste. Combine until the tomatoes are covered and season with a little salt. 

4. Grill the octopus. Heat a grill over medium high heat. Brush the octopus legs with olive oil. Grill the legs, about 3-4 minutes per side, until the legs are charred. Remove from the grill. 

5. Finish the dish.  Portion out the beans on four plates or dishes. Slice the octopus tentacles in relatively even pieces, and portion them to each plate or dish. Drizzle the roasted salsa verde over the octopus and beans. Garnish with the tomatoes and microgreens. 

PEACE.

Saturday, October 5, 2024

St. Helena Fish Cakes

If you find yourself in the middle of the Atlantic Ocean in the southern hemisphere, you may find yourself very far away and very close at the same time. You will most likely be far away from any significant land mass, as both South American and Africa are separated by thousands of miles of ocean. But, you may be very close to the island of St. Helena (and that is a big maybe).

St. Helena sits in the middle of the Atlantic Ocean in the Southern Hemisphere. It is over 1,200 miles from the African coast (where one would be standing in Namibia or Angola) and 2,500 miles from the South American coast (where one would be standing in Brazil). The island is figuratively and literally in the middle of nowhere. 

That isolation proved helpful when it came to banishing a certain Le Petit Caporal (i.e., Napoleon) in 1815 after he escaped his first imprisonment on the island of Elba. But, there have been people living on that ten mile by five mile long island since the late seventeenth century. Recent statistics place the number of people calling the island their home at over 4,400.  

Saints (source: St. Helena Info)
The people of St. Helena -- who refer to themselves as "Saints" -- descended from Europeans, who were mostly planters, government workers and ex-soldiers. Given St. Helena was part of the British empire, there are also people of Chinese ancestry, whose family members came to the island as workers, or of other Asian or African ancestry, whose family members were forcibly brought to the island as slaves. Together, the Saints have developed their own identity, culture and cuisine.

The cornerstone of Saint cuisine is the Fish Cake. Given St. Helena is an island surrounded by thousands of miles of ocean, one could expect that fish would have a prominent role in both the cuisine. The most prevalent fish in the Saint diet may well be yellowfin tuna. Saint cooks take fresh tuna, shred it down with a knife, and then prepare the fish cakes with mashed potatoes, onions, parsley, thyme and bacon. But, there is one ingredient that is just as important to the fish cake as the fish ... the chile. A Saint Fish Cake must have bite (that is, in the Saint vernacular, it must be spicy). Most recipes call for a "chile" or "chilli," but, depending upon the bite you are looking for, I would go with a jalapeno pepper (for less of a bite) or a serrano pepper (for more of a bite). If a serrano is not enough, there is alway the Scotch Bonnet or Habanero pepper.

In the end, the fish cake was very tasty, but I have to work on my preparation skills with this dish. I am used to making crabcakes, whose starch usually involves crackers. The use of mashed potato was part of the binding agent was new for me. I had some difficulty keeping the fish cakes together during the cooking process, but that can be improved when I make this dish again. 

Until then, I can just sit back and think about a short banished emperor sitting at a table on an island in the middle of nowhere. According to historical records, it took a while for Napoleon to get used to his new surroundings. Records published in 1824, which was after Napoleon's death in 1821, recounted that "fresh beef was so precious as to have occasioned restrictions upon its consumption." While fresh beef may have been hard to come by, one could picture Napoleon staring down at a table of full of fish cakes. And, thanks to artificial intelligence, we can now see a relatively close depiction of that fictional moment for ourselves. 

If you are as interested about St. Helena's island as I am, check out St. Helena Island Info at this website

ST. HELENA FISH CAKES

Recipe from Aberdeen News

Serves 4

Ingredients:

  • 1/2 pound Russet potatoes, peeled, quartered
  • 1/2 pound fresh tuna
  • Mild oil, such as canola
  • 1 small onion, finely chopped
  • 1 small clove of garlic, finely chopped
  • 1 slice bacon, diced
  • 1 tablespoon finely chopped fresh parsley
  • 1 teaspoon finely chopped fresh thyme
  • 1 fresh serrano chile, finely chopped
  • 1/4 teaspoon salt
  • 1/4 teaspoon black pepper
  • 1/4 teaspoon paprika
  • 1/4 teaspoon cayenne
  • 1 egg, lightly beaten
  • 1 lemon, zested.

Directions:

1. Boil the potato. Settle potato chunks in a large pot of salted water. Bring to a boil; cook until tender (poke one with a skewer, it should be easy work), about 18 minutes. Press potatoes through a ricer into a large bowl or smash with a potato smasher. Let cool. 

2. Prepare the tuna.  Use a sharp, heavy knife to finely chop the tuna (a little coarser than ground beef.). Use a fork to gently mix into the cooled potato. 

3. Saute remaining ingredients (except egg and lemon zest). Pour 1 tablespoon of oil into a large skillet. Heat over medium. Scrape in onion, garlic, bacon, parsley, thyme, chile and spices. Cook, stirring, until everything looks brown and tasty, about 8 minutes. Scrape ono a plate to cool. Wipe out skillet. 

4. Prepare the fish cakes. Scrape the cooled onion mix onto the fish and potatoes. Pour in egg, scatter on zest. Mix gently. Shape 8 pucks about 3/4 inch thick and 2 1/2 inches in diameter. Fry pucks until brown, about 2 to 3 minutes per side. Drain on paper towels.

PEACE.

Saturday, August 17, 2024

Grilled Clams with Mexican Salsa and Crumbled Chicharrones

Grilling clams is an easy way to prepare the shellfish. The heat of the grill cooks the clams in just minutes. The clams can be plucked off the grill, thereafter removing the top shell. The clam rests on the bottom shell, ready for whatever topping you wish to apply. I have experimented with a few different toppings, which seem to gravitate around Southeastern Asian cuisine. I have prepared Grilled Clams with a Cambodian Ginger Sauce and Vietnamese Grilled Clams with Oyster Sauce and Peanuts.  Both recipes were delicious.

However, this time I wanted to draw inspiration for a topping from a different part of the world. I chose Mexico because I thought that a take on a salsa would be a great topping for grilled clams. I looked for recipes, which were not too hard to find. However, I wanted to do more than simply create a Mexican-inspired topping. I wanted to go above and beyond. I really wanted a recipe that would stand out.

Looking at the recipes, some of them called for the use of bacon. Pork goes very well with clams. Look at any clam chowder and you will find some kind of pork (usually bacon, salt pork, or ham) used to make the recipe. There also also many dishes, like Porco Alentejana, that combine a cut of pork (like a pork butt) with clams. For this recipe, I wanted to take a more Mexican approach. The pork would not be bacon. Instead, it would be chicharrons.

Generally speaking, chicharrones are pieces of fried pork skin. There are many versions of chicharrons, but the classic version involves pork skin or pork belly that is deep fried. If it is just the skin, the process produces a light, puffy, crackling goodness. Chicharrones did not originate in Mexico; instead, these fried pork rinds got their start in Spain, and, more specifically, in the Andalusia region. Spanish conquistadors and colonialists brought not only pigs with them, but the recipes to prepare, among other things, chicharrones. The fried pork rinds took hold across much of the Spanish speaking world, including Mexico, where they are often added as an accompaniment or to finish a dish. 

That is how I used them in this grilled clams recipe. I prepared a Mexican salsa, drawing from recipes that I could find from Baja California. That is the Mexican State where one is most likely to find and harvest clams in Mexico. I took that recipe and then used crumbled chicharrones as a way to finish the dish. The end result was amazing.  I definitely need to incorporate this ingredient into my cooking more often.

GRILLED CLAMS WITH MEXICAN SALSA AND CRUMBLED CHICHARRONES

Recipe adapted from E is for Eat

Serves 2-3

Ingredients:

  • 2 pounds of top neck clams (about 8-12 clams)
  • 1/4 cup chicharrones, crumbled
  • 1 bunch scallions, white parts finely diced, green parts thinly sliced
  • 1 small serrano pepper, seeded and diced
  • 1 tomato, seeded and diced
  • Splash of tequila (about 1 ounce)
  • Pinch of red pepper flakes
  • 1 teaspoon dried Mexican oregano
  • 3-4 cloves garlic, minced
  • Couple dashes hot sauce (optional)
  • 1 lime, zested and juiced
  • Sea Salt
  • 2 tablespoons minced cilantro
  • 1 tablespoon vegetable oil

Directions:

1. Sauté the onions, pepper and garlic. Heat the vegetable oil in a skillet over medium-high heat. Add the scallions, peppers and garlic. Sauté for about 4-5 minutes. Add the crushed red pepper and oregano. Stir the mixture. Add the tequila and cook for about another 2-3 minutes until the tequila has cooked down. Add the tomatoes and cook for another 2-3 minutes.  

2. Finish the sauce. Remove the onion mixture from the heat, add the lime juice, lime zest and sea salt. Stir to combine. Pour the sauce into a bowl, garnish with the cilantro and chicharrones. 

3. Grill the clams. Heat a grill on high heat. Place the clams on the grate. Close the grill and cook the clams until they open, at most 5 minutes.  Remove the clams from the grill.

4. Finish the dish. Remove the top shells from the clams. Spoon some of the salsa over each clam. Serve immediately. 

PEACE.

Saturday, July 20, 2024

Tacos de Chapulines con Tequila y Guacamole

One of the benefits of a personal food blog, as well as the desire to learn more about food, is the moment of discovery. If I just lived my life in a suburban city in the United States, in my own little bubble or cocoon of daily existence, there is a lot that I would never, ever come across. This blog has served as the primary means through which I can learn more about food. It has led me down paths that I know I would never have walked otherwise. 

One such path led me to eating fried grasshoppers.

They are called chapulines, and, have been a fixture of the cuisine of indigenous peoples in Mexico and Central America. The little grasshoppers were an important source of protein before Spanish conquistadors and colonizers brought domesticated animals like pigs and cows. People would head out early in the morning, when it was cooler, to collect the grasshoppers. (Apparently, grasshoppers are less active when it is cooler, rather than in the heat of the day.) They would bring back the catch, and prepare them on a comal, which is a flat, cast iron griddle on which the grasshoppers would be toasted or fried. Once cooked, the grasshoppers would be seasoned with garlic, lime, salt and chiles. 

To state the obvious, I did not go out into fields to catch grasshoppers. I also did not toast them on a comal or any other griddle. As someone who lives in the suburbs of a city, I ordered a package of chapulines online. The grasshoppers came pre-seasoned with salt, lime and chiles, which was okay for the preparation that I had in mind. 

My goal was to recreate my very first experience eating chapulines. It was at Oyamel, a restaurant owned by renown chef, Jose Andres. The restaurant's menu included (and still includes) a chapulines taco. The menu described the taco as including grasshoppers sautéed with shallots, tequila and served with guacamole. Channeling my inner Andrew Zimmern (the host of Bizarre Foods), I ordered the taco. When I took my first bite, I noted the crunchy texture of the grasshoppers, which was well contrasted with the smoothness of the guacamole. 

For my effort, I decided to give a little nod to the region of Mexico that is most associated with chapulines ... Oaxaca. I found a recipe for Oaxacan guacamole from Bricia Lopez's Oaxaca cookbook (which is an excellent cookbook). That would serve as the basis for my taco. I then used the grasshoppers I purchased online, sautéing them in some oil with the shallots and finishing it with what was basically a shot of tequila. 

The recipe was very good, reminding me of what graces the plate at Oyamel. The biggest difference was the saltiness of the chapulines, which was due to the package that I purchased. When I make this dish in the future, I will have to figure a way to lightly rinse off some of that salt. This rinse will be necessary especially if (and when) and I try to incorporate them into other recipes, such as tlyuda.

TACOS DE CHAPULINES CON TEQUILA Y GUACAMOLE

Guacamole recipe from Bricia Lopez, Oaxaca, pg. 252

Serves 4

Ingredients (for the tacos):

  • Corn tortillas
  • 1 cup chapulines (plain, lime/salt, adobo or chipotle)
  • 2-3 tablespoons tequila
  • 1/4 small shallots, julienned or chopped finely
  • 2 tablespoons olive oil or vegetable oil

Ingredients (for the guacamole):

  • 6 tablespoons fresh lime juice
  • 1 teaspoon sea salt
  • 1 cup fresh cilantro, chopped
  • 1 serrano chile, stem removed
  • 1/4 dried oregano
  • 3 avocados, pitted and peeled

Directions:

1. Prepare the guacamole. Blend the lime juice, cilantro, sea salt, chile and oregano in a blender. In a large mixing bowl, mash the avocados. Pour the lime mixture over top and mix until everything is well combined.

2. Prepare the chapulines. Heat the oil in a skillet. Add the shallots and sauté for a few minutes. Add the chapulines and continue to fry until crispy. Add the tequila and keep stirring for another minute or two. 

3. Finish the dish. Warm the corn tortillas. Spoon the guacamole in the center of the taco and top with the chapulines. Serve immediately. 

PEACE. 

Thursday, April 4, 2019

Indian Flank Steak Tacos

For me, fusion cuisine is something of an issue.  I am a big fan of a wide ranges of cuisines, for the ingredients, the cooking processes and, of course, for the dishes produced.  When one starts picking and choosing from two or more cuisines to produce a dish, that becomes a little more problematic.  To be sure, there are some very good examples of fusion cuisine.  But, there are also a lot of misfires.

Yet, despite all of my misgivings about fusion food, this recipe caught my attention.  It involves the fusion between Mexican cuisine and Indian cuisine.  The smells and flavors of Masla-marinated meat served in naan to produce what is one of the most quintessential dishes of Mexican cuisine ... the taco.  Perhaps it is the fact that I like tacos.  Maybe it is the fact that I love Indian cuisine. Either way, I was determined to make this recipe.  And, apart from the need to improve my ability to cut flank steak on a bias, the recipe got me to rethink my view about fusion cuisine. 

The key to this recipe is the masala.  It begins with the classic of garlic and ginger, but only chiles, vinegar, curry leaves and onions are added to complete the masala.  (If you don't have curry leaves, don't worry, it will still turn out well.)  Once the masala is prepared, then the meat must be marinated.  The recipe calls for at least one hour of marination, but I would go at least two hours if not a little longer.  Once the steak is marinated, a quick grilling over high heat on the grill ensures that the steak will be incredibly delicious.  Just cut it on the bias to reduce the chewiness and serve with grilled naan, the onions, and the cilantro.  

Maybe fusion food is not that bad after all. 


INDIAN FLANK STEAK TACOS
Recipe adapted from Tasting Table
Serves 4

Ingredients (for the Masala):
3 tablespoons canola oil
1 large red onion, diced
1/2 cup packed curry leaves
6 garlic cloves, roughly chopped
1 serrano chile (or jalapeno chile), minced
1 three-inch piece of ginger, peeled and roughly chopped
1/4 cup soy sauce
1/4 cup white distilled vinegar
2 tablespoons freshly ground black pepper
1 teaspoon kosher salt

Ingredients (for the tacos):
1 pound of flank steak
1/2 red onion, plus more for serving, thinly sliced
2 tablespoons freshly squeezed lime juice
Grilled naan, for serving
Lime wedges, for serving
Cilantro leaves, for serving

Directions:
1.  Prepare the masala.  In a 12-inch skillet, heat the canola oil over medium-high heat.  Add the onions and cook  until translucent and lightly golden, 3 to 4 minutes.  Add the curry leaves, garlic, serrano (or jalapeno) and ginger and cook until fragrant, 2 minutes more.  Remove from the heat and transfer to a blender with the remaining masala ingredients.  Blend until smooth and let cool completely.

2.  Marinate the meat and the onions.  In a large bowl,  toss the flank steak with the masala to coat.  Refrigerate for at least 1 hour.  Meanwhile, in a small bowl, toss the sliced red onion with lime juice and set aside. 

3.  Grill the meat.  Light a grill or heat a cast iron grill pan over high heat.  Grill the steak, flipping once until caramelized and medium rare, 7 to 8 minutes.  Let rest for 5 minutes, then thinly slice against the grain on a bias. 

4.  Finish the dish. Serve the steak with pieces of grilled naan, sliced red onion and lime wedges, garnishing with cilantro leaves.

ENJOY!

Thursday, November 9, 2017

Mexican Oyster Cocktail

Oysters have a special place in Maryland and Virginia, one that goes back hundreds of years.  When John Smith navigated the Chesapeake Bay in 1608, he wrote down his observations of everything he saw, including the wildlife.  Smith made two trips in 1608 from Jamestown, Virginia into the Bay.   His notes documented the tremendous diversity of life in the bay: including "sturgeon, grampus, porpoise, seals, stingrays, ... brits, mullets, white salmon (rockfish), trouts, soles, and perch of three sorts ...."  When it came to the Chesapeake Bay oysters, Smith remarked that they "lay as thick as stones." 

A lot has happened over the following four centuries, but it is safe to say that the oysters do not "lay as thick as stones" today in the Bay.  Overfishing, disease, pollution and, yes, maybe even climate change, have contributed to the downfall of oyster stocks in the Bay. According to Sea Grant Maryland, a study by the University of Maryland found that the oyster population is just 0.3% of what it was in the 1800s.  Yet, there are rays of hope in the Delmarva.  Those oyster stocks have stabilized and have even shown the promise of increasing, especially in Maryland.

One of the factors behind the success has been the increase in aquaculture of oysters.  Virginia took the lead in this effort, but Maryland is catching up when it comes to promoting the farming of these important bivalves.  One example of the effort in Maryland is Harris Seafood Company, which is the last packinghouse in Kent Narrows and the last shucking house in the State of Maryland.  Harris has an aquaculture program that enables the grower to plant millions of oysters in the Chesapeake Bay on ground that it leases.  This video provides a very brief explanation of the oyster aquaculture process:


That is just one example.  When it is multiplied by the growing number of aquaculture farms in Maryland and Virginia, the product is the promise that the Chesapeake oyster population can continue to rebound.  And, to state the obvious, that means more oysters for people like me, who love to eat them.

Usually, I buy oysters and shuck them, using skills I learned as a cook in a seafood restaurant while I was in college.  Shucking oysters takes time, because, despite my cooking experience, I lack the true expert skills of a shucker in a shucking house.  When pressed for time, I will purchase a pint of pre-shucked oysters.  Given I have had little time in recent days and weeks, I recently purchased a pint of pre-shucked Maryland oysters from Harris Seafood Company.

When I bought those oysters, I already had a recipe in mind ... a Mexican Oyster Cocktail.  The recipe comes from one of Mario Batali's cookbooks, America Farm To Table, which has a whole chapter dedicated to oysters.  I love all of the recipes, but this cocktail recipe caught my attention.  The reason is that I found it while I was writing the blog post for Oyster Shooters with Tomatoes, Lime and Chiles.  The oyster shooter recipe still stands as the best recipe ever invented, but, l was looking for challengers.

This recipe brings together a lot of ingredients -- tomatoes, scallions, celery, shallots, and chiles -- that provide a good base for an oyster shooter.  All of those ingredients work well together, especially when the lime juice and zest are added.  If there was any issue, it was the relative lack of liquid in the cocktail.  The lime juice does not provide enough liquid for the cocktail.  I strained the oyster liqueur from the pre-shucked oysters and added it to the cocktail, but it was still not enough.  Maybe the next time I make this recipe, I will add some water or, maybe because it is a Mexican oyster cocktail, I will add some tequila.  


MEXICAN OYSTER COCKTAIL
Recipe from Permaquid Oyster Company
Printed in Mario Batali, America Farm to Table, page 61
Serves 4 to 6

Ingredients:
4 ripe plum tomatoes
4 scallions, thinly sliced
1 bunch fresh cilantro, chopped
2 tablespoons extra-virgin olive oil
1 teaspoon ground cumin
2 ribs celery, sliced paper thin
2 shallots, finely minced
Zest and juice of 3 limes
2 serrano chiles, finely chopped
24 fresh oysters, scrubbed
Kosher salt

Directions:
1.  Prepare the cocktail.  Halve the tomatoes and squeeze the seeds into a bowl..  Chop the tomatoes into 1/4 inch dice and toss them into a bowl.  Add the scallions, cilantro, olive oil, cumin, celery, shallots, lime zest, lime juice, and chiles and mix well, then cover and refrigerate for 1 hour.

2.  Finish the dish.  Shuck the oysters over a strainer set over a small bowl to collect their liquid.  Toss the oysters with their liquor into the mixture and stir gently.  Check for seasoning, it may or may not need salt.  Serve in clear glasses or seafood cocktail servers.

ENJOY!

Tuesday, August 4, 2015

Grilled Steak with Green Sriracha

One of the things on my culinary bucket list is to make my own hot sauce.  It may not seem like much, especially to cooks and chefs who could easily make a hot sauce for various dishes.  However, I love hot sauce.  I really, really LOVE hot sauce.  I usually keep at least 3 or 4 different types of hot sauce on hand in our refrigerator, including the "staples," like Tabasco and Sriracha. 

Recently, I came across a recipe for a grilled steak with a green sriracha sauce.  A sriracha sauce is a type of hot sauce typically made from chiles, distilled vinegar, garlic, sugar and salt. The sauce is Thai in origin, often called sot Siracha; the name comes from the city of Si Racha, which is located in the Chonburi province of eastern Thailand.  The sauce is typically used in Thai cuisine as a condiment; and, it even finds its way into Vietnamese cuisine, served alongside bowls of phở.

Sriracha is particularly popular in the United States.  Given that over one ton of Sriracha sauce is produced every hour, it has found its way into many grocery stores and restaurants across the United States.  The supply is readily eaten by demand, including one person who consumed three bottles of it at one time.  While I have consumed my fair share of Sriracha sauce, I have never simply guzzled the hot sauce.  It is best drizzled over food, especially fried or grilled foods.

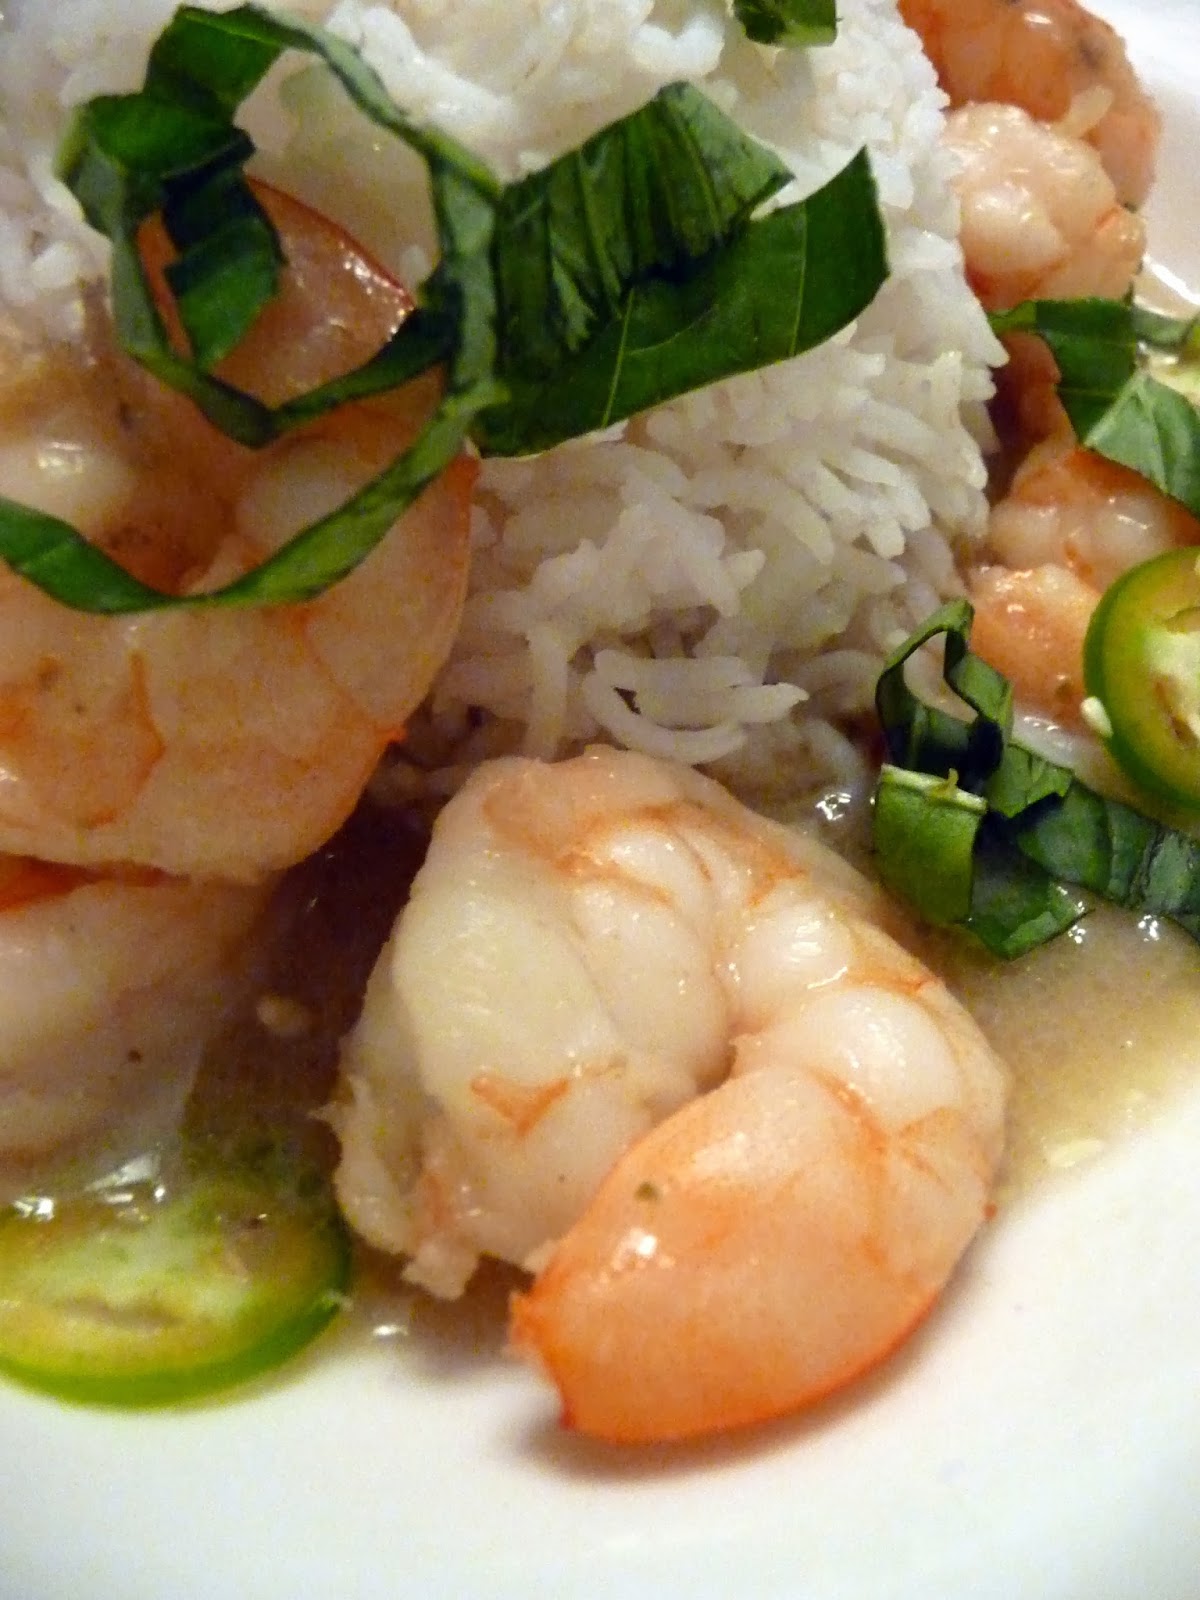
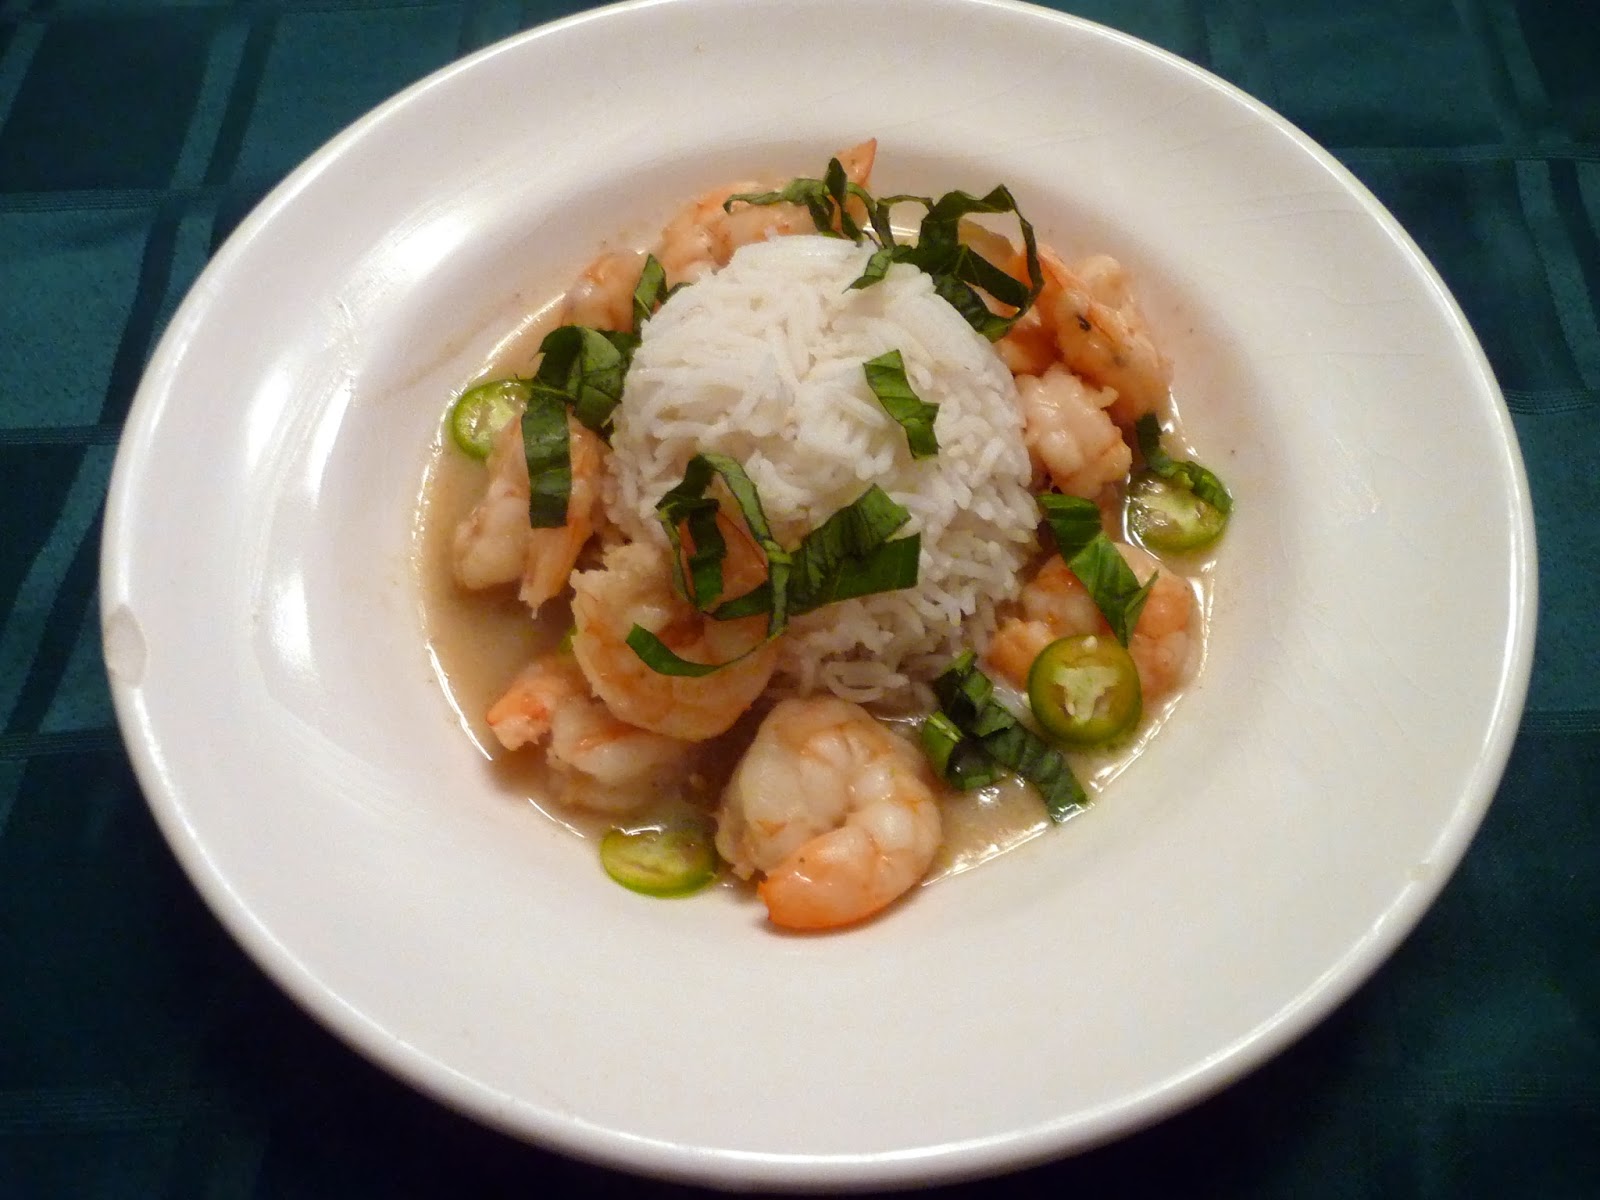
While the red Sriracha sauce is almost ubiquitous, the green sauce seems more intriguing and it is one that I have never tried before.  The recipe incorporates green chiles -- roasted poblano peppers and serrano chiles -- with a range of fresh ingredients such as basil, chives, cilantro, lemongrass, lime leaves and coconut.  The poblano peppers add depth to the flavor of the sauce, while the serrano chiles provide quite the kick, which one would expect.  The end result is a hot sauce that is in many respects better than the red Sriracha.  Maybe it is the use of fresh ingredients, prepared using a blender.  Maybe it is the tartness of the lime juice contrasted with the heat of the serranos, along the field of chives, cilantro, basil and mint.  Maybe it is just that I love most of what I make.    


GRILLED STEAK WITH GREEN SRIRACHA
Recipe from Food & Wine
Serves 4

Ingredients:
3 large poblano chiles 
2 serrano chiles
3 large garlic cloves, peeled & smashed
1/2 cup fresh ginger, sliced
1 half-inch piece of turmeric or
     1/2 teaspoon of ground turmeric
1 cup shredded unsweetened coconut
2 loose cups of basil leaves
2 loose cups of mint leaves
1 1/2 cups of snipped chives
1/2 cup of chopped cilantro
4 kaffir lime leaves, shredded
1 lemongrass stalk, tender inner bulb, bottom 4 inches
     peeled and thinly sliced
1 cup canola oil, plus more for grilling
1/4 cup of lime juice, plus 2 tablespoons
Kosher salt
4-5 pounds of steak, such as flank steak or skirt steak, cut into 
     4 even sized pieces

Directions:
1.  Prepare the Green Sriracha.  Roast the poblano chiles directly over a gas flame, turning, until charred and tender.  Transfer to a bowl, cover with plastic wrap and let cool.  Peel, core and seed the poblanos.  Transfer the poblanos to a blender.  Add the serranos, garlic, ginger, turmeric, coconut, basil, mint, chives, cilantro, lime leaves and lemongrass and pulse to chop.  With the machine on, add the 1 cup of oil and puree.  Add the lime juice and season the green Sriracha with salt. Once the sauce is made, it can be refrigerated for up to three days.

2.  Grill the steak.  Light a grill.  Brush the steaks with oil and season with salt.  Oil the grill grates and grill the steaks in batches over high heat, turning once or twice, until the meat is lightly charred and medium rare, 5 to 6 minutes.  Cook a little longer, 1 to 2 minutes more, to obtain medium, if that is your desired doneness.  Transfer to a carving board and let rest for 5 minutes before slicing across the grain.  Serve the steak with the green Sriracha.

Monday, January 27, 2014

Thai Shrimp with Red Curry

A few weeks ago, I posted a recipe for Kaeng Kiao Wan Kung  or Thai Shrimp in Green Curry.  In that post, I noted my many efforts to make the dish, all of which technically failed due to my failure to procure one of the most vital ingredients of the dish ... green curry paste.  Whenever I was at the store, the shelves were stocked with red curry paste, but no green curry paste.  I would inevitably leave with a jar of red curry paste.  However, red curry paste does not make for a good Thai Shrimp in Green Curry.

Nevertheless, I used that paste and made Thai Shrimp in Red Curry.  This dish most resembled the curry dishes that I would order whenever we went out to eat at a Thai restaurant.  The aromas were very similar, as were the tastes.  The combination of the red curry paste, coconut milk, brown sugar, and, the fish sauce work very well with this dish.  This curry dish was a good consolation for all those times that I failed to find the green curry paste.

This leaves the question of the moment: which is better ... Thai Shrimp with Green Curry or Thai Shrimp with Red Curry?  I think it is a draw.  I have to admit that I just about love any curry that I eat.


THAI SHRIMP WITH RED CURRY
Recipe adopted from from Whats4Eats
Serves 4
Ingredients:
1 cup of coconut cream
2-3 tablespoons of red curry paste
3 cups of coconut milk
1/4 cup of fish sauce
2 tablespoons of brown sugar
1 pound of shrimp, peeled and deveined
Shrimp, peeled and deveined -- 1 pound
1/2 cup of basil
3 kaffir lime leaves
2-3 serrano chiles, sliced into thin rounds

Directions:
1.  Simmer the cream and paste.  In a large saucepan or wok, simmer the coconut cream over low heat until most of the moisture boils away and the oil separates out. Stir in the curry paste and simmer for another 2 or 3 minutes. Do not allow to burn.

2.  Add the coconut milk. Add the coconut milk, fish sauce and sugar. Increase heat to medium high and bring to a boil. Then reduce heat to low and simmer for 5 to 10 minutes.

3.  Add the shrimp. Stir in the shrimp and simmer another 5 or 6 minutes, or until the shrimp is just cooked through. Adjust seasoning adding more fish sauce or sugar if you like and stir in the basil and lime leaves.

4.  Plate the dish.  Serve in individual bowls with steamed rice or rice noodles and garnish with the sliced chile pepper.

 ENJOY!

Sunday, January 5, 2014

Kaeng Kiao Wan Kung (Thai Shrimp in Green Curry Sauce)

This particular recipe -- Kaeng Kiao Wan Kung (Thai Shrimp in Green Curry Sauce) -- has a little backstory to it.  I found this recipe on one of the websites that I regularly visit (Whats4Eats) several months back.  This recipe was high on the priority list of things to make for my beautiful Angel, because I thought she would really like it.  I tried to make it several times; however, each time failed.  It was not because I screwed up the recipe.  Each meal turned out well and we enjoyed the food.  

The meal failed because every time I made the dish, I made with red curry paste.  What was supposed to be Thai Shrimp in Gren Curry Sauce ended up being Thai Shrimp in Red Curry Sauce.  (Don't ask me how that translates in Thai.)  The reason was simple: every time I went to a particular grocery store after work, I would go to the Asian foods section.  As I stood before the shelves, basket in hand, my eyes always fixated on the one gap -- the one open space -- on the shelves. Sure enough, the little tag read "Green Curry Paste."  There were lots of jars of red curry paste, but no jars of green curry paste.  I would reach to the back of the shelf, hoping that there was a stray jar of green curry paste.  Each time, I left ... with a jar of red curry paste.

However, on one occasion, I checked that shelf and there it was ... green curry paste.  A bottle of water, green chilies, onions, lemon grass, galangal, garlic, sugar, salt and tamarind.  All of those ingredients pureed into the one paste I needed to make Kaeng Kiao Wan Kung.  I purchased a jar and a pound of the larges shrimp I could find.  I headed home to make the dish for Clare.

Overall, the dish turned out well, although the green curry sauce did not end up as green as I thought it would.  The lack of a greenish hue is most likely due to the color of the green curry paste that I used.  Still, we both really enjoyed this dish.  It is simple to make and has those Thai flavors that appeal to both of us.


KAENG KIAO WAN KUNG 
(THAI SHRIMP IN GREEN CURRY SAUCE)
Recipe from Whats4Eats
Serves 4


Ingredients:
1 cup of coconut cream
2-3 tablespoons of green curry paste
3 cups of coconut milk
1/4 cup of fish sauce
2 tablespoons of brown sugar
1 pound of shrimp, peeled and deveined
Shrimp, peeled and deveined -- 1 pound
1/2 cup of basil
3 kaffir lime leaves
2-3 serrano chiles, sliced into thin rounds

Directions:

1.  Simmer the cream and paste.  In a large saucepan or wok, simmer the coconut cream over low heat until most of the moisture boils away and the oil separates out. Stir in the curry paste and simmer for another 2 or 3 minutes. Do not allow to burn.

2.  Add the coconut milk. Add the coconut milk, fish sauce and sugar. Increase heat to medium high and bring to a boil. Then reduce heat to low and simmer for 5 to 10 minutes.

3.  Add the shrimp. Stir in the shrimp and simmer another 5 or 6 minutes, or until the shrimp is just cooked through. Adjust seasoning adding more fish sauce or sugar if you like and stir in the basil and lime leaves.

4.  Plate the dish.  Serve in individual bowls with steamed rice or rice noodles and garnish with the sliced chile pepper.

 ENJOY!

Wednesday, August 1, 2012

Moqueca Baiana

Recently, I was looking for a new fish dish to make for my beautiful wife, Clare.  I wanted a recipe that was easy, but, at the same time, was interesting enough to grab my attention.  More specifically, I was looking for a dish from another country, one which has a little story behind it.  I found that dish ... and it comes out of Brazilian cuisine.

The dish is called Moqueca or Muqueca.  Although generally referred to as a "seafood stew, " many recipes actually produce a fish stew.  The recipes call for the use of white fleshed fish as the principal ingredient and, inevitably, at the end, they suggest that as "variations," one could use or add lobster shrimp, scallops, or other seafood. 

What makes this dish fascinating is that there are two versions -- Moqueca Capixaba and Moqueca Baiana -- and each of the versions is a nod to the different influences upon Brazilian cuisine.  The Capixaba version is made principally in Southern Brazil, in the state of Espirito Santo.  This version features the influences of Brazil's indigenous peoples.  It is the simpler of the two Moquecas, with fish roasted on banana leaves over hot coals.  By contrast, the Moqueca Baiana is the version made in the northern state of Bahia.  This version is heavily influenced by the African populations in Brazil.  It uses palm oil and a base of coconut milk, which create a flavorful broth for the mixture of vegetables (onions, bell peppers, tomatoes, garlic and chiles) and a nice buttery flavor that complements the fish. 

I decided to make Moqueca Baiana, although I changed the recipe in a couple small respects.  First, I did not have any dende oil (or palm oil), so I just omitted that ingredient.  Second, I did not have any the requisite chiles.  The recipe calls for malagueta peppers, which are fiery, red peppers that are widely used in Portuguese-influenced cuisines, which includes the cuisines of Brazil and Mozambique.  The peppers actually go by separate names, depending upon their maturity when they are picked.  If the peppers are a small size when picked, they are known as malaguetinha in Brazil or "piri-piri" in Portugal.  If the peppers are allowed to mature and reach a larger size, they are called malaguetão in Brazil or malagueta in Portugal.  Given the recipe calls for malagueta peppers, I presume that the larger peppers are supposed to be used.  However, I did not have any fresh or dried malagueta peppers, I only had ground piri piri peppers.  I decided that I wanted to use fresh chiles and keep the heat in check since I was making the dish for my wife.  I went with a couple of serrano chiles, which have a lower rating on the Scoville Scale than the malagueta peppers.  I also chose serrano chiles because I thought that the diced chiles would add a nice green fleck to the combination of red tomatoes, orange bell pepper and yellow bell pepper.  For once, I was thinking of the presentation.

Finally, the dish calls for "white fleshed fish."  This general description covers a wide range of fish, including cod, haddock, hake, and pollock.  The local store had limited options for white fish, offering only hake.  Generally speaking, populations of hake in some areas, such as the in the northern Atlantic Ocean, are doing okay, while they are overfished and struggling in other areas, such as in the Atlantic Ocean around the Carolinas.  Of course, the store did not specify where the fish was caught; instead, it just stuck a yellow fish sticker on the sign.  I begrudgingly bought some hake, which worked especially well with this dish. 


MOQUECA BAIANA
Recipe from Whats4Eats
Serves 4 to 6

Ingredients:
1 1/2 pounds of white-fleshed fish, cut into chunks
2 limes, juiced
1 teaspoon of salt
2 tablespoons of oil
2 onions, diced
2 bell peppers, diced
2-3 garlic cloves, diced
1-3 chile (malagueta) peppers
3 cups of tomatoes, peeled and seeded
2 cups of coconut milk
2 tablespoons of dende oil (optional)

Directions:
1.  Marinate the fish.  Toss the fish, lime juice and salt together in a large, non-reactive bowl and set aside to marinate for about 30 minutes.

2.  Saute the onions, peppers and tomatoes.  Heat the oil in a medium sized pot over medium flame.  Add the onions and peppers.  Saute until hte onions are translucent.  Add the garlic and chile peppers, saute for an additional minute.  Add the tomatoes and simmer for about 5 minutes more to cook them down.

3.  Add the coconut milk and fish.   Stir in the coconut milk and the fish with its marinadse.  Bring to a boil and then reduce heat to low.  Simmer gently for about 5 minutes or until the fish is cooked through.  Adjust the seasoning.  Stir in the dende oil.  

PAIRING THIS RECIPE

If you are looking for a good pairing, one website suggests an oaked Chardonnay wine (that is, a Chardonnay that has been aged in oaked barrels) pairs well with dishes that use coconut milk.  I have reviewed one Chardonnay that was aged in oak barrels, which may go with this recipe (although I have to admit that I am not sure):

Sugarloaf Mountain Vineyard -- Chardonnay (2010)
100% Chardonnay
Comus, Maryland, USA
Flavors of pear and apple

ENJOY!

Monday, June 4, 2012

Around the World in 80 Dishes: Bhutan

After making a four course Haitian meal, my personal culinary challenge takes me across the globe to the Kingdom of Bhutan or, as the locals call it, "Druk Yul," the Land of the Thundering Dragon.  The location of Bhutan has left it relatively isolated from the rest of the world.  As I accepted this challenge, I had only heard of the Kingdom.  I did not know anything about the cuisine or culture of the Bhutanese. 

The Bhutanese identity, as well as the country itself, first emerged in the early 17th century after Shabdrung Ngawang Namgyal, a Tibetan Buddhist lama,  fled to the region to escape religious persecution.  The Shabdrung, which is a title used to address Buddhist lamas, unified warring factions, which led to the founding of Bhutan.  Over the centuries, the Bhutanese cultivated their identity, which is predominantly Tibetan Mahayana Buddhist in nature  (As I write this, I feel compelled to note that, during the 1980s and 1990s, the Buddhist government passed laws to preserve that Tibetan Buddhist identity, which resulted in discrimination and forced eviction of thousands of Bhutanese who are of Nepalese decent and who practice Hinduism.)

The hallmark of Bhutanese cuisine is simplicity.  Rice, buckwheat and maize are staples foods, but the Bhutanese have access to meats such as pork, beef, yak, chicken and mutton.  The Bhutanese typically prepare dishes by cooking meats and vegetables in water or oil, which would suggest a certain amount of blandness.  Such a suggestion is deceptive, because the Bhutanese love chiles, called "ema," and they add peppers to many of their dishes.  The use of chiles is clearly something that I can work with.

THE FIRST COURSE

For a first dish, I decided to make Ema Datshi, which is commonly referred to as the "national dish" of Bhutan.  It is a mixture of cheese and chiles, that is served over cracked red rice.  I could not find cracked red rice; however, the Bhutanese also use white rice.  Emadatshi is very spicy, primarily because of the chiles.  As with cracked red rice, I could not track down the specific chiles used by the Bhutanese in their cooking.  Most recipes provide substitutions, such as a mixture of Anaheim and Serrano chiles.  You could probably use other chiles, such as Hatch chiles or Sanaam chiles.


EMA DATSHI
Serves 2 to 4

Ingredients:
2 Anaheim peppers
1 Serrano chile
1/4 cup farmer’s cheese
2 cups Monterrey jack, grated
water as needed
1 tablespoon of vegetable oil

Directions:
1.  Cook the peppers.  Slice the peppers into thin strips.  You can remove the seeds and membranes from the peppers if you want to reduce the heat from the peppers.  Heat the vegetable oil in a covered pan on medium heat.  Add the peppers and saute for several minutes until the peppers are soft.  

2.  Add the cheese.  Take the pan off of the heat.  Add the monterey jack and stir as the cheese melts.  Add a little water (about 1/4 to 1/3 of a cup), stirring until the mixture becomes creamy.   Season with salt and pepper. 

3.  Finish the dish.  Crumble the farmer's cheese and add to the sauce.  Stir to incorporate the farmer's cheese into the sauce.

4.  Plate the dish.  Place some precooked rice in a dish or bowl.  Spoon the cheese and chiles over the rice.

THE MAIN COURSE

Although Emadatshi may be the national dish of Bhutan, I did not think that it was enough of a dish for my personal culinary challenge.  The challenge is to make a main course, and, more specifically, I wanted to make a dish that incorporated some kind of protein, whether it was beef, pork, chicken or fish.  After a lot of research, I came across dishes referred to as "tshoem" in Dzongkha, the native language of the Bhutanese.  The word "tshoem" roughly translates to "curry."  Although a Tshoem may mean a curry in Bhutan, the dish differs significantly from the types of curries that may grace the table of a family in India or Thailand.  Bhutanese Tshoem use only a handful of ingredients, and, they do not involve a lot of spices.  Instead, the Bhutanese typically prepare a tshoem with a protein (such as beef, chicken or pork), garlic, ginger and chiles.

There was one particular Tshoem that caught my attention ... Kangchu Maroo or "Pig Trotter Curry."  Although there is not a lot of information about this dish, it is described as one of the classic curries or tshoem in Bhutan.  The recipes for Kangchu Maroo seem to fit the mold of a Bhutanese dish ... the use of a few ingredients and a lot of chiles. 


KANGCHU MAROO
Adapted from Celtnet.org.uk
Serves 4

Ingredients:
2 pounds of pig's feet
1 bunch of spring onions
2 cloves garlic
1 teaspoon freshly grated ginger
2 teaspoons salt
6 chilies, finely chopped

Directions:
1.  Boil the pig's feet.  Wash, chop, and place the pig's feet in a pan.  Cover with water and boil for about one hour and forty minutes.

2.  Cook the pig's feet.  Remove the meat from the bones.  Return the meat to the pan and add 1 cup of the cooking liquid and all of the other ingredients.  Bring to a boil and cook for fifteen minutes.

3.  Plate the dish.  Spoon some rice in the middle of the dish.  Spoon the tshoem over the rice.

*     *     *

In the end, I would consider this challenge to be a success.  I think that I was far more successful making the Kangchu Maroo than I was making the Emadatshi.   I think that the difference was due to the fact that I spent more time thinking through the process of making the main course.  I added the Emadatshi because I felt it was a good opportunity to make the national dish of Bhutan.

Both the Kangchu Maroo and the Emadatshi share one thing in common ... both dishes are fairly spicy.  The mix of Anaheim peppers and Serrano chiles (especially the latter) provided a lot of heat in the dish.  Given the mountainous and cold terrain in which the Bhutanese find themselves, I guess any kind of heat helps, especially in the winter time.

Well, I now turn to the next challenge.  Until that time ...

ENJOY!

For more about Bhutan and its cuisine, check out the KingdomofBhutan.comWikipedia and India Forums.

Saturday, October 29, 2011

Arroz Mexicano (Mexican Rice)

It seems almost natural.  Order any dish at a Mexican restaurant and a little bowl or side of Mexican rice (Arroz Mexicano) magically appears.  It is as if there is some unseen and unspoken bond between the dish and the rice.  Whether it is fajitas, tacos or enchiladas, those dishes are accompanied by this seemingly omnipresent rice. 

Interestingly, rice is not native to Mexico and this common side dish represents an interesting example of fusion cuisine.  The Spanish conquistadors and colonists brought rice with them during the 1500s.   Although rice is definitely Spanish in origin, grown in Valencia for centuries, this dish is Mexican in preparation.  The rice is sauteed first, before the addition of chicken broth and tomatoes.  The use of tomatoes actually are a cheaper, New World substitute for saffron, which is what the Spanish would have used in the Old World when making a rice dish. 

I recently made Arroz Mexicano as a side for the Mole Verde Zacatecano. There are many recipes for Mexican Rice, but I wanted a recipe that would be quick and easy.  This would allow me to focus on making the mole.  I found a recipe from the Food Network that was fairly easy to make and, as it turns out, very delicious. The rice took on that nice red-orange color that is characteristic of Mexican rice.

One note, instead of using chicken broth, I used chicken stock.  I thought the use of stock would give more flavor to the rice.  

This recipe is so easy that it will most likely surface again whenever I make a Mexican dish.  This is how it must have started ...

ARROZ MEXICANO
Recipe from FoodNetwork.com
Serves 6 to 8

Ingredients:
3 tomatoes
2 cups of chicken broth or chicken stock, plus more as needed
1 tablespoon of olive oil
1 onion, chopped
1 carrot, finely diced
1 large garlic clove, minced
2 cups of medium grain rice
2 teaspoons of salt
1 bay leaf
1 whole serrano chile
1/4 cup fresh or frozen peas, thawed

Directions:
1.  Prepare the cooking liquid. Cut the tomatoes in half, and remove the seeds. Add the tomatoes and two cups of broth to a blender and puree. Strain into a bowl and reserve the liquid. Add enough extra broth to make four cups of liquid.

2.  Saute the vegetables.  In a large saucepan, heat the oil over medium-high heat. Add the onion and carrots and saute for four minutes until the onion is translucent. Add the garlic and saute for one minute.

3.  Toast the rice.  Stir the rice in with the onions and garlic.  Cook teh rice until slightly toasted, about three minutes. 

4.  Boil the rice.  Add the tomato broth mixture, stir and bring to boil. Add the salt, bay leaf, and the serrano chile. Reduce the heat, cover and simmer until the rice is tender, about 20 minutes. 

5.  Finish the dish.  Remove the pan from heat. Scatter the peas over the top of the rice, cover, and let the rice stand for five minutes. Fluff the rice with a fork, transfer to a serving bowl and serve. 

ENJOY!

For more about the history of Arroz Mexicano, check out About.com and Mexconnect.