Monday, September 12, 2011

Around the World in 80 Dishes: Mozambique

My culinary adventures take me to Mozambique, a large country located in southeastern Africa.  The history of Mozambique can be best simplified and summarized by three emigrations.  First, there was the emigration of Bantu peoples, who brought agriculture and farming to the area around 300 A.D.  Second, there was the arrival of the Swahili and the Arabs, who established commercial and military ports in the land that would become Mozambique.  Third, and most significantly, there were the Portuguese, who colonized the country in the early 16th century.  The Portuguese controlled Mozambique as a colony for more than three hundred years, leaving an indelible print upon the culture and cuisine of that country and its people.

The Portuguese influence is perhaps the most apparent when it comes to the ingredients used by Mozambican cooks.  The Portuguese introduced cassava and cashew nuts as crops for agriculture, along with maize, rice, sorghum and potatoes.  The Portuguese also introduced the use of certain spices, such as bay leaves, coriander, garlic, red sweet peppers, chile peppers, onions, paprika and wine. 

Moreover, this influence of the Portuguese extends beyond ingredients and reaches the dishes prepared in Mozambican kitchens.  For example, Mozambicans have their own version of Feijoada, the Portuguese bean stew and condiments like Piri-Piri Sauce.  They have also incorporated roasting methods introduced by the Portuguese to create dishes such as Frango a Portuguesa (Chicken, the Portuguese way).

For this challenge, I wanted to go beyond the influence of the Portuguese and reach for a dish that is reflective of the indigenous peoples of Mozambique.  I decided to make Matata, a clam and peanut stew enjoyed by local Mozambicans.  The principal ingredients for this stew are simple -- clams, peanuts, pumpkin leaves -- highlight the local nature of the dish.  However, I could not complete the meal without at least doing one dish that is influenced by the Portuguese.  That dish is Camarao Mozambique, which is as fiery shrimp dish that is heavily influenced by chiles and wines of the Portuguese. 

THE SAUCE

Before making Camarao Mozambique, I need to make one of the ingredients for that dish, Piri Piri Sauce.  This sauce is basically a hot pepper sauce that combines Portuguese and African influences.  The Portuguese contributed the peppers, which originated in the New World.  Explorers and traders brought the peppers to Portuguese colonies in Angola and Mozambique.  In Mozambique, the peppers acquired the name of "piri piri," which is "pepper pepper" in Swahili.  This recipe is adapted from one by Jorge Jordão, the chef at Zambi, a restaurant in Maputo, Mozambique.  I could not find the right red chiles, so I used red bell peppers and added some ground Mombosa pepper, which is said to be the descendant of the peppers brought to Africa by the Portuguese. 


PIRI-PIRI SAUCE
Recipe adapted from Saveur.com

Ingredients:
2 red peppers
1 teaspoon of ground Mombosa (Piri Piri) pepper
     (you can use more if you want a more spicy dish)
3 tablespoons of fresh lime juice
2 teaspoons of dark brown sugar
1/2 tablespoon of olive oil
1/2 tablespoon of finely chopped fresh ginger
1/4 tablespoon of white wine vinegar
1/4 teaspoon of kosher salt
1 clove of garlic

Directions:
Add all of the ingredients in a blender and puree into a chunky sauce.

THE APPETIZER

With the sauce, I can turn to the Camaro Mozambique.  As noted above, Portuguese explorers introduced chile peppers to Mozambicans.  However, it was the Mozambicans who combined those peppers with shrimp.  In doing so, local cooks created a dish that has become very popular, not only in Mozambique, but also in Portugal itself.


CAMARAO MOZAMBIQUE
Adapted from ChopOnionsBoilWater
Serves 3-4

Ingredients:
7-10 threads of saffron
1 pound of shrimp, deveined but not deshelled
1/8 cup of olive oil
1/8 cup of water
5 cloves of garlic, roughly chopped
4 tablespoons of butter
1/4 bottle of white wine (like a Vinho Verde)
1/2 teaspoon of paprika
1 tablespoon of hot crushed red pepper
1/2 lemon, juiced
1/4 cup, flat parsley, coarsely chopped (optional, for garnish)
Portuguese piri-piri sauce , to taste

Directions:
1.  Steep the saffron.  Put the saffron in the water and let it steep.  You could let it steep overnight, but usually I just let it steep for fifteen minutes to thirty minutes.

2.  Saute the shrimp.  Place a deep saucepan on medium-high heat, when the pan warms, add the olive oil. When oil begins to shimmer add the shrimp and sauté until they just turn pink.  Remove the shrimp from the pan with a slotted spoon and keep the juices and oil in the pan. Put the shrimp aside and keep them warm.

3.  Saute the garlic.  Add the garlic to the pan and sauté for 2-3 minutes until golden.  Do not let the garlic brown or burn.

4.  Make the sauce.  Add the saffron and water, wine, paprika, crushed pepper, hot sauce, and lemon juice. Bring this mixture to a boil, adjust to a lively simmer and allow it to reduce and thicken slightly.

5.  Finish the shrimp.  Return the shrimp to the pan and continue simmering, stirring frequently for about 2-3 minutes.

6.  Finish the sauce.  Add the butter to the pan stirring frequently. Once butter melts, stir one more time, remove from heat and adjust salt and pepper to taste.

THE MAIN COURSE

Finally, I turn my attention to the main course, which is the subject of the Around the World in 80 Dishes Challenge.  The main course and challenge for Mozambique is Matata, a clam and peanut stew with pumpkin leaves.  I had to make two alterations to this recipe.  The original recipe called for the use of canned clams.  There is nothing wrong with using canned clams (other than the fact that clams are living shellfish and once removed from their shell, clams have to be preserved).  I had access to fresh cherrystone clams and bought three small bags of clams to use in this recipe.  The one drawback to using fresh clams is that I had to shuck them, which is time consuming but well worth the effort.  The same goes for the peanuts.  Bottles of peanuts line shelves in a grocery store; however, I bought fresh peanuts and shelled them myself. 

However, the original recipe also calls for pumpkin leaves.  Unlike the clams and peanuts, I did not have a source for fresh pumpkin leaves.  The authors of the recipe (and authors of other Matata recipes) anticipate the lack of pumpkin leaves.  They suggest fresh spinach leaves as an alternative.  I readily accepted this alternative and proceeded to make the dish. 


MATATA (CLAM AND PEANUT STEW)
Adapted from the University of Pennsylvania's African Cookbook
Serves 2-3 

Ingredients:
1/2 cup of chopped onions
1 ounce of extra virgin olive oil
1/2 cup of chopped peanuts
1 tomato, diced
2 cups of clams, chopped
1/2 tablespoon of sea salt
1/4 teaspoon of ground black pepper
1/2 teaspoon of crushed red pepper
3/4 of a pound of fresh spinach

Directions:
1.  Saute the onions.  Heat the olive oil in a pan on medium heat.   Add the onions and simmer until soft, but not brown.

2.  Add ingredients (except the spinach).  Add the peanuts, tomato, clams, salt, black pepper, and red pepper.  Stir and simmer for about thirty minutes.

3.  Add the spinach.  Add the spinach and cover the pan.  When the spinach has wilted, the dish is ready to serve.

4.  Plate the dish.  Matata is usually served over rice.  Plate some rice in the center of the bowl and spoon the Matata around the rice. 

*     *     *

Overall, I think this challenge was a success.  I was most pleased with my variation on the Piri-Piri sauce.  I confronted a lack of red chiles by substituting ingredients to still achieve the desired result ... a spicy sauce.  My efforts also made for a sauce with more complex flavors, sweet up front, followed by vinegar with a kick in the end.  The Camarao Mozambique and Matata also turned out well for the first time that I made each dish.  I was surprised how much I liked the Matata, given the fact that I am not a big fan of spinach.

With this challenge in the books, it is time to turn to the next one.  Until next time ...

ENJOY!

For more about the cuisine of Mozambique, check out Food by Country.

Sunday, September 11, 2011

The Duck Rabbit Brewery Barleywine Ale

There is a craft brewery in Farmville, North Carolina that bills itself as the "Dark Beer Specialist."  The Duck Rabbit Brewery was founded by Paul Philippon, a university philosophy professor.  Drawing from his teaching experience, he chose the duck rabbit diagram, which looks like a duck or a rabbit depending upon the viewer's perspective.  The Duck Rabbit produces four year around ales, including a brown ale, porter, red ale and a milk stout.   When Clare and I were visiting Ocracoke Island, we came across a little store with a big beer selection, including the Duck Rabbit's Barleywine Ale. 

I've reviewed barleywines in the past, such as the Nøgne-Ø 100, the Schlafly Reserve Barleywine Style Ale and the L'Abri de Tempete Corps Mort.  I've even reviewed and contrasted the difference between beers brewed in the English barleywine style, such as the Almond 22 Torbata and those brewed in the American barleywine style, such as the Troegs' Flying Mouflan.  Perhaps the one thing that these barleywines have in common is that they each have their own distinctive style.

I can now add the Duck-Rabbit Barleywine to this list.  The beer pours a dark honey or gold color, with a wispy thin foam.  The aroma of the beer suggests alcohol, but speaks of malt, bread, and toast flavors.  There is also a presence of caramel and toffee in the aroma of the beer.  These flavors also are featured in the taste of the beer, but there is also a significant presence of hops in the finish.  The hops contribute a piney or citrus flavor so that each sip seems to gradually run the spectrum from malt to hop.  At least for me, the Duck-Rabbit barleywine seems to unite the American barleywine and English barleywine styles, combining the hop flavors of the American style with the malt flavors of the English style.

For me, barleywines are perhaps some of the most difficult beers to pair with food.  When I have difficulties with food pairing, I do my research and, in this case, it is to consult Garrett Oliver's book, The Brewmaster's Table.   The head brewer at Brooklyn Brewery, Oliver is also a member of the Slow Food Movement and a font of knowledge when it comes to pairing beer with food.  In his book at pages 163-64, he suggests that, at least for English barleywines, the beer scan be paired with meats like lamb or boar.  (I wish I knew that before I drank this beer because I have a couple of cinghiale -- Italian wild boar -- recipes I've been wanting to try.)  Oliver also suggests that this style of beer can be paired with cheddar cheeses, goat cheeses, and caramelized desserts.  And, as always, you can do what I did and just enjoy the beer by itself. 

As I noted above, we found this beer in North Carolina; however, I have seen Duck Rabbit beers on the menus at restaurants and in some beer stores with larger selections.

ENJOY!

Saturday, September 10, 2011

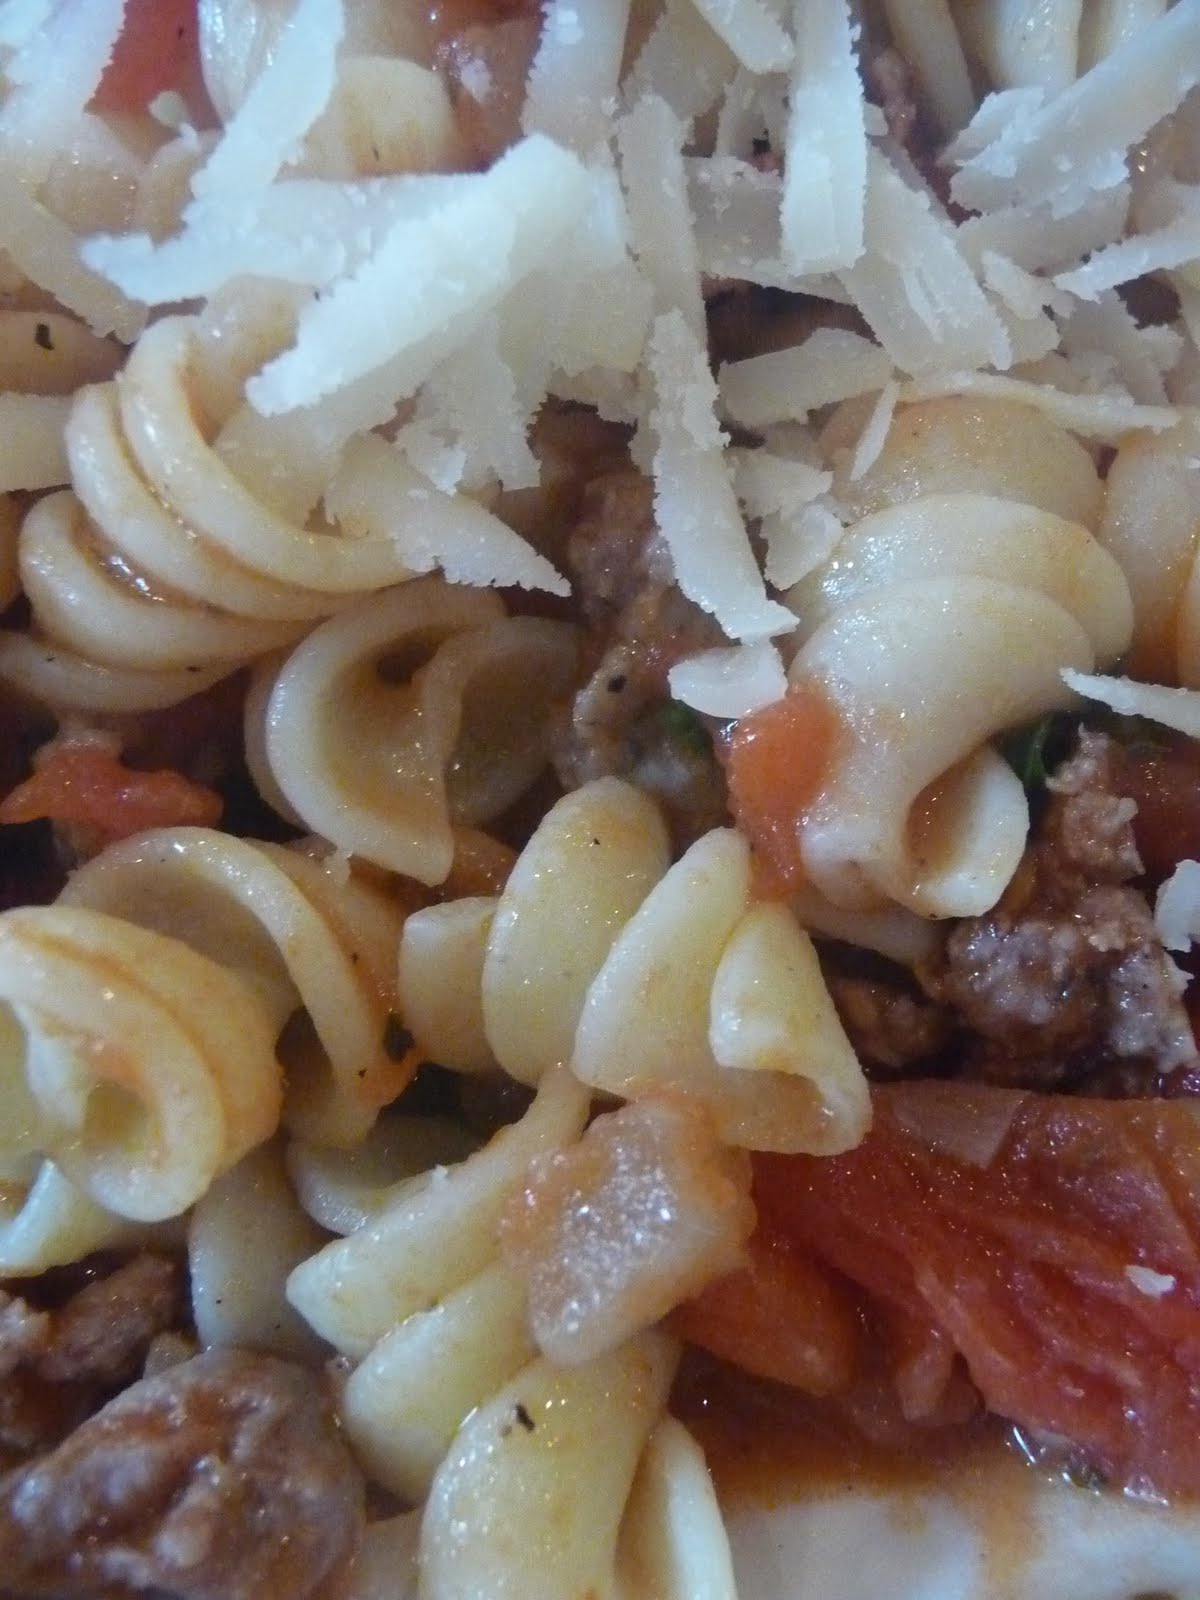
Fusilli con la Salsicca dell'Agnello (Fusilli with Lamb Sausage)

While perusing the stalls of Eastern Market, I was struggling to create a primi or first dish for a meal with Clare and her parents.  Typically, in Italy, a primi is either a soup, salad or pasta dish.  My mind was focused on a pasta dish that incorporated form of meat (and, for my Angel, shrimp) along with a simple red sauce.  

Thus, I had two choices to make.  First, I had to decide upon a pasta.  I chose freshly made fusilli, primarily because I did not see the pappardelle hidden in the back.  Fusilli is a pasta that may have originated in Naples, the capital of the Italian region of Campania.  There are several possible sources for the name.  Some believe that the pasta got its name from fusile or fucile, which is the Italian word for "rifle."  The rounded, spiral shape of the pasta is supposed to represent the groves in the rifle's barrel. Others point to the Neapolitan dialect where fuso is a word that refers to spindle. 

After choosing the pasta, I had to decide upon the meat.  There are a lot of choices at Eastern Market, but I ultimately selected fresh lamb sausage.  The use of sausage provides one handy shortcut ... it provides not only the meat for the dish, but also some seasoning.  It is important to keep that in mind because if you add the normal levels of seasoning, you may end up with a dish that is -- depending upon the type of sausage you use -- too salty or too spicy.  I chose a regular lamb sausage, which did not have any chiles or peppers in it.  

One last note, when working with sausage, I ordinarily brown the sausage first.  However, I wanted to try something different, that is reflected in this recipe.  Rather than browning the sausage, I added the sausage to the tomato sauce and cooked it in the sauce.  I did this because I wanted to break up the sausage into as small of pieces as I could.  It took longer for the sausage to cook, but the end result was still very good. 


FUSILLI CON LA SALSICCA DELL'AGNELLO
(FUSILLI WITH LAMB SAUSAGE)
A Chef Bolek Original
Serves 3-4


Ingredients:
3/4 pound of fresh fusilli
1/2 pound of fresh lamb sausage, removed from casings
1 large clove of garlic, diced finely
1/2 onion, diced finely
3/4 of a can of whole San Marzano tomatoes
1/2 tablespoon of dried basil
1 teaspoon of dried oregano
1/2 teaspoon of red chile flakes
2 teaspoons of finely grated Parmigiano Reggiano
Salt, to taste
Pepper, to taste
3 tablespoons of extra virgin olive oil

Directions:
1.  Saute the garlic and onions. Heat the olive oil on medium heat.  Add the garlic.  Cook for one minute.  Add the onions and continue to cook for about three to four minutes, until the onions are translucent.  Stir occasionally to prevent the garlic from burning.

2.  Add the tomatoes and lamb.  Add the tomatoes to the onion/garlic mixture.  Using a masher, mash the tomatoes until they are broken up well.  Add the basil, oregano and chile pepper flakes.  When the tomatoes begin to boil, break the lamb sausage into small pieces and add to the tomato sauce.  Continue to cook until the lamb is cooked. Add the Parmigiano Reggiano cheese and stir well.

3.  Cook the pasta.  Heat a pot of water until it is boiling.  Add the fresh fusilli to the boiling water.  Cook for two minutes.  Remove the pasta from the water and add it to the tomato sauce, with a little of the water.  Stir very well until the pasta is covered with the sauce.  Serve immediately.

ENJOY!

Friday, September 9, 2011

Pub Dog Hoppy Dog Pale Ale

For the past ten years, Pub Dog Pizza and Drafthouse has quietly brewed beers while other Maryland breweries, like Flying Dog and Heavy Seas have grown and garnered a lot of attention.  The brewpub has two locations, one in Baltimore and the other in Columbia.  Pub Dog produces a wide range of beers, from a White Dog (an orange wheat beer) to a Black Dog (the stout).  Recently, Clare purchased a bottle of the Hoppy Dog.

The Hoppy Dog is billed as an India Pale Ale.  An IPA is a moderately hoppy style of beer, with some bitterness from the hops.  Whether it is an English IPA or an American IPA, the beer should have a floral, citrusy aroma, a hoppy but not too bitter taste, and a clean finish. While the Hoppy Dog is good, it falls a little short of an IPA, showing itself to be more like an American Pale Ale than an India Pale Ale.

The beer does pour a golden color with a thick foam that has a very long retention time.  The aromas of the beer is a little floral and a little hoppy.  The aroma of the hops is not overwhelming.  The hops show through in the taste, but, like the aroma, the hop flavor is not overwhelming.  This is a pale ale that would appeal to people who normally steer clear of India Pale Ales or American Pale Ales because of the fear of bitter or citrusy tastes.  This is a very drinkable beer, kind of like a session beer.

Pub Dog's Hoppy Dog Pale Ale has an ABV of 5.4% Clare found this beer at Gilly's, a local beer store.  The beer should be available at beer stores around Maryland.

ENJOY!

Wednesday, September 7, 2011

Smoked Sockeye Salmon

Salmon has a very important place in the culture of Native American tribes in the Pacific Northwest.  The tribes long believed that if someone mishandled the fish, the great spirits of the sea would drive the salmon from the waters.

It is known as the Legend of the Lost Salmon.  Briefly, the Creator told the people that the salmon, which had been created especially for them, had to be treated in accordance with certain rules.  The people initially followed those rules; however, over time, they became careless.  They stopped following the rules and the salmon vanished.  As the people walked the river, they were shocked that the salmon were gone.  They came across a dead salmon and all cried out that, if they were only given one more chance, they would do better.  They also thought if they could revive the dead salmon, the salmon would return to their waters.  

The tribe called a council and asked one of their most venerable members, Old Man Rattlesnake, to help them.  Old Man Rattlesnake went to where the dead salmon laid and crawled over the salmon four times.  When he crawled over the salmon a fifth time, something magnificent happened ... Old Man Rattlesnake disappeared into the fish and the salmon awoke.  The people learned their lesson about taking care of salmon and the fish returned to the streams. 

The Legend of the Lost Salmon is not just a story passed down by generations of Native Americans; it has a moral that transcends cultures and nationalities.  We all have to "follow the rules" when it comes to the fauna and flora in our environment.  Our failure to do so could lead to us losing them.  This morale is especially true when it comes to fish, because our activity has decimated the stocks of many fish around the world, including salmon. Today, there are a lot of rules when it comes to the fishing of  Pacific Salmon and Alaska Salmon, including Sockeye and King Salmon.  These rules have led watchdog groups like Seafood Watch to give these fish the "Best Choice" when it comes to sustainable fish.

Recently, while visiting Eastern Market with Clare and her parents, we stopped by Southern Maryland Seafood and saw some beautiful fillets of wild Sockeye Salmon.  We decided that we would buy a two pound fillet of Sockeye Salmon.  Our plan was to smoke the fish.

Smoking fish involves choices.  Before the smoking can begin, one must decide on how to "cure" the fish.  There are two methods: wet cure or dry cure.  A wet cure is a brine with a base of water, salt and sugar (as well as other ingredients).  A dry cure is a rub, usually consisting of salt and sugar (as well as with other herbs and spices).  Once a choice has been made with respect to the cure, the next decision to make is the method of smoking the fish.  Once again, there are two choices: cold smoking or hot smoking.  Cold smoking involves cooking the meat with smoke at temperatures of 85 degrees Fahrenheit or less.  By contrast, hot smoking involves cooking the meat with smoke at temperature between 120 to 180 degrees Fahrenheit or more. 

Ultimately, we decided to use a wet cure and the hot smoking method to smoke our Sockeye Salmon fillet. We created a simple brine for the fish and let the fish rest in the brine for about forty-five minutes.  While we were air-drying the fish, we decided to smoke the fish using apple wood.  Most often, salmon is smoked using alder wood, but apple wood is a tame wood that imparts a sweet smoke flavor to meat.  After about an hour, we pulled the fish from the heat and were treated to an amazing meal.


SMOKED SOCKEYE SALMON
Adapted from Great Salmon Recipes
Serves many

Ingredients:
2 pounds of sockeye salmon
4 cups water
3/4 cup of Kosher Salt
1/2 cup of light brown sugar

Directions:
1.   Brine the salmon.  Combine the water, salt and brown sugar to create the brine.  Add the sockeye to the brine and allow the fish to rest for about forty-five minutes. After forty-five minutes, remove the fish and set it out to air-dry.  

2.  Smoke the salmon.   Prepare the fire for the smoker.  Once the fire is set, add some pieces of apple wood to start the smoke.   Ideally, you do not want the temperature to exceed 200 degrees Fahrenheit.  (It is better for the temperature to be less than 200 degrees.)  Add the salmon and smoke it for about one hour.  The internal temperature should reach about 140 degrees Fahrenheit and the meat of the fish should be easy to flake. 

3.  Finish the dish.  Remove the fish from the heat and allow it to return to room temperature. Serve immediately.


ENJOY!

For more about smoking salmon, check out the Gourmet Food Store.  For more about the Legend of the Lost Salmon, check out Native American Indian Legends.

Tuesday, September 6, 2011

Oven Roasted Tomatoes

Sometimes the most simplest of recipes can result in the most delicious of dishes.  This is one such recipe.  A handful of small tomatoes, generous amounts of salt, black pepper and sugar, and liberal drizzles of olive oil and balsamic vinegar.  Add the heat of an oven and the end result are some amazing roasted tomatoes.

I used cherry tomatoes for this recipe; however, the great thing about this recipe is that any type of  small tomato could be used.  This recipe would also work well with Roma, plum or grape tomatoes.

One last note about this recipe.  Do not use aged balsamic vinegar. It is simply too expensive and to fragile to be subjected to heat for any period of time.  It is okay to use a balsamic vinegar of lesser quality.  As an alternative, you can simply withhold the aged balsamic vinegar until after the tomatoes are roasted and then drizzle it over the tomatoes before serving. 

OVEN ROASTED TOMATOES
Adapted from a recipe by Ina Garten
Serves 2-4

Ingredients:
12 small tomatoes of any variety
Sea Salt, to sprinkle
Ground black pepper, to taste
6 cloves, smashed
Extra virgin olive oil, for drizzling
Balsamic vinegar

Directions:
1.  Cut the tomatoes in half and arrange on a baking sheet with the garlic cloves.  Drizzle the olive oil and balsamic vinegar over the tomatoes.  Sprinkle the sea salt, ground black pepper and sugar.  

2.  Heat an oven to 450 degrees Fahrenheit.  Roast for twenty-five or thirty minutes. 

ENJOY!

Sunday, September 4, 2011

Peach Cobbler

I am not the only one who cooks in our family.  My beautiful wife, Clare, is also a great cook and a great baker.  Every once in a while, I ask my Angel to provide a guest blog post so that I can share some of the amazing and delicious things that she makes for family, friends and, of course, me.  She has already provided guest blog posts about Tuscan Vegetable Soup, Cuban Bread, Loyalist Bread and Salmon Burgers.  So, without further ado,

A Guest Blog Post by Clare ...

Peaches are a great summertime fruit and are very versatile.  I bought some peaches during a recent trip with Keith to Eastern Market.  I have previously used peaches to make ice cream, which Keith devours at every chance he can get.  But, I decided to do something different.  After doing a little searching on the Internet, I came across a recipe for a peach cobbler.  Keith devoured that as well.  Fortunately for me and this guest post, Keith took pictures of the cobbler before he began eating it.   

Usually, at this point, Keith would probably say something about the history of the dish or the ingredients used to make the dish. According to the Food Timeline, food historians have determined that the cobbler dates back to the second half of the 19th century, when settlers where making their way across North America.  These pioneers created the dish using a crust, filling it with whatever fresh or canned fruit they may have, and cooking it in a dutch oven.  The first reference to a "cobbler" appeared as early as 1839 in a book called The Kentucky Housewife, which provided a recipe for a "peach pot-pie" or "cobler."  The term also began to appear in American dictionaries in 1859.

Over the past 160 years, the cobbler has evolved over time, as people settled down and, once again, were able to cook with ovens rather than over a fire.  This recipe comes from the Food Network.


PEACH COBBLER
Adapted from Food Network
Serves many

Ingredients (for the filling):
4 cups of peeled and sliced peaches
3/4 cup of brown sugar
1 teaspoon cinnamon
1 teaspoon vanilla
1 tablespoon flour
1 cup flour

Ingredients (for the crust):
1 teaspoon baking powder
1/2 teaspoon of baking soda
3 tablespoons of brown sugar
4 tablespoons of unsalted butter, cut in to small pieces
2/3 cup of buttermilk
1 tablespoon brown sugar for topping
Whipped cream

Directions:
1.  Preheat the oven to 425 degrees F.

2. Generously butter a 1 1/2-quart shallow baking dish. Place the sliced peaches in the dish and sprinkle with brown sugar, cinnamon, vanilla, and flour. Mix gently and spread evenly again. Bake for 10 minutes.

3. Meanwhile combine all dry ingredients for cobbler crust in a bowl. Cut in the butter with a pastry cutter or your fingers, to make the texture like coarse crumbs. Add buttermilk and stir to form a soft dough.

4.  Remove fruit from oven and drop rounded spoonfuls of dough on top. Sprinkle with last tablespoon of brown sugar and return to oven. Bake until fruit is bubbly and crust topping is golden brown, about 20 minutes. Serve warm with whipped cream. 

A great accompaniment for this dessert is either some whipped cream (which I made from scratch) or some ice cream.  Maybe some peach ice cream.  Well, until next time, as Chef Bolek would say ...

ENJOY!

Saturday, September 3, 2011

Mother Earth Brewing Dark Cloud

The history of beer in Munich has a dark past.  When I speak of a "dark past," it is nothing sinister.  Instead, the first beers brewed in the city, as well as elsewhere in Bavaria were dunkel lagers, or dark lagers.  Generally speaking, the grist used to make the beer is made from primarily German munich malt, with some German pilsner malt.  Some chocolate malts may be used to darken the color of the beer, but not to affect the taste.  

Mother Earth Brewing is a craft brewer whose motto is "Peace, Love & Beer."  Located in Kinston, North Carolina, the brewer produces four year around beers -- Sisters of the Moon India Pale Ale, Endless River Kolsch Style Ale, Weeping Willow Wit, and the Dark Cloud Munich-Style Dunkel Ale.  I first tried Mother Earth Brewing when Clare and I were vacationing in the Outer Banks.  A small restaurant in Ocrakoke had the Sisters of the Moon.  It was a very good IPA and, when I saw some other Mother Earth Brewing beers, I bought a couple and brought them home to try at a later date. 

The Dark Cloud is definitely a dunkel lager because it pours a dark brown in color.  The beer is very carbonated, with a thick foam developing as the beer is poured. The aroma of the beer is full of malt, with a gentle sweetness.  This beer is surprisingly light and sweet for a dark lager.  I definitely enjoyed this beer, which I think is a very good example of an American craft brewer working with a European beer style.

The brewer suggests several pairings for this beer. These pairings include cheeseburgers, chicken with brown mushroom gravy, Eastern Carolina BBQ, and garlic mashed potatoes.  As you can tell, these pairing all suggest meatier, earthier flavors, which I think is probably the best pairing for a beer like the Dark Cloud.  The lightness of the beer will not make any of these foods seem "heavy."  The sweetness of the beer would pair well with the tart, vinegary taste of Eastern Carolina BBQ (of which, by the way, I am a big fan).

From what I can tell, Mother Earth Brewing is a small craft brewery.  Just as I look for wines made with grapes I have never heard of, I also look for craft brewers (and beer styles) that are completely new to me.  Prior to visiting Okracoke, I had not seen or heard of Mother Earth Brewing.  Since then, I have not seen Mother Earth beers around where I live, but they are obviously available in North Carolina.

ENJOY!

For more information about the Munich Dunkel style, check out the Beer Judge Certification Program.

Friday, September 2, 2011

L'Ecole No. 41 Columbia Valley Sémillon (2009)

If wine grapes were Hollywood actor, Sémillon would probably be an extra.  The grape is fairly easy to cultivate, fairly resistant to diseases that plague other grapes, and is fairly available, as it is found around the world, including countries such as France and Australia.  Thus, the grape is always available. 

However, the grape is hardly ever featured on its own in a wine.  Instead, winemakers usually blend Sémillon with other grapes.  For example, French winemakers blend Sémillon with Sauvignon Blanc and Muscadelle.  Australian winemakers blend Sémillon with Sauvignon Blanc and Chardonnay. In the end, it is almost always the other grape that gets the top billing, with the Sémillon grape getting attention in the fine print of the credits.

In the United States, one winemaker is giving Sémillon a starring role in a wine.  L'Ecole No. 41 is a winery in the Walla Walla region of Washington State where, from a historic Frenchtown School, the Clubb family has been producing wines like the Sémillon since 1983.  To produce this wine, L'Ecole No. 41 uses grapes that are grown at vineyards in the Columbia Valley.  The wine is then made with 87% Sémillon and 13% Sauvignon Blanc.  This turns the tables, making Sémillon the lead actor in this wine while relegating the Sauvignon Blanc to what could be best described as a supporting role.

The Sémillon pours bright and lustrous, almost like a shiny, clear apple or pear juice.  The aroma of the wine, like most wines, speak of fruit.  Melon, pear and apple seem to be the principal aromatic elements of the wine.  The taste of the wine is light, but a little tart, speaking more of pear and apple than melon.  The tartness is not bad; instead, it is a tartness one expects from citrus, like lemons.  The winemaker says that the wine has honeysuckle, with lemon bar, lychee nut and key lime showing through the finish.  I'm not sure about the honeysuckle (which is a good thing because I am not a big fan of honeysuckle), but the lemon and the lime do show through as part of that slightly tart citrus flavor in the wine.  The body of the wine is quite light, and, lends itself to the wines that one would like to drink on or after a very hot, summer day.

When it comes to pairing this wine with food, I paired the L'Ecole No. 41 Columbia Valley Sémillon with the Panni Ularthiyathu, a dry curry from the Indian State of Kerala. I chose this pairing not simply because it was a white wine and the dish had white meat (pork is, after all the "other" white meat).  Rather, I knew the dish would be spicy and I wanted a lighter wine with some citrus and a little sweetness to round out the heat of the peppers.  I am a little proud of myself with respect to the pairing, because, although perhaps a sommelier may take issue with it, the wine worked very well with the flavors of the dish. 

For a starring role, the Sémillon could definitely win some awards.  It has won some rave reviews in the past., from other bloggers, like Cuvée Corner Wine Blog.  I found this wine at a local Whole Foods Market for about $16.99 a bottle.   You should be able to find it at other wine retailers. 

ENJOY!

Thursday, September 1, 2011

Panni Ularthiyathu (Kerala Dry Pork Curry)

A few months back, I made a rub for a big pork chop based upon the dry curry from Kerala known as Panni Ularthiyathu or Kerala Dry Pork Curry.  Panni Ularthiyathu is a popular dish in Kerala, whose origins could probably be traced back to the Portuguese who visited the subcontinent during the late 15th century.  The Portuguese brought with them Christianity, chile peppers and lots of pigs.  Take the latter two and you are on your way to Ularthiyathu.  Panni Ularthiyathu means sauteed pork, and it is actually a dry curry.  In other words, unlike some curries -- where the protein is swimming in a spiced broth -- this curry has little to no liquid to it.   Ularthiyathu is a favorite among Christians in Kerala, who serve it at Christmas.

After having made a rub inspired by this dish, I promised myself that I would make the actual curry.  Well, I recently fulfilled that promise. I researched the dish and prepared myself to make it for the first time. The key to making this dish is to use a cut of pork with some fat in it.  The fat helps to provide some moisture to the dry curry.  Luckily for me, I had a couple pounds of sliced boston butt in the freezer.  (Long story, but the lesson is always check to see if your local grocer sliced the pork shoulder before you buy it to smoke it.)  The hardest part of this recipe is to cook off the liquid so that the curry remains "dry."  The one other consideration for this recipe is the chile that you use.   Some recipes call for fresh green chiles, others call for chile powder.  I opted for the latter, because I had some leftover dried Sanaam peppers from previous recipes.

The picture below is not the greatest one that I've taken, but do not be misled.  This is a very tasty dish.


PANNI ULARTHIYATHU (KERALA DRY PORK CURRY)
Adapted from a Indimom Recipe
Serves 4-6

Ingredients:
2 pounds of pork (preferably with some fat on it, like from the belly or shoulder)
     sliced into even bite-sized pieces
2 onions, thinly sliced
1 tablespoon of minced ginger
1 tablespoon of minced garlic
2 teaspoons of chile powder (I used ground Sanaam peppers)
2 tablespoons of coriander powder
1/2 teaspoon of ground black peppers
1/2 teaspoon of turmeric powder
2 teaspoons of lime juice
Salt to taste
1 inch of cinnamon
4 cardamom pods (2 green and 2 black)
5 cloves
1/4 teaspoon of fennel seeds
3 tablespoons of canola oil

Directions:
1.  Prepare the spices. Grind the cardamom, chile peppers, cloves, and fennel seeds.  Add the coriander powder, black pepper, salt, turmeric powder.  Mix well.

2.  Saute the pork.  Heat the oil in a big pan over medium heat.   Add the pork.  Add the spice mix, garlic and ginger.  Mix well so that all of the pork is covered.  Add the lime juice.  Cook the pork until it is almost done.  (It is hard to give a timeframe because it depends upon the size of the pork pieces.)  Remove the pork and set aside.

3.  Saute the onions and the pork again.  Add the onions to the pan.  Saute the onions until they begin to brown.  Keep stirring the onions until they are evenly browned.  Drain the onions, if necessary, and return the pork to the pan.   Continue to cook until the pork is finished, mixing so that the spices from the pork are also on the onions.  

4.  Finish the dish.  Once the pork is cooked, remove from the heat.  Serve immediately with Indian rice.

ENJOY!