Wednesday, March 13, 2013

The Quest for El Dorado

There are many stories throughout history about the "gilded one."  Back in the 17th century, one author, Juan Rodríguez Freyle wrote in El Camero about how the "gilded one" emerged from a cave at Lake Guatavita (in what is now Colombia) covered in gold dust.  This was a special ceremony, which was part of the ascension of the gilded one to become the leader of the Muisca people.  To the Spanish conquistadors, the "gilded one" was known as El Dorado.  The conquistadors believed that Lake Guatavita was full of gold and, at one point, they drained the lake to reveal its riches.  Unable or unwilling to drain the lake completely, the Spaniards were only able to find some gold coins along the edge.

For centuries thereafter, the name El Dorado became synonymous with a place where there was abundant wealth.  However, wealth can be more than the number of gold ducats in your possession.  Indeed, it does not even need to be associated with the chemical symbol Au.  In the context of craft beer, the El Dorado  is that beer with the perfect accumulation of aromas and tastes.  It is that beer that will motivate people to assume the roles of modern day conquistadors, plodding through unknown beer stores, grocery stores and other locales searching out that very special beer.
 
I was one of those beer conquistadors.  Walking through a newly discovered beer store, I came across El Dorado.  This beer is one of the latest, limited releases by Flying Dog, and it is brewed using only a single hop, aptly named the El Dorado. According to the brewers, the El Dorado hop was first bred between 20 and 25 years ago by a United States Department of Agriculture research program.  The USDA program cultivated the hops for eventual use by Anheuser-Busch. However, Anheuser-Busch eventually decided to abandon the hop.  Now, A sole grower in Moxee Valley, a northern district of the famed Yakima Valley, kept the variety in the ground over the years and in 2010, harvested a mere 1.5 acres.  Those cones made their way to Frederick, Maryland, where Flying Dog used them to produce this beer.

As the name suggests, Flying Dog used only the El Dorado hops to produce this beer. However, they also used Rye, Cara-Pils and Biscuit malts, along with an American ale yeast during the brewing process. 

The El Dorado pours a bright gold or orange color, with only a thin, quick receding foam.   The aroma is full of citrus, such as grapefruit, tangerines and perhaps a little lemon.  There is even a little pepper or spice around the edges.  The taste of the beer mirrors the grapefruit aromas, which provides some bitterness, along with some grassy or herbal notes.  The most surprising aspect of the El Dorado is the sweetness that is found in the taste of the beer.  That sweetness numbs the bitterness, especially during the finish of the beer.

The brewers at Flying Dog suggest that this beer can be paired with a range of ingredients or dishes.  Pineapples and star fruit.  Thai or Mexican dishes.  This is just reflective of Imperial Pale Ales, which are fairly easy to pair with foods. I paired this beer with a lamb t-bones, grilled in the Fiorentina style, with mashed potatoes and a basic mushroom sauce.  The pairing worked very well. 

I found this six pack at a local beer and wine store.  It sold for about $15.00 for a six-pack.  Of course, I guess gold is kind of expensive....

ENJOY!

For more about the legend of El Dorado, check out the National Geographic Society.

Sunday, March 10, 2013

Penne Rigate with Asparagus-Pistachio Pesto

One of the most interesting chefs and television personalities is Andrew Zimmern.  I am a big fan of his television shows, especially Bizarre Foods.  Andrew has a very interesting and inspiring personal history.  He moved to Minnesota in the 1990s to receive treatment for chemical dependency and alcoholism.  After he finished the treatment program, he found a job at a French restaurant called Café Un Deux Trois.  Although Andrew washed dishes and bussed tables, he closely watched the chef, who had spent a few years learning under Chef Bouley in New York City.  Andrew watched the chef closely, and, when a line cook called in sick, Andrew took the job as a line cook.  After a few weeks, Andrew climbed the ranks and took over the kitchen.

I have been wanting to make some of Andrew's recipes for quite a while.  Recently, I came across a recipe for Rigatoni with Asparagus-Pistachio Pesto.  This recipe dates back to Café Un Deux Trois.  Andrew recalls that the the old chef at the restaurant claimed to have gotten the recipe from Chef Bouley.  Whether or not that is true, Andrew notes that the recipe is delicious.

And, Andrew is right.  This recipe is very delicious.  I made two changes to his recipe.  First, I substituted rigatoni with penne rigate.  Really, this dish could be prepared with any pasta, although I think rigatoni and penne rigate, as well as fusilli or orcchiette, would be the best pasta for this dish. Second, I used regular Parmesan cheese rather than Parmigiano Reggiano because I was making this dish for my beautiful wife, Clare.  Given she is pregnant, unpasteurized cheeses -- like Parmigiano Reggiano -- are off the table.  However, regular Parmesan is pasteurized and it works as a good substitute. 


PENNE RIGATE WITH ASPARAGUS-PISTACHIO PESTO
Adapted from recipe by Andrew Zimmern and available at Food & Wine
Serves 4-6

Ingredients:
1/4 cup of pine nuts
1 1/2 pounds of asparagus, cut into 1 inch lengths
3 medium carrots, chopped
1 medium shallot, chopped
1/2 cup packed basil leaves
2 garlic cloves
1 tablespoon of honey
2 teaspoons of thyme, finely chopped
1 1/2 teaspoons of lemon zest, finely grated
1 teaspoon of cumin
1/4 cup of extra virgin olive oil, plus more for tossing
Kosher salt
Freshly ground pepper
1 pound of Penne Rigate
1 cup of vegetable broth
4 tablespoons of unsalted butter
1/4 cup unsalted roasted pistachios, very finely chopped
1/3 cup parsley, chopped
Grated Parmesan cheese for serving

Directions:
1.  Toast the pine nuts.  Preheat the oven to 400°. Spread the pine nuts in a pie plate and toast for about 3 minutes, until golden brown.

2.  Begin preparing the pesto.  In the bowl of a food processor, combine the asparagus with the carrots and shallot and process until finely chopped. Scrape the mixture into a 9-by-13-inch glass or ceramic baking dish. Stir in the basil, garlic, honey, thyme, lemon zest, cumin and the 1/4 cup of olive oil. Bake for 25 to 30 minutes, stirring once, until the vegetables are soft and just starting to brown. Season with salt and pepper.

3.  Cook the pasta.  Meanwhile, in a large pot of boiling salted water, cook the pasta until al dente, 10 to 12 minutes. Drain, reserving 1/2 cup of the cooking water. Transfer the pasta to a baking sheet and toss with olive oil.

4.  Finish the pesto and the dish.   In a very large skillet, combine the cooked vegetables with the chicken stock and butter and cook over moderate heat, stirring occasionally, until hot, about 4 minutes. Add the pasta, pine nuts, pistachios and the reserved 1/2 cup of pasta water and cook, tossing, until the sauce is thick and the pasta is coated. Stir in the parsley and chopped bacon and season with salt and pepper. Transfer the pasta to bowls and serve, passing the grated cheese at the table. 

ENJOY!

Friday, March 8, 2013

The Bornhem

The phrase "abbey ale" or "abbey-style ale" is meant to invoke a specific image.  One of trappist monks working in the brewery attached to a monastery, producing beer for both the soul and the stomach.  Of course, it is just an image.  Trappist beers come with a specific label indicating that it is an "Authentic Trappist Product."  To have that label, the beer must satisfy some rather specific requirements adopted in 1992, including one in which the beer is produced entirely within the walls of the monastery.  If the beer cannot meet that requirement, then it cannot be labeled as an authentic Trappist product.

So goes the story of the Bornem.  Originally, the beer was brewed by monks at the St. Bernard Abbey in the Belgian town of Bornem.  However, during the French Revolution, the monks fled to England.  They returned to monastery after the revolution was over, but their numbers dwindled.  Eventually, it reached the point that the monks lacked the manpower to brew the Bornem beers.  Thereafter, they licensed Brouwerij Van Steenberge to produce the beers.  In so doing, however, the monks lost the ability to label their beers as a trappist product.  Instead, the Bornem beers, like the Tripel (or "Triple"), became "Abbey Ales."

The Bornhem Tripel pours a golden color, with a thick cloud of foam.  That cloud quickly recedes, leaving much smaller puffy clouds gently resting on the surface of the beer.  The aromatic elements of this beer have the characteristic spiciness of a tripel, suggesting cloves, bananas and even a little bubble gum.  There is little to no hop aromas, which is to be expected given that a tripel is produced with three times as much malts as an ordinary beer.  As for the taste, once again the Bornem displays the classic attributes of a tripel ... bananas with a light malty or bready flavor, as well as some hints of the Belgian yeast.  There is some spice, such as a hint of pepper in the background, but nothing that even rises to the level of the other elements in the beer. Finally, there is a hint of booziness in the taste of the beer.  After all, the Bornem Tripel has an ABV of 9%.

When it comes to pairing the Bornem with food, the most common suggestion is to pair the tripel with a variety of cheeses.  Indeed, this beer will work well with most hard cheeses, except those that incorporate whole seeds (like cumin seeds), as well as soft and blue cheeses.  Another common suggestion is to enjoy this beer as a digestif after a nice meal.  

I was given this bottle by my father, so I don't know how much it costs.  I have to say that I have not seen it in any stores.  But, if you should happen to run across it, it might be worth a try.  

ENJOY!

Wednesday, March 6, 2013

Around the World in 80 Dishes: Mauritius

I have been working on my ongoing, personal culinary challenge, Around the World in 80 Dishes.  However, as I worked on a couple of particular challenges, a surprise challenge seemed to emerge out of nowhere.  It was a dot in amongst an ocean of ingredients.  A package of duck breasts.  My eyes fixated on that package, and, I began to wonder what I could make with it.  As soon as I got to a computer, I began to review various recipes that used duck breasts.  It was then that I came across for a recipe of Mauritius Duck Curry.  That recipe gave rise to a challenge.  I would make a main course from the country of Mauritius. 

Much like those duck breasts, the Republic of Mauritius is a dot or dots in the larger Indian Ocean. The country consists of a set of islands, including Mauritius, Agaléga, Rodrigues, and Saint Brandon.  Mauritius was first charted by Arab sailors, although it was Portuguese explorers, perhaps Diogo Fernandes Pereira, who established the first base on the island of Mauritius.  At that time, the Portuguese encountered the local inhabitants ... the dodo bird. The Portuguese later abandoned the islands, only to have the Dutch who landed and later settled the island.  (The Dutch gave the country its name, Mauritius.) The Dutch settlements did not survive, but they left sugar cane, domestic animals and deer.

After the Dutch abandoned the island, it was the French who settled in and established a long-lasting settlement and renamed the islands the "Isle de France." The French established Port Louis, the capital, and used it as a naval base to raid British shipping.  Ultimately, the French lost the islands to the British in 1810 as a result of the British victory in the Napoleonic war.  The British allowed the residents to keep their land, their French language and their laws.  This probably gave rise to the Mauritian Creole (Kreol Morisien), a French-based language spoken by the populace, even though English is the official language.

It is at this point the focus shifts to the culture and cuisine.  Mauritius has a very diverse population.  At first, there were the Africans, Creoles and Europeans.  During the 19th century, Indians began to emigrate to Mauritius from the subcontinent, bringing their culinary traditions with them.  Toward the end of that century, the Chinese began to migrate to Mauritius.

Each of these populations have left their mark on the Mauritian cuisine. A variety of dishes may grace the tables of Mauritians, whether at home, on the street or in a restaurant.  These dishes include Indian curries, European braised dishes, and Chinese stir frys. Such a range of culinary influences creates a dilemma for my personal culinary challenge.  The question becomes what which influence should serve as my starting point.  For this challenge, the choice of a duck curry made this decision rather easy.  I would be exploring the Indian influence on Mauritian cuisine. 

FIRST COURSE

Indians migrated to Mauritius from both North and South India, which means that there is a wide range of influences just within the Indian cuisine in Mauritius.  As followers of my blog know, I try to make more than just the main course.  I usually try to make a first course, side dish and/or a beverage.  On this occasion, I decided to make a first course of Chana Masala. 

Chana -- or chole -- are more commonly known as chickpeas.  This masala is a very popular dish in the Punjab region of India, as well as in Guajarat and Rajahstan.  I found the recipe on the Mijo Recipes website.   The one substitution that I made was to use canned chickpeas, rather than dried chickpeas.  This cut down on the preparation time, although it also meant that I would not have the reserved liquid that is called for in Step 3.  I had some vegetable stock in the refrigerator, so I used that in place of the reserved liquid.  This substitution worked out very well. 


CHANA MASALA
Recipe adapted from Mijo Recipes
Serves 4-6

Ingredients:
2-3 cups of chana/chole/chickpeas (if using dried, soaked overnight or at least 5 hours)
2 2/3 tablespoons of butter
1 medium onion, chopped finely
1 tablespoon garlic-ginger paste (or 4 cloves garlic and 2 cm ginger, grated)
1-2 red chiles, sliced
1 teaspoon cumin seeds
1/4 teaspoon turmeric powder
1 teaspoon coriander powder
1 teaspoon garam masala powder
2 medium tomatoes, chopped to a paste (or made into a paste with a blender)
1 tablespoon of cilantro, chopped
1/2 cup of low sodium vegetable stock or broth (if using canned chickpeas)

Directions:
1.  Prepare the chole.  Soak the chole in water overnight or for at least 5 hours. Wash and boil them until well cooked. Take one chole and if you can mash it with your fingers, then it’s done. Drain the chole and reserve the liquid.

2.  Begin to prepare the masala.  Heat a non-stick pot over medium heat.  When warm, add the butter and allow it to melt.  Add the cumin seeds and let them fry for a few minutes.  Add the chopped onions and fry until most of the water evaporates.  Add ginger-garlic, fry until fragrant. Lower your heat, add turmeric powder, coriander powder, garam masala powder, salt and 1 tbsp water. Mix until you get a nice paste and cook until fragrant. The low heat and adding some water prevents the spices from burning.

3.  Continue to prepare the masala.  Put heat to medium. Add red chillies, chopped tomatoes and cook until the mixture reduces to about half in quantity. The mixture will become a bit thicker.  Add the chole/chickpeas, and add half-cup of the reserved liquid.  Cook for a further 10 minutes covered.

4.  Finish the dish.  Mash up some of the chickpeas and add water until the mixture reaches your desired consistency.  Add chopped coriander leaves.  Mix and serve.

This dish is very good.  I liked this recipe because it allows the cook to adjust the consistency of the masala to his or her own liking. Personally, I prefer the masala on the dry side.  This meant that I did not add any water at the end of the cooking.

MAIN COURSE

When I selected the challenge to make a main course from Mauritius, I did not expect that it would come with a lesson about food security.  However, I should have expected it.  Mauritius is a series of islands, which means that there is not a lot of land to grow crops or raise livestock.  The country imports about 75% of its food, while only producing 25% locally.  Food also accounts for approximately one-third of the expenses incurred by a Mauritian family.   Taken together, these facts reveal the basic problem in the context of food security: the vulnerability to increases in food prices.  For the people of Mauritius, they not only face higher increases in the cost of basic food, but also increased costs attendant to the importation of that food. These increases in food and transportation costs translate into an even larger portion of an average family's expenses being used to purchase the food they need to survive.

Given this real threat of food insecurity, the Mauritian government has undertaken various initiatives to obtain food "independence," which means self-sufficiency in the production of dairy, vegetables, and meat.  This provides a good transition to those duck breasts.  One of the government's initiatives is to increase the production and consumption of ducks.  Private companies brought stocks of Pekin and Muscovy ducks to Mauritius.  However, with some assistance, the Mauritian government established a "Duck Unit," which included the construction of a hatchery in Reduit and a farm in Albion.  The government's objectives include the development of high yielding meat strains through breeding, to increase the number of hatchlings and to further research duck nutrition.

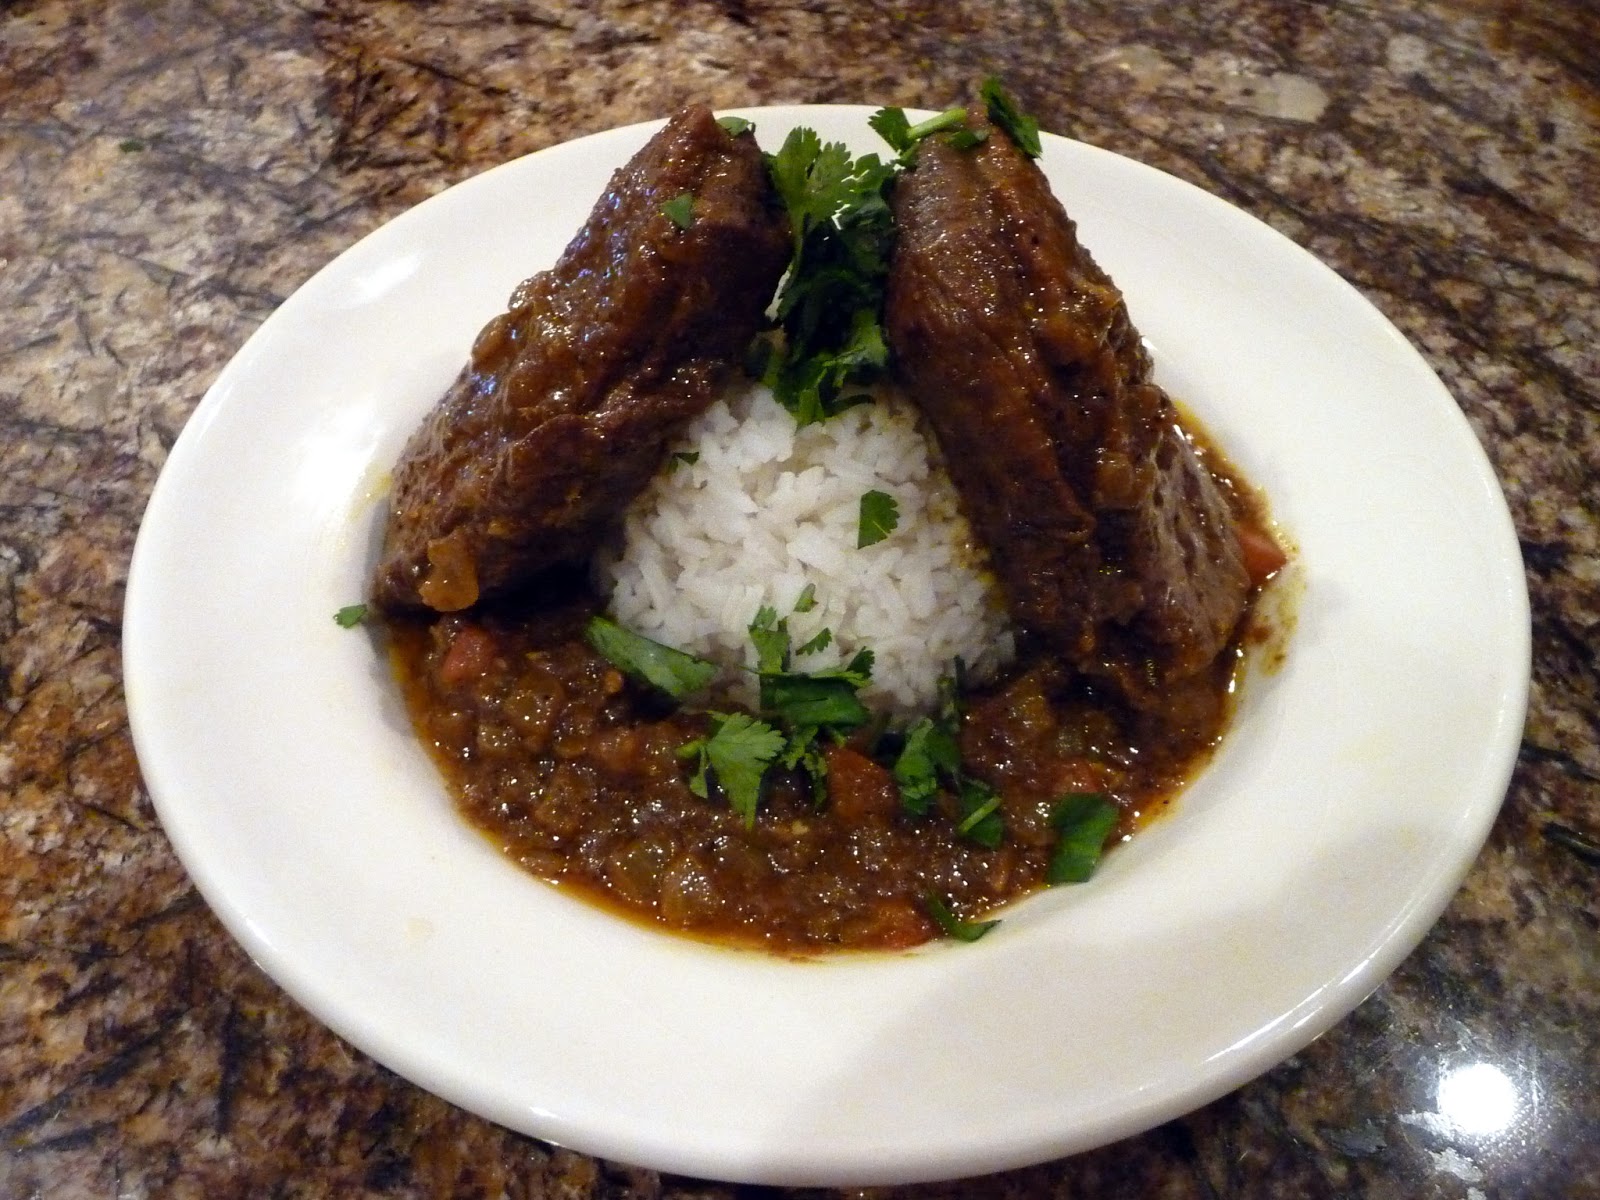
As the Mauritian government promotes the production and consumption of ducks, chefs and cooks have risen to the challenge by using their creativity to develop dishes that feature Mauritian ducks.  One such chef is Jocelyn Riviere, who was born in Mauritius but who heads kitchens in Australian restaurants.  Chef Riviere created a recipe for Mauritian Duck Curry, which serves as the main dish for my challenge.

This is a very interesting recipe and I wished I could have followed it to the letter. Unfortunately, I had to make a couple of changes due to the availability of ingredients.  First, the original recipe calls for the use of a whole duck, but I wanted to cook with duck breasts and, in any event, the store where I bought the duck did not have whole ducks available.  So, I used duck breasts.  Second, the recipe calls for the use of stalks of young curry leaves.  Once again, the store did not have any curry leaves and I did not have the time to stop at the stores where I knew that ingredient would be available.  So, I made the dish without the curry leaves, but I left them in the recipe.  Finally, the recipe calls for the use of bird eye chilies.  These chiles are also known as "piri-piri."  I did not have any whole bird eye chiles, but I did have ground piri-piri.  So, I substituted ground chiles for whole ones.  This substitution greatly increased the heat of the dish, but, it is consistent with the fact that Mauritians love spicy foods.  (After all, the influences of African, Indian and Chinese cuisines provides the perfect conditions for spicy dishes.)  With all of those changes, I proceeded to the challenge:


MAURITIAN DUCK CURRY
Recipe adapted from SBS Food
Serves 2-4

Ingredients:
1 whole duck cut into sauté pieces or four duck breasts
Vegetable oil
3 inch piece of fresh ginger, peeled
6-8 large cloves garlic, peeled and chopped
1-2 birds eye chilies (or 1/4 teaspoon of ground piri-piri pepper)
4 tablespoons of curry powder, mixed with water to make a wet paste
2 medium onions, finely chopped
10 stalks of fresh young curry leaves
Half a bunch of washed coriander, coarsely chopped
4 medium sized ripe tomatoes, pulp removed and diced coarsely

Directions:
1.  Make the garlic/ginger/chile paste.  In a mortar and pestle crush ginger, garlic and chilli with a pinch of salt to form a paste. 

2.  Prepare the duck.  Remove all the excess fat and skin that hangs from the sides or ends of the duck, leaving only the skin that sits on top of the meat. Cut the duck into 2 drumsticks, 2 thighs, and 4-breast quarter and the rest into same size pieces. Place in a bowl, season well with salt and fresh ground white pepper and toss. If you are using duck breasts, just season them liberally with salt and ground pepper.  

3.  Brown the duck.  Heat a large heavy sauté pan on medium to high heat. When it is hot, put in as many duck pieces as will fit easily, skin side down. Quickly brown the duck on both sides. Set the browned pieces aside. Continue to brown all the duck pieces in the same way. (Do not burn the bottom of the pan) Reduce to medium heat. 

4.  Saute the onions.  To the same hot pan, which should have enough duck fat for frying, add the onion and sauté until light brown. Add the garlic, chile and ginger paste. Sauté and cook for about 2 minutes, then add the curry leaves and curry powder mix, stirring and cooking over medium-low heat for another 2 minutes until the paste bubbles and cooks out. 

5.  Make the curry.  Add one-half cup of water, the cooked duck pieces and any juices from the bowl.  Mix well and add another cup of water to bring the liquid level to half way up the ingredients. Check seasoning.   Bring to the boil then cover and simmer on a low heat for 45 minutes to 1 hour until meat is tender (almost falling of the bone). Stir gently every 20 minutes or so during the cooking period, turning the duck pieces over now and then. 

6.  Finish the curry.  Remove lid and add chopped tomato. Allow the tomato to break down into the sauce, gently turning up the heat to reduce. Check the seasoning and, just before serving, add the chopped cilantro. 

*          *          *

When asked to give advice to home cooks, Chef Riviere recommended that they be "well organized and season everything before cooking (especially with freshly ground pepper)."  "More importantly," he added, "remember that it takes a few tries to get it perfect."  Those words are sage advice.  I have to say that my first attempt at Chana Masala and Mauritian Duck Curry was a good start.  The masala was very good and I was able to taste the various spices in the dish.  The duck curry was a little reminiscent of the Kerala Duck Curry that I made a few weeks ago.  If I had to chose between the two types of curry -- Mauritian or Keralan, I think I would choose the Mauritian Duck Curry.  I also plan on following Chef Riviere's advice by making the duck curry again.  I will update this post with any changes based upon my future efforts.  

Now, it is time to return to my previously scheduled challenges, and, until that time ...


ENJOY!


For more about Mauritius, check out Wikipedia

Monday, March 4, 2013

Chile Rubbed Salmon with Tomatillo, Jalapeno Pepper and Lime Juice

As I continued preparing a wonderful Valentine's dinner for my beautiful Angel, Clare, I had to think of a main course.  Clare loves salmon and, due to her pregnancy, she has not been able to eat as much of it as she would like.  All of the pregnancy guidelines say that it is important to eat certain fish.  Salmon is one of those fish, provided that it is wild salmon rather than farmed salmon.  There are many issues with respect to farmed salmon, which are better left for another post.  Fortunately, I have a lot of access to wild sockeye salmon.  So, I purchased two six ounce fillets and began to work on the recipe.

I had planned on following the same approach to planning this course that I used when I made my Roasted Root Vegetable Soup.  I planned on choosing ingredients that would complement each other, as determined by The Flavor Bible.  However, as I perused the section on Salmon, I came across a dish prepared by Zarela Martinez for her restaurant.  The dish was "Salmon Rubbed with Ground Red Chile and Lime and Pan Seared.  Served with a Tangy, Spicy, Tomatillo, Jalapeno and Lime Juice Sauce.  The dish caught my attention, and, I decided to make it.  The only problem is that I did not have a recipe.

So this recipe is my first effort to create Martinez's dish.  I made estimates of the amount of each ingredients for the salmon and the sauce.  For the salmon, I used ground Hatch chiles for the rub, but ground ancho chile and even cayenne pepper could be used.  For the sauce, I used a couple tomatillos with some onion, shallot and garlic to help add flavors and body to the sauce.  I did not add any more spices or herbs (other than salt and pepper) to keep the sauce rather simple. Finally, I decided to pair this dish with some saffron rice, which is just ordinary rice with a pinch of saffron added during the boiling stage.  

Overall, I think this dish worked out very well.  The sauce may need a little more work, especially with respect to consistency.  (The consistency of sauces continues to be an area that I need to develop.)  The flavor was there and it worked very well with the not only the salmon, but also the rice. 


CHILE RUBBED SALMON WITH TOMATILLO,
JALAPENO PEPPER AND LIME JUICE SAUCE
A Chef Bolek Original
Serves 2
Ingredients:
2 six-ounce sockeye salmon fillets
2 tablespoons of vegetable oil or canola oil
3 tomatillos, de-husked, and diced
1 jalapeno pepper, diced
1 yellow onion, diced
1 shallot, diced
2 cloves of garlic, diced
1 teaspoon of dried oregano
2 cups of rice, made according to instructions
2 limes, juiced
1 pinch of saffron
Salt, to taste
Ground black pepper, to taste
Cilantro, chopped

Directions:
1.  Prepare the rice.  Prepare the rice according to the the instructions.  Before you begin to boil the water, add a pinch of saffron to the water.  Then continue as directed by the instructions.  

2. Prepare the sauce.  Heat 1 tablespoon of oil in a skillet.  Add the onions and saute until soft, about four to five minutes.  Add the shallot, garlic and oregano, saute for two minutes more.  Add the jalapeno pepper and saute for about three more minutes.   Season with a couple grinds of salt and pepper.  Add the tomatillos and continue to saute for about five to eight minutes, until the tomatillos begin to soften.   Remove the pan from the heat and transfer the ingredients to a blender.  Blend the ingredients until they are a liquid.  Tranfer the ingredients to a pot, season again with salt and pepper.  Cover and set aside. 

3.  Saute the salmon.  Heat the remaining oil in a pan.  Saute the salmon, skin side up, for about four minutes.  Flip the salmon and saute for about four minutes more or until done.  

ENJOY!

Friday, March 1, 2013

Roasted Root Vegetable Soup

I always talk about wanting to make special meals for my beautiful Angel, Clare; but, for various reasons, I do not get to do that as often as I want.  For example, I planned a three course meal for New Years Eve, but, I was unable to do so because I was very much under the weather.  We have both been very busy at work and with preparing for Baby Bolek, which further limits the opportunities.  However, when Valentine's Day came along, I decided that I would prepare that special, three-course dinner for her.  Each course would be a Chef Bolek original.  

I also decided to make it a challenge.  I would decide on a primary ingredient, and then choose anywhere from three to five additional ingredients (excluding things like oils, spices, etc.).  To ensure that the ingredients complemented each other, I consulted the Flavor Bible, which my parents got me as a gift.   I have used the Flavor Bible in the past, and, the meals turned out very well. 

For the soup, I decided that the primary ingredient would be leeks.  After all, they are in season right now.  I then decided to use potatoes, carrots, and an onion.  As I began preparing this dish, I decided that I would separate the carrots from the rest of the dish.  I initially planned on swirling the pureed carrots into the leek/onion/potato soup.  However, in recognition of Valentine's day, I tried to pipe the carrots onto the soup in the shape of a heart.  I need to work on my piping skills, but the heart turned out fairly well.

Overall, the soup turned out well.  If I would have done anything different, I would have added some herbs or spices, such as thyme, coriander, turmeric or cumin.  The herbs and spices are not necessary, and, the soup was a delicious and creative way to start the dinner.  


ROASTED ROOT VEGETABLE SOUP
A Chef Bolek Original
Serves 2-3

Ingredients:
4 leeks, white and light green parts only, sliced
1 onion, peeled and quartered
1 Russet potato, peeled and cut into small 2 inch pieces
4-6 carrots, peeled, and cut in large pieces
2-3 cups of vegetable broth
1 cup of water
1 teaspoon of kosher salt, plus more to taste
1 teaspoon of freshly ground pepper, plus more to taste
Grapeseed oil

Directions:
1. Roast the vegetables.  Preheat oven to 375 degrees Fahrenheit.  Place the leeks, onions, potato and carrots in a bowl.  Add the grapeseed oil and toss until the vegetables are covered. Spread out the vegetables on a baking sheet and roast the vegetables in the oven, about 30 to 45 minutes.  

2.  Puree the vegetables.  Add 1 cup of vegetable broth to a blender.  Add all of the vegetables except the carrots.  Blend until the vegetables are a liquid, adding another cup of vegetable broth during the blending.  Transfer to a pot.  You can add additional vegetable broth to reach the desired consistency.  Clean the blender and repeat the process with the carrots, but use 1/2 cup of water and add 1/2 cup of water during the blending.  Pour the carrot into a separate pot and add additional water to reach the desired consistency if needed.

3.  Finish the dish.  Heat both pots over low heat to warm the soups.  Pour the root vegetable soup into a bowl.  Drizzle the carrot soup as swirls or shapes over the soup.  

ENJOY!

Tuesday, February 26, 2013

Catching the Sculpin

It seems only natural that, if the brewers love to fish, they would name their beers after those fish. Take, for example, the brewers at Ballast Point Brewing Company in San Diego, California.  The brewery has a webpage dedicated to the Ballast Point Fishing Team and their stories about catching and tagging some very impressive fish, such as yellow tuna, wahoo, and grouper. 

So, it comes somewhat as a surprise that Ballast Point chose "Sculpin" as the name for its India Pale Ale.  The sculpin is an elongated fish with a heavy head, gill covers with spines and wide, fan like pectoral fins.  Different species of the sculpin can be found in the Atlantic Ocean (including the bullrout and the longhorn sculpin) and Pacific Ocean (including the cabezone and the long snout sculpin), where they move slowly along the ocean floor seeking out small fish and shrimp. The sculpin is far from a tuna or a grouper.

A Sculpin from our Lobster-Fishing Experience
During our vacation in Maine, both Clare and I came face to face with the sculpin.  We spent a morning aboard a working lobster boat, learning about how a fisherman earns a living catching lobsters.  The sculpin often enter the lobster traps to feast on the bait.  That easy meal sometimes comes with a price as the sculpin are often trapped in the cages and pulled up with the lobsters.  Some fishermen use the trapped sculpin as bait to catch more lobsters.  On our trip, we pulled up a couple of sculpin in the lobster traps.  The largest of the fish is shown in the picture to the right.  That sculpin was lucky. It was thrown back in the water rather than as being used as bait in the lobster trap.

 For the brewers at Ballast Point, the Sculpin is a "testament" to their humble beginnings as the Home Brew Mart, where they began to brew their beers.  The brewers describe the Sculpin as "a deceptively light bodied, yet very hoppy IPA with bright apricot, peach, mango and lemon flavors," which are achieved through the use of different hops.  

The Sculpin pours a nice gold to orange color with a thin, wispy foam.  The aromatic elements of the beer feature strong citrus tones, with some other fruit, such as the apricot or peach suggested by the brewers.  The beer does have a light body, and, it is full of citrus hop flavors.  The hops are well rounded and the citrus flavors continue into the finish, which is somewhat dry.  The hop flavors are well balanced, without imparting too much bitterness and even bringing out some sweetness in the beer.  

One reviewer suggests that the Sculpin is best paired with fish tacos, steamed mussels or blue cheese.  I think the fish tacos would work well, but steamed mussels and blue cheese provide two different end points to a range of flavors that may fall outside of what would work best for an India Pale Ale.  Another review suggests a meaty pizza or Italian dishes.  Personally, I think that the Sculpin is best paired with grilled meats and vegetables.  The light citrus and bitter flavors of the beer would complement the fats of the meats and the oils used with the vegetables.

I found the Sculpin at a local grocery store and if you see it, you should definitely consider buying a bottle to try, even if you are someone who ordinarily does not like hoppy or bitter beers.  It sells for $9.99 a bottle.

ENJOY!

Thursday, February 21, 2013

Turkey Biryani with Cucumber Raita

One dish that I have wanted to make for a very long time is Biryani, a "one-pot" dish of rice in a heavily spiced sauce with meat and vegetables.  The name "biryani" is Persian in origin, for "fried" or "roasted."  Legend has it, according to one blogger, that the dish was brought to what is known as India today by a Persian king named Taimur, who ruled between 1336 to 1405.  By contrast, Wikipedia claims that the dish was created in the kitchen of the Mughal Emperors.

Whatever the source, there seems to be an infinite variety of Biryani.  There are the regional versions, such as the Hyderabadi Biryani, Sindhi Biryani and Bhatkali Biryani.  There are also versions based upon different proteins, such as chicken, fish and shrimp biryanis, as well as a vegetarian version of daal biryani.  This range of different dishes presents a major challenge for myself, because I want to learn about the history and background of each version, as well as cook it for myself, family and friends.

Speaking of which, I recently had the opportunity to make a biryani, although a somewhat Americanized version of it.  I made a turkey biryani with raita.  The use of turkey is what "Americanizes" this dish, because the fowl is not widely available where biryanis are traditionally prepared.  The recipe comes from Atul Kochhar, a 1 star Michelin chef of Benares, Mayfair.  This dish was intended as a way to use turkey leftovers from Thanksgiving.  I changed it a little, using fresh turkey rather than leftovers.  I bought the equivalent weight of fresh turkey thighs.  (If you can get skinless and boneless thighs, that will save you a lot of work.)   I cut the turkey into pieces and sauteed it in batches.  Given the directions of this recipe, it worked out perfectly because the turkey was warm and ready to be added toward the end.


TURKEY BIRYANI WITH CUCUMBER RAITA
Recipe by Atul Kochhar and Reprinted at
Serves 6

Ingredients (for the Biryani):
2 pounds of cooked turkey meat
1.5 cups of basmati rice, boiled or steamed to just done
3 tablespoons of vegetable oil
2 cloves
2 bay leaves
1 star anise
1 cinnamon stick (about 1 inch)
1 teaspoon of cumin seeds
4 medium size onions, thinly sliced
1 tablespoon of garlic, minced
1 tablespoon of ginger, minced
1 green chile, minced
1 teaspoon of turmeric powder
1 teaspoon coriander powder
1/2 teaspoon black pepper powder
1 teaspoon garam masala
4-6 medium size tomatoes, blended to a paste
7 ounces coconut milk
Salt to taste

Ingredients (for the Raita):
1 teaspoon of cumin seeds, toasted and crushed to powder
4 tablespoons of seedless cucumber, grated
Salt, to taste
1/2 tablespoon of mint leaves, finely chopped

Directions:
1.  Prepare the sauce.  Heat the oil in a pan; add the cloves, bay leaves, star anise, cinnamon stick and cumin seeds.  As the spices crackle in the heat, add the sliced onion and a pinch of salt, sauté until golden brown in colour.  Stir-in the ginger, garlic and chilli, sauté for 2 minutes or until cooked.  Add the turmeric, coriander, black pepper and garam masala powders and sauté for 1 minute before adding the tomatoes.  While stirring, bring to simmer and cook for further 2-3 minutes and then add coconut milk and simmer for further 2-3 minutes. Check for seasoning.

2.  Prepare the raita.  Whisk the yogurt and mix in the rest of the ingredients.  Serve chilled.

3.  Finish the dish.   When ready to serve, stir in turkey into the sauce and heat for a minute and add rice and mix lightly with a rice fork. Garnish with chopped coriander leaves and serve with chilled cucumber raita.
ENJOY!

Monday, February 18, 2013

Strawberries in Madeira and Cream

"Arcadian Dainties." According to David DeWitt, who wrote Founding Foodies, that is the name given by Thomas Jefferson to a recipe of Strawberries in Madeira and Cream.  DeWitt cites a source who noted that, in the late eighteenth century, cultivated strawberries were one of the fruits cultivated at the gardens of Monticello.

Strawberries were not the only thing that "abounded" at Monticello.  If the fields may have been full of strawberries, the wine cellar was stocked with Madeira, a fortified wine produced in the Madeira Islands of Portugal.  Traditionally, the wine was made with Sercial, Verdelho, Bual and Malvasia grapes, although other grapes were introduced into the production over time.  During the late eighteenth century, Madeira had become the wine of the new United States. It is reported that Madeira was used to toast the Declaration of Independence, and that many of the "Founding Fathers," such as George Washington, John Adams, Benjamin Franklin, and, of course, Thomas Jefferson, were enthusiasts of the wine.

However, it is a "Founding Mother" who is entitled to the credit for this recipe.  According to DeWitt, in his book Founding Foodies, Abigail Adams wrote in 1798: [a]fter walking in the garden we returned and found the table spread with 6 or 8 quarts of large ... strawberry, gathered from the vines with a proportional quantity of cream, wine, and sugar.  This quote is the recipe for Strawberries in Madeira and Cream, which served as the dessert for our wine club dinner. 


STRAWBERRIES IN MADEIRA & CREAM
Recipe from Dave DeWitt, Founding Foodies at p. 205
Serves 4

Ingredients:
4 cups fresh strawberries, sliced
2 cups Madeira
Confectioners' sugar for sprinkling
1 1/2 cups heavy cream, whipped

Directions:
1.  Prepare the strawberries.  In a bowl, combine the strawberries with the Maderia, and mix well.  Marinate for two hours.  Drain the strawberries and place in 4 bowls.  

2.  Finish the dish.  Sprinkle sugar lightly over the strawberries, and top with a dollow of whipped cream.

ENJOY!

Saturday, February 16, 2013

Classic Clam Chowder

According to David DeWitt, in his book The Founding Foodies (which is a very good book), seafood chowders were a "signature dish" of the colonial period in the New England region.  Chowders were usually made with fish, such as flounder or pollock, but cooks also used shellfish such as clams and lobsters.  The basic recipe called for rendering fat from salt pork, the creation of a "roux" that was thickened with flour, ship biscuits or saltine crackers, and the addition of milk.  Once the base was completed, then the seafood, whether fish or shell fish, would be added. 

This recipe comes from The Founding Foodies and it was a recipe that we made for our Wine Club dinner, A Colonial Dinner in New England.  According to DeWitt, the recipe is based upon one written by Mrs. N.K. M. Lee.  The recipe was published in 1842 and, in describing the recipe, Mrs. Lee wrote "[t]his Receipt is according to the most approved method, practiced by fishing parties in Boston harbor."

DeWitt notes that a couple of substitutions from the original recipes.  First, those recipes traditionally used salt pork, although that may be hard for some people to find.  DeWitt substituted bacon, which has become more common in modern versions of clam chowder.  Second, the recipe calls for the use of steamer clams.  DeWitt suggests that larger, Quahog clams could be used for a more robust flavor.  Cherrystone clams (younger Quahogs) could also be used.  If you do not have access to clams or do not want to shuck them, then DeWitt suggests using 2 cups of canned chopped clams.  For this recipe, I bought Cherrystone clams, but they were rather small.  So I doubled the number of clams (4 dozen).


CLASSIC CLAM CHOWDER
Recipe from Dave DeWitt, Founding Foodies at p. 199-200
Serves 8

Ingredients:
1/4 pound bacon, chopped fine
1 cup minced onions
4 cups diced potatoes
3 cups water
1/2 cup crushed plain crackers
2 dozen steamer clams, removed from their shells and chopped, with their juice
2 cups heavy cream
3 cloves (optional)
Salt, to taste
Ground black pepper, to taste
Paprika, for garnish

Directions:
1.  Render the bacon and saute the onions.  In a stewpot, saute the bacon until the first fat is rendered, then add the onions and fry until they are golden brown.

2.  Cook the potatoes.   Add the water and the potatoes, and simmer until potatoes are cooked but still firm.  

3.  Continue to cook the chowder.  Add the crackers and clams, salt and pepper, and cloves (if you are using them), and simmer, covered, for 15 minutes. 

4.  Heat the cream.  In a separate pan, heat the cream but do not allow it to boil. 

5.  Finish the dish.  Add the heated cream to the chowder, stir will, and simmer, uncovered for another 10 minutes.  Serve in individual bowls sprinkled with a little paprika for color.  

In the end, the clam chowder recipe was very good and I think everyone enjoyed the dish.  I will definitely make this recipe again, although I may try some other variants of clam chowder first. 

ENJOY!